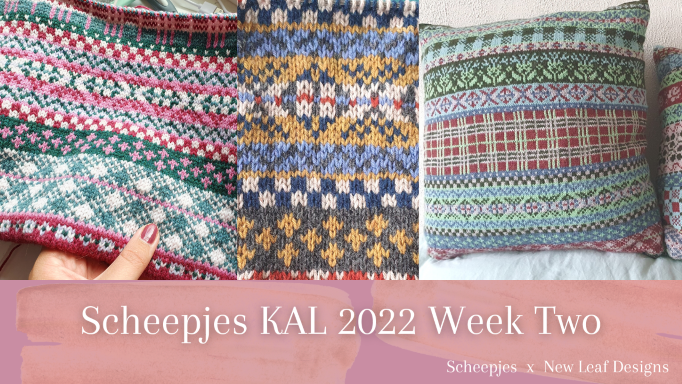
Scheepjes KAL 2022 – Week Two | Week Twee
Welcome everyone to Week 2 of the Scheepjes KAL 2022! If you haven’t started the pattern yet, please find a link to Part one in the purple box below. In my weekly blogposts, I will point you towards the downloadable PDF for the pattern. I also have a black-and-white colouring sheet for those of you working with a different colour palette, and some extra tips for this weeks charts. Enjoy!
Welkom iedereen bij Week 2 van het Scheepjes KAL 2022 patroon! Als je het patroon nog niet begonnen bent, vind dan een linkje naar Deel 1 hieronder. In mijn wekelijkse blogposts zal ik je wijzen waar je de PDF van deze week kunt downloaden. Ik heb ook een kleurplaat-versie van het schema voor je, erg handig als je met andere kleuren meedoet; en nog wat extra tips voor de schema’s van deze week. Brei ze!
Pattern Parts |
Delen van het patroon |
|---|---|
| Part 1 | Deel 1 |
| Part 3 | Deel 3 |
| Part 4 | Deel 4 |
| Part 5 | Deel 5 |
| Part 6 | Deel 6 |
| Part 7 | Deel 7 |
| Part 8 | Deel 8 |
| Part 9 | Deel 9 |
| Part 10 | Deel 10 |
Pattern Part Two | Patroon Deel Twee
For Week Two of the Scheepjes KAL we will be continuing Jamie’s cushion. Find the downloadable pattern here on the Scheepjes website, and in the Scheepjes Facebook Group.If you’re using an official kit, please note that there are three versions of the pattern (Cirsium, Rosa, Erica) so that the charts match your yarns in colour. If you are using different colours, you may find the colouring-book version handy where you can print out and colour in the charts.
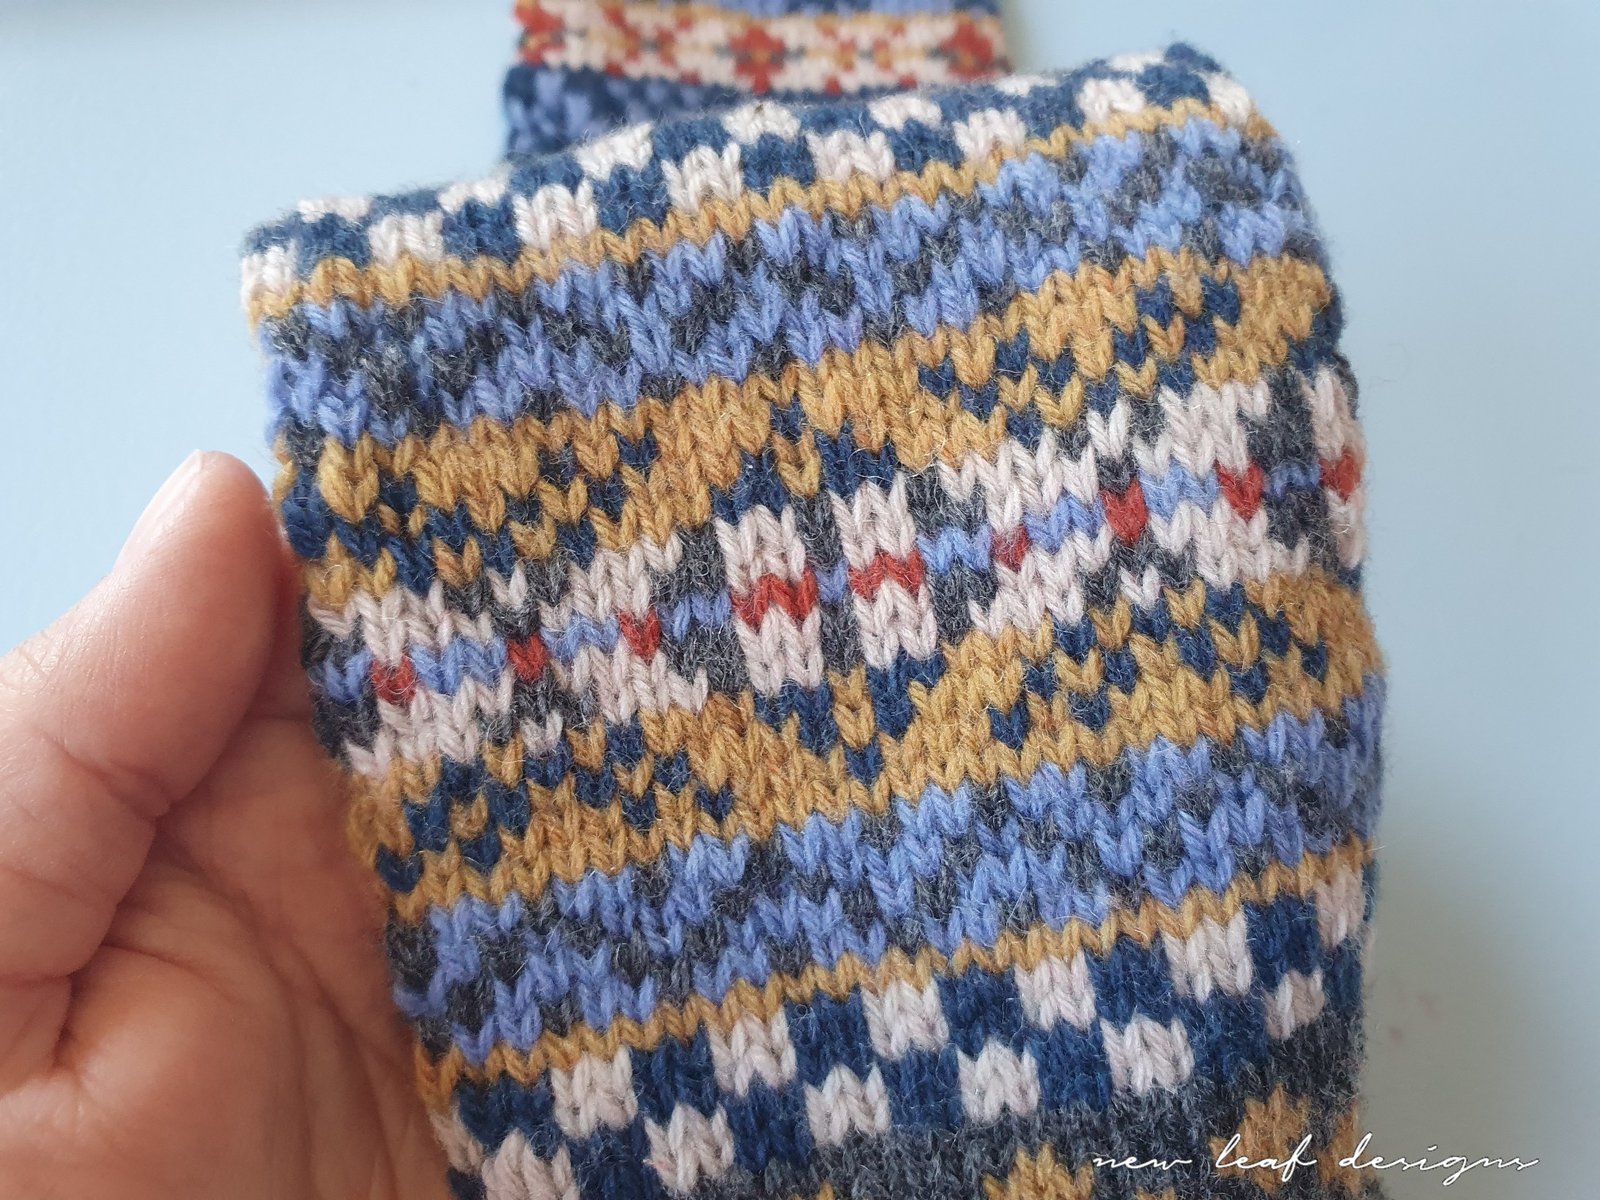
This week contains my favourite chart of the whole Knit-a-Long, a traditional Fair Isle “OXO” chart. I just think it’s so pretty, especially with the colour changes. If I recall correctly, it’s the only chart that uses all six colours in one chart.
Voor Week Twee van de Scheepjes KAL breien we verder aan Jamie’s kussen. Vind het patroon hier op de Scheepjes website, of in de Scheepjes Facebook Groep. Als je een officiële kit gebruikt (Cirsium, Rosa, Erica), dan zitten er kleurschema’s bij die passen bij jouw kleuren garen. Als je andere kleuren gebruikt, kijk dan hieronder voor de kleurplaat-versie van het schema, die is dan extra handig.
In deze week breien we mijn favoriete schema, het traditionele Fair Isle “OXO” schema. Ik vind het zo mooi, vooral met de kleurwisselingen. Als ik het me goed herinner is dit het enige schema van de KAL die alle zes kleuren gebruikt in één schema.
Colour your Chart | Kleur je schema in
![]()
Here is the colouring chart for this week, especially for those knitting the Scheepjes KAL with other colours. Download the pdf here.
Hier is de inkleur-versie van het schema voor deze week, speciaal voor diegenen die andere kleuren gebruiken voor de Scheepjes KAL. Download de pdf hier.
Tips for this Week | Tips voor deze Week
The best pieces of advice I can give you is to not knit when you’re tired, and to try to find easy repeats in your charts. With the ‘checkerboard’ rounds, it’s very obvious, but for other parts of the chart it might not be. For the zigzag lines, I want you to know that the 1st and 4th round of those charts are “one, two, one, two”, and the 2nd and 3rd rounds are “three, one, one, one; three, one, one, one”.
For the big ‘OXO’ chart – see how the pattern seems to have an O and an X? – there is no easy memorable repeat, so perhaps make use of some stitch markers for that pattern. After a while you will get used to the chart, it has lots of symmetry so it will still be relatively easy.
De beste tips die ik je kan geven is om niet te breien als je moe bent, en om te kijken of je gemakkelijke herhalingen vindt in de schema’s. Met het ‘schaakbord’ schema is dit gemakkelijk, maar bij andere delen valt het minder op. Voor de zigzag lijntjes geldt: de 1e en 4e toer van die schema’s zijn telkens “een, twee, een, twee”, en de 2e en 3e toeren zijn “drie, een, een, een; drie, een, een, een”.
Voor het grote “OXO” schema – zie je hoe je een O en een X erin kunt zien? – zijn er geen gemakkelijke herhaalpatroontjes, dus is het handig om hier wat stekenmarkers te plaatsen tussen de herhalingen in. Na een tijdje raak je gewend aan het schema. Het heeft veel symmetrie waardoor je het snel onder de knie hebt.
Weaving in ends | Eindjes wegwerken
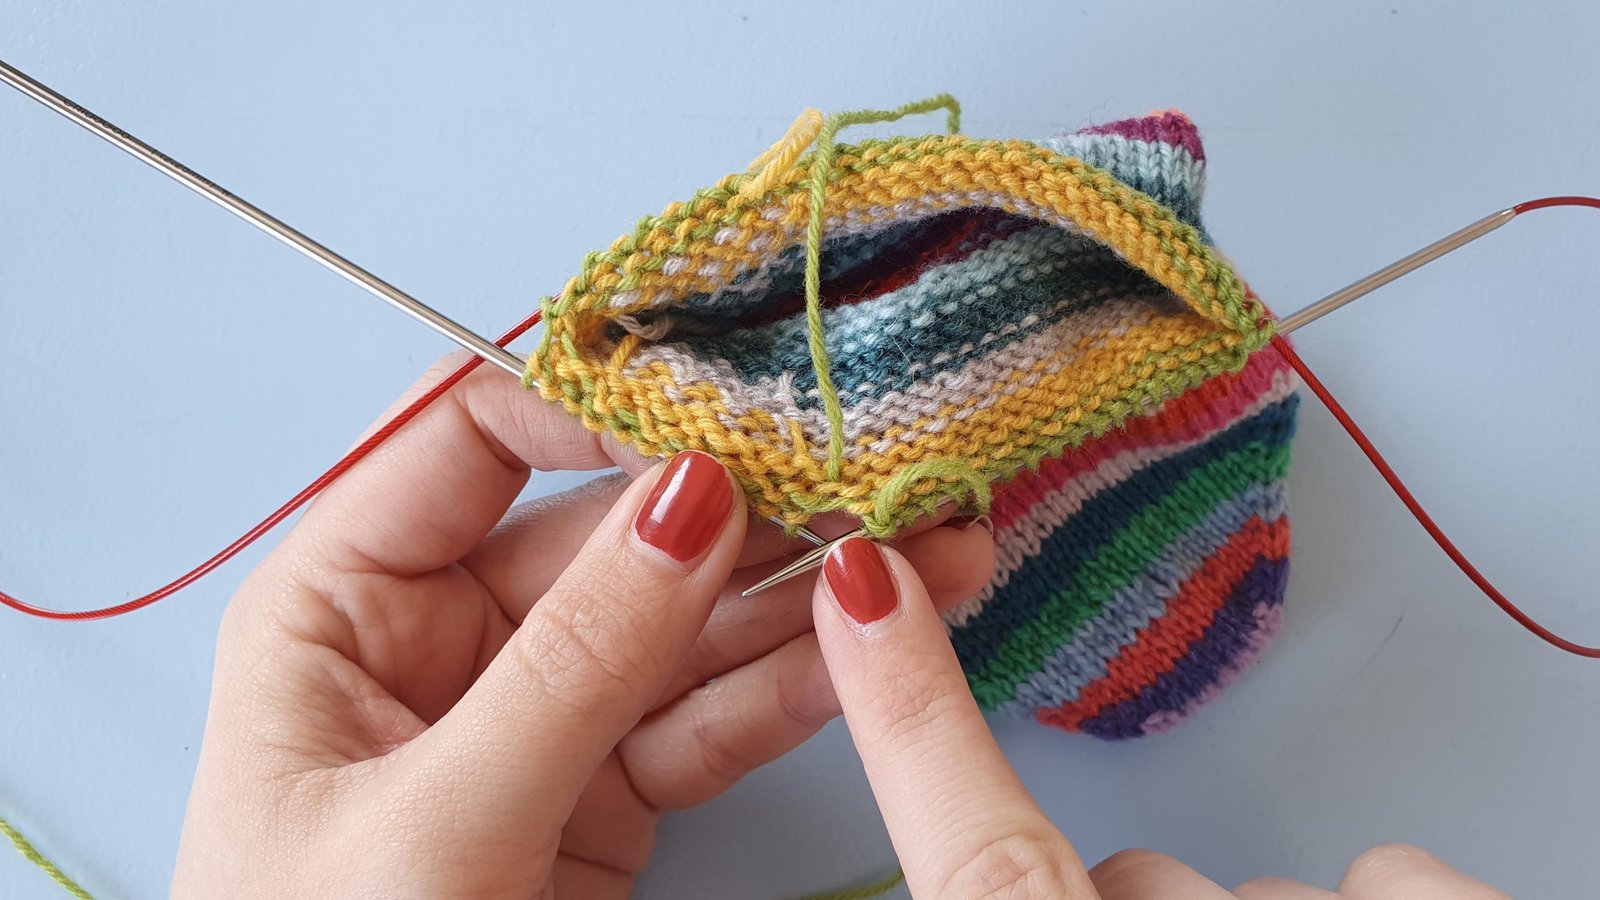
Last week I received a lot of questions about what to do with the ends. Do you tie knots, do you weave them in, and is there a specific method? Please do not tie them into knots, they may come undone and they won’t be as neat. Please weave in your ends, and you can do this as soon as you finish a chart. I left them all until the end, but that’s my preference. I always weave in my ends like I did for this video. Nothing fancy, just threading the yarn through the back of the stitches and making a few ‘bends’. With colourwork, one other thing you could do is to make sure you don’t leave a hole. A good way of closing the holes is to always weave the ends on the opposite side. So a yarn tail from joining a colour, at the start of the round, should be woven in on the inside of the back of the cushion. A yarn tail from cutting a colour, at the end of a round, should be woven in on the inside of the front of the cushion. When weaving in ends, take care to not pull too tightly.
In the picture below you see the inside of my Rosa cushion, perhaps it helps to illustrate what I mean.
Afgelopen week kreeg ik veel vragen over het wegwerken van de eindjes. Maak je knoopjes, naai ze ze weg, is er een specifieke methode? Ten eerste, maak er alsjeblieft geen knoopjes in, die kunnen loskomen en ze zien er minder net uit. Werk je eindjes weg met een stopnaald, dit kun je gelijk na het einde van een schema doen. Ik heb ze allemaal tot het einde gelaten, maar dat is mijn eigen voorkeur. Ik werk mijn draadjes eigenlijk altijd op de manier weg zoals ik in deze (Engelstalige) video laat zien. Heel simpel, ik haal ze door de achterkant van de steken en maak een paar bochtjes. Met kleurwerk is het goed te onthouden dat je het garen altijd aan ‘de andere kant’ wegwerkt zodat je geen gat hebt. Dus een gareneindje van het aanhechten van een kleur, aan het begin van de toer, werk je weg aan de binnenkant van de achterzijde. Een gareneind van het afknippen van een kleur, aan het eind van de toer, werk je weg aan de binnenkant van de voorzijde. Let er ook op dat je niet te hard aan het garen trekt.
Hieronder zie je een foto van de binnenkant van mijn Rosa kussen, wellicht geeft het je een idee.

Wrapping your ends | Eindjes inpakken
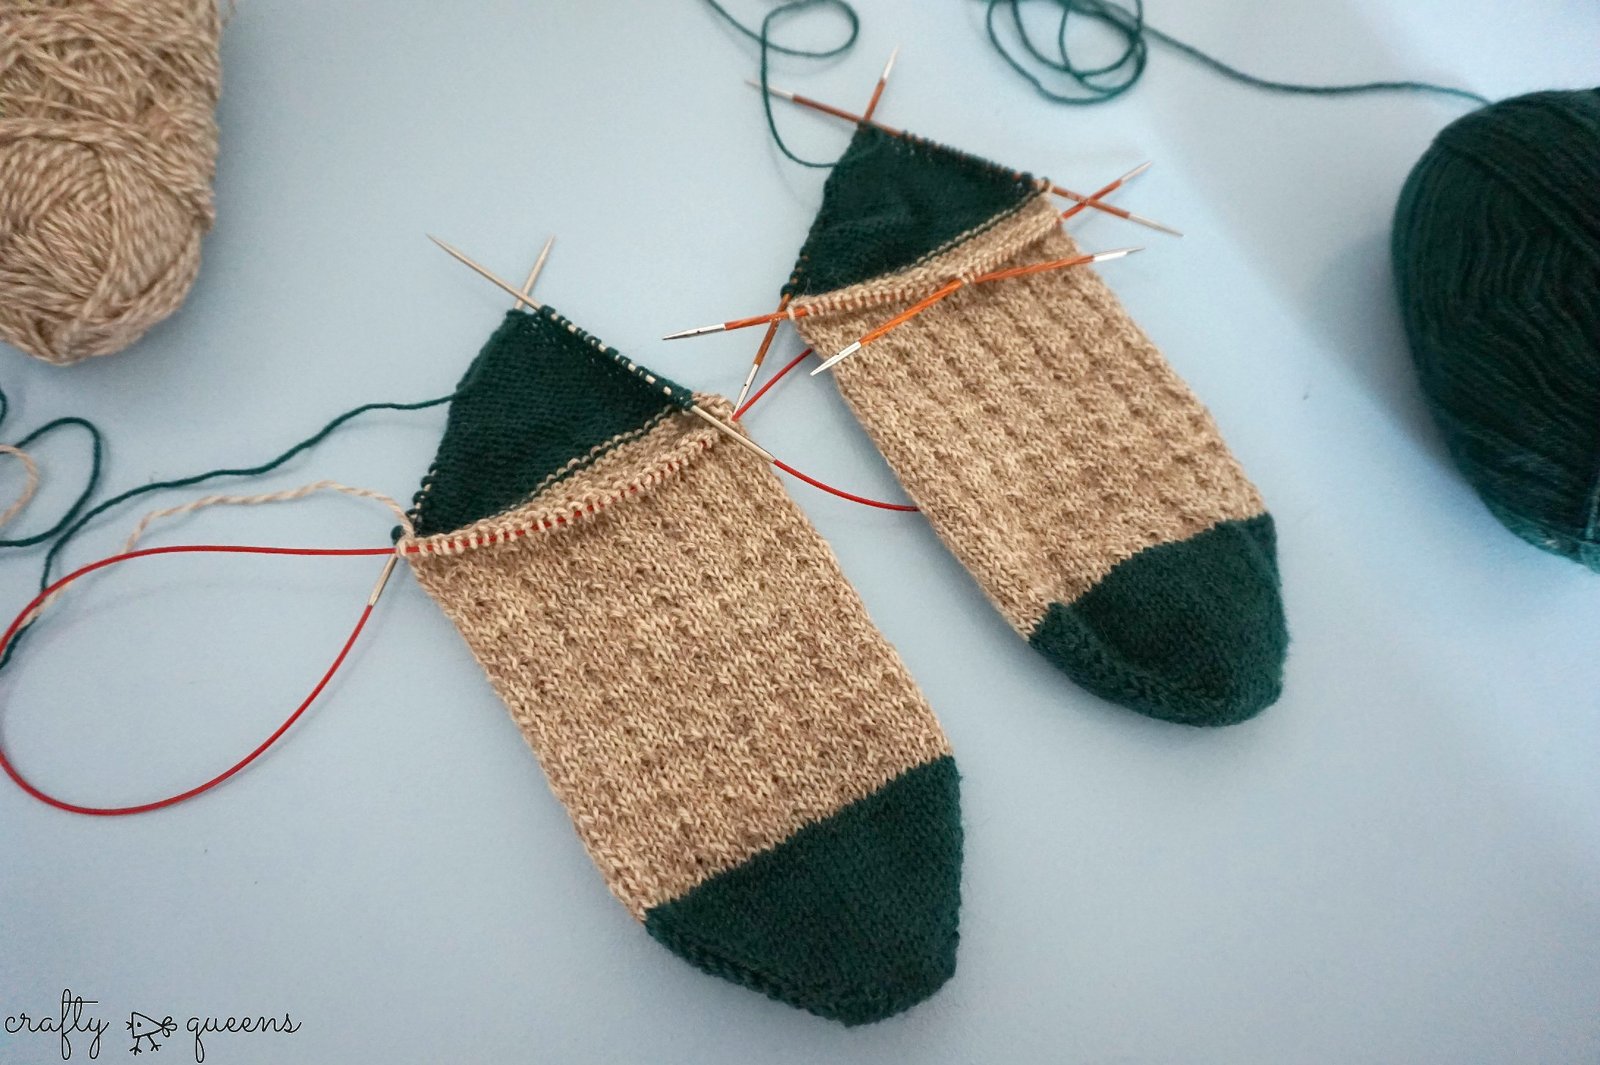
Another thing you can do is to wrap your yarn ends while knitting. I shared this in the Scheepjes Facebook Group last weekend, you can find the video here. I recorded this video when I was working on my scrappy socks, but you can use the same technique for the cushions. For the cushions, you are sometimes switching multiple colours at a time, so you will have more yarn ends than I have for my socks. In that case, you can wrap yarn 1 in the one round, and yarn 2 in the next round. Please note that in order for you to not need to weave in your ends with a needle, you need to wrap your yarn ends in both directions. Sometimes I only wrap them in one direction, so I have less work weaving them in later.
Nog een andere manier die je kunt toepassen is je gareneindjes inpakken. Ik deelde afgelopen weekend al een link naar deze video in de Scheepjes Facebook Groep. Deze video maakte ik toen ik mijn restjessokken breide, maar je kunt dezelfde techniek gebruiken bij de kussens. Voor de kussens heb je wel vaak meerder gareneindjes dan ik had voor mijn sokken. In dat geval kun je kleur 1 inpakken in de ene toer, kleur 2 in de volgende toer. Let wel dat je de gareneindjes een keer in beide richtingen inpakt, dan zit het pas echt goed vast en hoeft er geen stopnaald aan te pas te komen. Wat ik soms ook doe, is dat ik de draadjes in één richting inpak, zodat ik later met mijn stopnaald minder werk heb.
Have fun! | Veel plezier!
Above all, have fun with the knitting charts for this week of the Scheepjes KAL, and share your pictures on Facebook or Instagram with the hashtags #ScheepjesKAL2022 and #SassenachKAL. For posting on Instagram, tag me @newleafdesigns.nl in your photo so I can see. For Facebook, post them in the Scheepjes Facebook Group and tag me (Carmen New Leaf) as well. Also, I would very much appreciate it if you create a project page on Ravelry and add your photos and thoughts there. Thank you so much!!
En bovenal, veel plezier weer met deze week van de Scheepjes KAL, en deel je foto’s op Facebook of Instagram met de hashtags #ScheepjesKAL2022 en #SassenachKAL. Op Instagram kun je me taggen als @newleafdesigns.nl in je foto zodat ik hem kan zien. Op Facebook plaats je in de Scheepjes Facebook Groep en tag je mij (Carmen New Leaf). Ik zou het ook enorm op prijs stellen als je een projectpagina aanmaakt op Ravelry en daar je foto’s toevoegt. Alvast bedankt!!
You might also like | Misschien vind je dit ook leuk


8 Comments
[…] Part 2 […]
[…] Part 2 […]
[…] Part 2 […]
[…] Part 2 […]
[…] Part 2 […]
[…] Part 2 […]
[…] Part 2 […]
[…] Part 2 […]