
Scheepjes KAL – Week Five | Week Vijf
Hi everyone, and welcome to Week Five! We’ve reached the halfway point of the Scheepjes Knit-a-Long, and in this week you will be finishing your first cushion. I’m already looking forward to seeing your pillows nicely blocked and filled with inner cushions, it’s going to look even better! I was so pleased to see everyone’s thistle sections and to see you were all so pleased with them, they are really satisfying to make aren’t they? For Week Five’s charts, it’ll be smooth sailing as it’s not super easy but nothing you haven’t seen before. This week features another nice gingham pattern, a more detailed XO pattern, and we finish off with the same chart that we knit at the very start of the cushion. And then… the zipper! Not to panic, I’ve got you all covered with another tutorial video, and as I’m not very experienced myself with sewing I’m able to give you a beginner point of view on this. I hope everything will go smoothly, and as always for help you can find me and the lovely moderators in the Scheepjes Facebook Groups. Enjoy!
Hallo iedereen, en welkom bij Week Vijf! We zijn halverwege de Scheepjes Knit-a-Long en deze week maken we het eerste kussen af. Ik heb zó naar deze week uitgekeken, omdat ik niet kan wachten de eerste kussens mooi afgewerkt en gevuld te zien! Het zal een wereld van verschil zijn, met het binnenkussen rekken de steken nog wat uit en komen ze nóg mooier uit. Bedankt ook voor het delen van de foto’s van de vorige week, en ik zag dat jullie veel plezier hebben gehad met de distels! Leuk zijn ze om te maken he? Voor de schema’s van Week Vijf zal het redelijk soepel gaan, het wordt niet té gemakkelijk maar er komen geen overdreven moeilijke dingen deze week. Deze week breien we weer een leuk geruit patroon, een meer gedetailleerd XO patroon, en we eindigen met hetzelfde schema als waar we dit kussen mee begonnen. En dan… de rits! Geen paniek, ik heb een tutorial video gemaakt waar jullie allemaal hopelijk veel aan gaan hebben. Zelf ben ik nog echt een beginner met de naaimachine en ik heb het idee dat als ik zelf nog ergens een beginner in ben, dat ik het soms beter uit kan leggen voor andere beginners. En zoals altijd kun je extra hulp vragen in de Scheepjes Facebook Groepen, waar de geweldige moderators en ikzelf je vragen kunnen beantwoorden. Brei ze!
Pattern Parts |
Delen van het patroon |
|---|---|
| Part 1 | Deel 1 |
| Part 2 | Deel 2 |
| Part 3 | Deel 3 |
| Part 4 | Deel 4 |
| Part 6 | Deel 6 |
| Part 7 | Deel 7 |
| Part 8 | Deel 8 |
| Part 9 | Deel 9 |
| Part 10 | Deel 10 |
Pattern Part Five | Patroon Deel Vijf
For this week, I want you to note first that on the pattern PDF the charts do not appear in order. Please look for Chart 15 first, then 16 which is at the bottom of the page, then Chart 17. We have another delightful plaid pattern coming up this week, a beautiful XO pattern and we finish off with the same pattern as in the very first chart of the pillow.
Please find Part 5 of the Scheepjes KAL pattern here on the Scheepjes website. Scroll a bit down so you see ‘Week 5’ in red, then ‘Instructions’ in black. Below that, you will find the pattern linked as a PDF. Click on the text making sure you select the right language, and the PDF will open. You can also find the pattern in the Scheepjes Facebook Group. If you would rather have a colouring sheet for the charts so you can colour it in yourself, please find it below.
Voor deze week wil ik je eerst even erop wijzen dat de schema’s niet helemaal logisch in volgorde staan op het PDF patroon. Kijk goed naar de schema nummers en brei eerst Schema 15, dan Schema 16 onderaan de pagina, en dan Schema 17. We hebben weer een heerlijk geruit patroon, een mooi groot XO patroon, en we eindigen met hetzelfde patroontje als van het allereerste schema van het kussen.
Je vindt Deel 5 van het Scheepjes KAL patroon hier op de Scheepjes website. Je ziet eerst ‘Week 5’ staan in het rood, en daaronder ‘Instructies’ in zwarte tekst. Daaronder is het patroon gelinkt als een PDF. Klik op de tekst, en het PDF opent zich. Je kunt het patroon ook vinden in de Scheepjes Facebook Groep. Als je liever een inkleur-versie hebt zodat je die zelf in kan kleuren, kijk dan hieronder.
Colour Your Chart | Kleur je schema in
![]()
If you want to print out your colouring chart, click here for the PDF version. For Chart 16, Rows 12-26 of the pattern, make sure to use strongly contrasting colours as it can be difficult to see otherwise.
Als je de inkleur versie graag wilt uitprinten, klik dan hier voor de PDF versie. Voor Schema 16, of Rijen 12-26 van het inkleurschema, gebruik je het beste sterk contrasterende kleuren, anders is dit deel moeilijk te zien.
Tips for this Week | Tips voor deze Week
Chart 15 | Schema 15
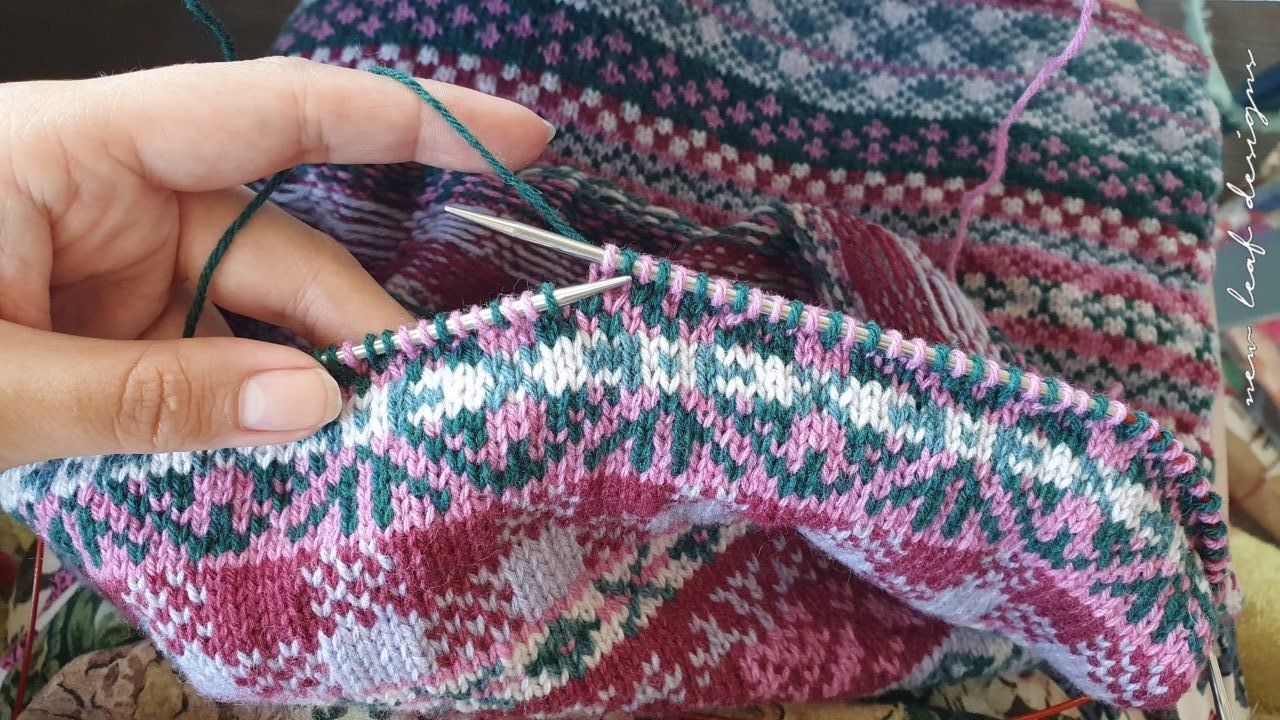
The first chart of this week is relatively easy, although it will give you some practice for your stitch tension. For this fun gingham chart, a repeat of 10 stitches, you will need to wrap your floats in two rounds: Rounds 3 and 5, as you have 7 consecutive stitches of Yarn B after each other. Now, I know most of you want to wrap floats more often, because in the other rounds you have 5 stitches of one colour after each other. Pay attention: if you wrap floats on more rounds, do not wrap your floats in the same ‘stitch column’, so not on top of each other. If you wrap floats in the same spot round after round, the fabric will pull apart slightly there and your float will be visible. Just offsetting it by 1 stitch will help. On Rounds 7, 9 and 11, you can wrap the float of the background colour. This is the first time throughout the entire cushion that this happens, up until now you’ve only needed to wrap the pattern colour. By far the easiest way is to momentarily switch your yarns for these spots, and wrap your floats how you are used to doing them. Watch my tutorial video for how to wrap the background colour yarn.
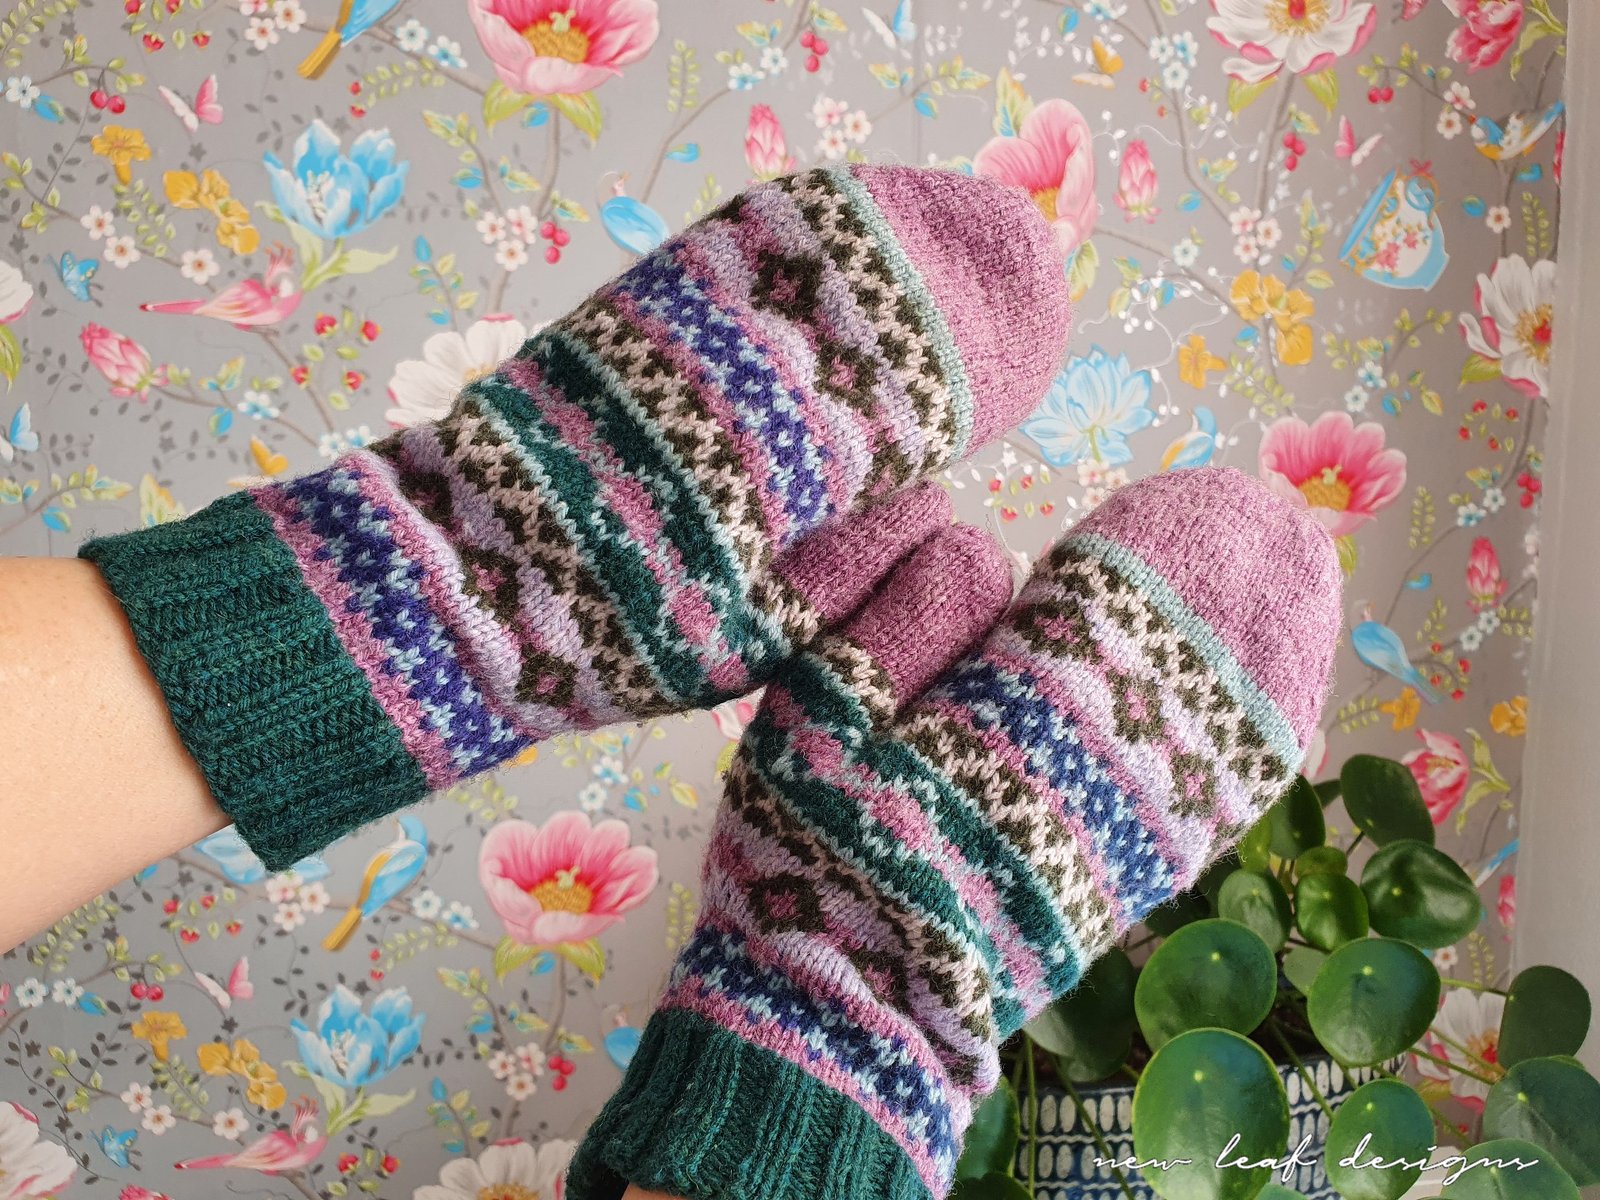
If you look closely at the picture below, you can see that for my pillow I did not wrap my floats at all for the gingham section. I tend to only wrap floats in corners. If you feel comfortable not wrapping your floats for the gingham section, give it a try!
Het eerste schema van deze week is relatief gemakkelijk, al moet je wel weer een beetje letten op je draadspanning. Voor dit leuke geruite schema, een herhaling van 10 steken, zul je je garen moeten inpakken in Toeren 3 en 5, omdat je daar 7 opeenvolgende steken van Kleur B hebt. Nu weet ik dat de meeste van jullie de garens vaker willen inpakken, omdat de andere Toeren 5 opeenvolgende steken van dezelfde kleur hebben. Let dan op: als je garens inpakt op meerdere toeren, pak ze dan niet in dezelfde stekenkolom op, dus niet bovenop elkaar. Als je dit wel doet, dan zie je de garens door het werk heen. Als je het al één steek naar links of naar rechts plaatst zal het al minder zichtbaar zijn. Op Toeren 7, 9 en 11 wil je de achtergrondkleur inpakken. Dit is de eerste keer in het hele kussen dat we de achtergrondkleur inpakken, meestal pak je de patroonkleur in. Het is veruit het gemakkelijkst om gewoon je draden even in de andere hand vast te houden, en het in te pakken zoals je gewend bent. Maar, ik heb een korte tutorial voorbereid die je hier kunt bekijken.
Als je goed kijkt naar de foto hieronder, zie je dat ik mijn garens helemaal niet heb ingepakt voor het geruite gedeelte. Volgens mij heb ik alleen in de hoeken van het kussen de garens ingepakt, en verder helemaal niet. Als je dat ook eens wilt proberen, ga er dan voor!
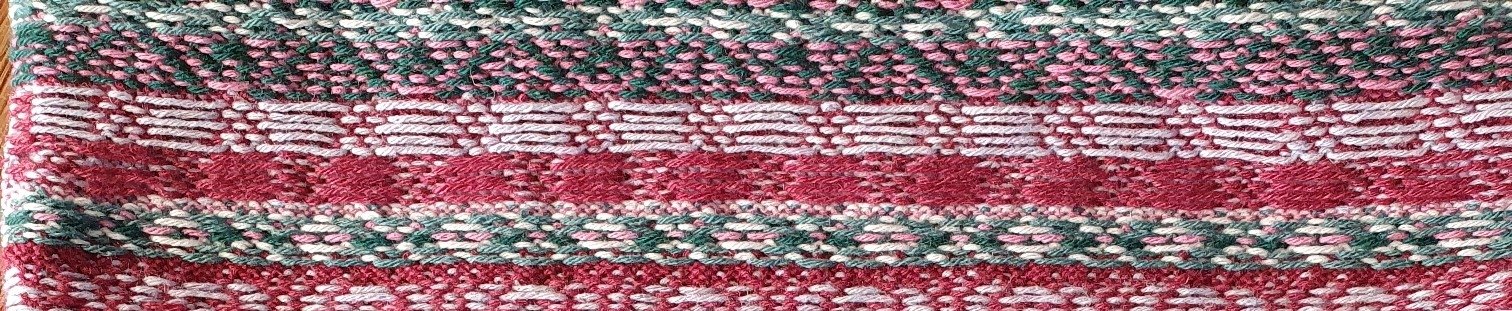
Chart 16 | Schema 16
Chart 16 is another XO chart, meaning that you can see an ‘X’ and an ‘O’ in the pattern if you look closely. These patterns are often seen in Fair Isle knitting. For this pattern, it is slightly less visible because it’s a more ‘delicate’ version. Because of that, do make sure to use a contrasting pair of colours if you’re not using the official KAL kit colours. Because the diagonal lines are very slim, they will be hard to see when you are not using contrasting colours.
Schema 16 is nog een XO schema, wat betekent dat als je goed naar het patroon kijkt, je een ‘X’ en een ‘O’ erin kan zien. Dit soort patronen zijn kenmerkend voor Fair Isle breien. Bij dit patroon is het wat minder zichtbaar omdat de lijnen dunner zijn. Dat betekent ook dat het heel belangrijk is goede contrasterende kleuren te kiezen voor dit schema, als je niet een van de officiële kits gebruikt. Omdat de diagonale lijnen heel dun zijn zullen deze moeilijk te zien zijn als je geen contrasterende kleuren gebruikt.

Casting off | Afkanten
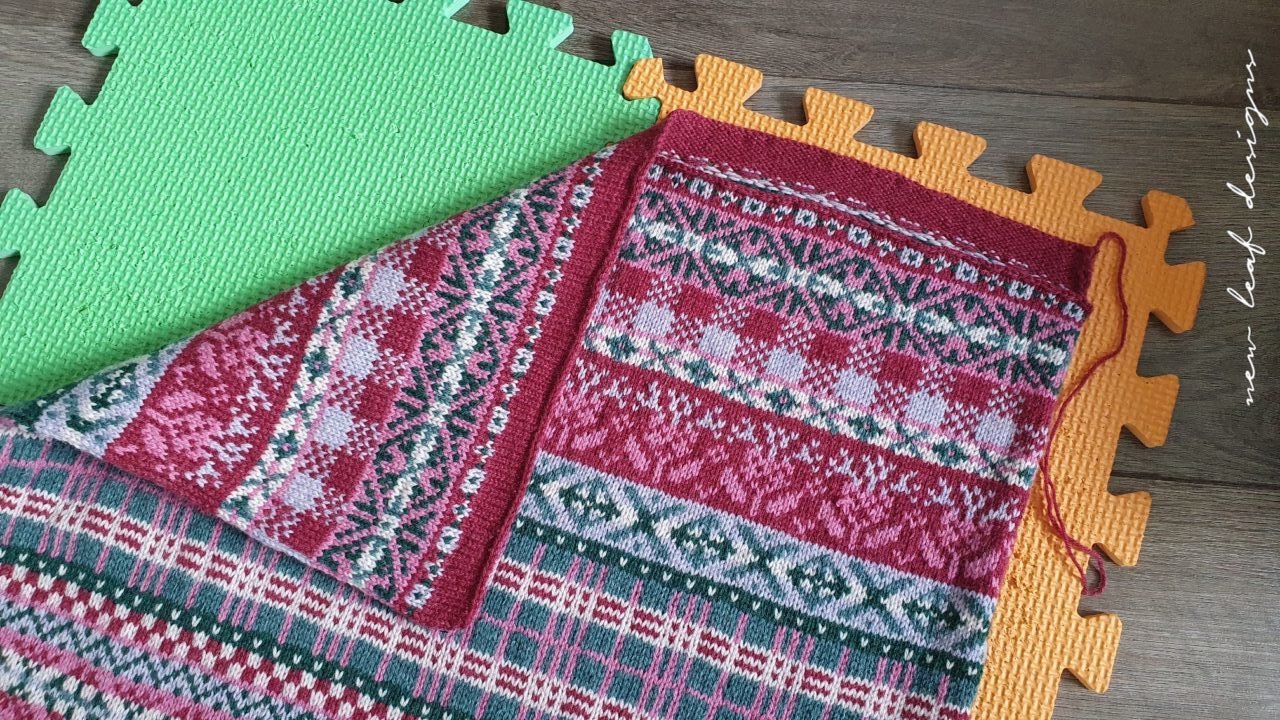
For the cushion, it’s important to cast off quite tightly. I’ve attached a picture of my Claire cushion to give you an impression. Don’t overdo it obviously, but if you cast off tightly it will make it much easier to sew a neat line with your sewing machine. When sewing by hand it isn’t much of a problem if your cast off edge is loose, but since a sewing machine tends to stretch the fabric while sewing, a loose cast off edge will look ‘wavy’ when attached to the zipper.
TIP! If you’re unsure whether you’re going to cast off tightly enough, put in a lifeline first. It’s in the Tips and Tricks video if you missed it. It is very tedious to undo a cast off row, it’s a bit more difficult than regular stockinette knitting. So put in a lifeline – use a very thin sewing thread so that it doesn’t affect the look of the cast off – and then check afterwards whether the cast off is tight enough.
Voor het kussen is het belangrijk om redelijk strak af te kanten. Ik heb hieronder een foto toegevoegd van mijn Claire kussen om je een indruk te geven. Doe het niet té strak natuurlijk, maar als je het strak afkant is het veel gemakkelijker om een nette lijn te naaien met de naaimachine. Als je de rits met de hand erin naait is het niet zo’n probleem, maar de naaimachine lijkt de stof vaak wat uit te rekken. Als je losjes hebt afgekant kan dit zorgen voor een ‘golvend’ effect, en dat wil je niet hebben.
TIP! Als je van tevoren nog niet weet of je strak genoeg afkant, breng dan eerst een levenslijn in. Als je dit gemist hebt, het staat in de Tips en Tricks video. Het is namelijk heel vervelend om een afkantrij weer uit te halen, veel moeilijker dan een gewone rij uithalen. Dus plaats gewoon een levenslijn – gebruik dun naaigaren zodat het zo min mogelijk zichtbaar is – en bekijk dan of je het strak genoeg hebt gedaan.

Finishing | Afwerking
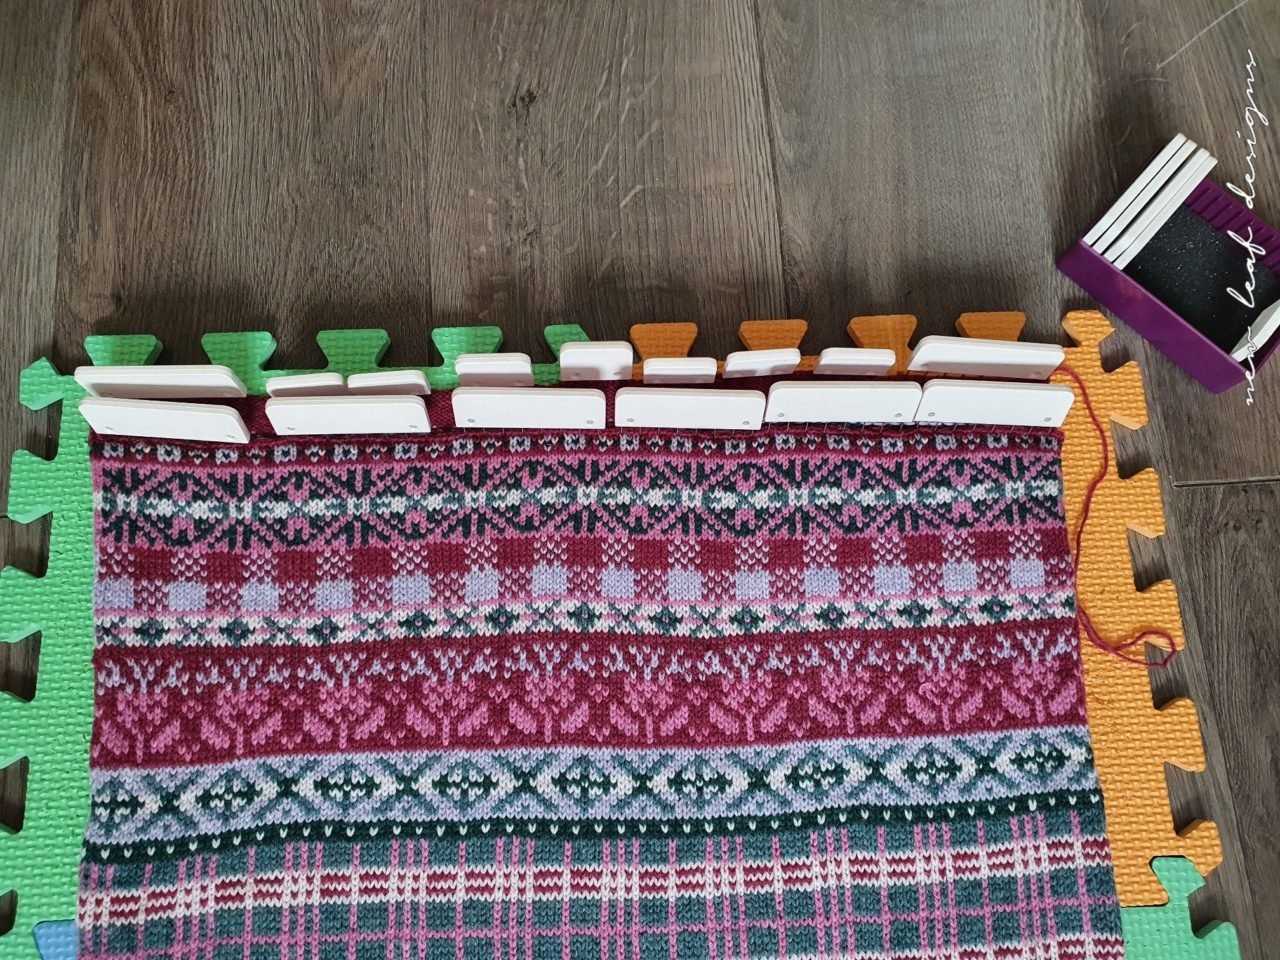
After casting off, wash your pillowcase with woolwash, and let it dry flat on a blocking board or other foam mats. For the cushion cover, I only pinned the cast off edges as these tend to roll over. Pin them into place with Knitpro Blockers like I did in the picture, or simple pins. Do NOT, I repeat do NOT stretch out your pillowcase, unless it is much smaller than the recommended size of 49x49cm.
Na het afkanten was je de kussensloop met wolwasmiddel, en laat je het plat drogen op een blocking bord of andere type foam matten. Voor de kussensloop heb ik alleen de afkantranden vastgepind omdat deze omkrullen. Pin ze met Knitpro Blockers zoals ik in de foto heb gedaan, of gebruik spelden. Rek je kussen NIET uit, behalve als deze veel kleiner is dan de aanbevolen maat van 49x49cm.
Ironing | Strijken
After blocking you can also iron the cast off edges of the pillowcase if they are not laying completely flat. It will be easier to pin the zipper to the pillowcase when the edges are flat. Please make sure to set the iron to the wool setting, and if possible place a T-shirt or thin towel between the pillowcase and the iron. Alternatively, hover over the knitted fabric and steam it, then pat it with your fingers (careful to wait a few seconds because it’s hot) to make it flat.
Na het blocken kun je ook nog de afkantranden van de kussensloop strijken als deze niet helemaal plat liggen. Als ze plat zijn is het gemakkelijker de rits eraan te spelden. Let op dat je het strijkijzer op de wol stand zet, en het liefst leg je er ook even een T-shirt of theedoek tussen. Nog een manier is om je strijkijzer boven je breiwerk te houden en het niet aan te raken, maar het breiwerk te stomen. Wacht dan een paar seconden zodat het niet meer te heet is en ‘klop’ met je handen op het breiwerk om het plat te maken.
The Zipper | De Rits
And now for the scary part! Although I promise, you can do it! I was apprehensive about sewing the zipper before I did it, but honestly it’s not that bad. Having said that, I do find it more difficult than all the knitting in this cushion. I have prepared a tutorial video to make it easier for you, and I hope it will come in handy! Find it below.
En nu voor het enge gedeelte! Maar ik beloof je, je kunt het! Ik keek er een beetje tegenop om de rits in de kussensloop te naaien, en achteraf viel het best mee. Al vind ik het moeilijker dan al het breiwerk in het kussen samen opgeteld. Ik heb een tutorial voorbereid voor de rits, hopelijk heb je daar veel aan. De Engelse versie heb ik hieronder geplaatst, de Nederlandse versie vind je hier.
Share your makes | Deel jouw creatie
I hope you have fun with this week of the Scheepjes KAL, and please do share your pictures on Facebook or Instagram with the hashtags #ScheepjesKAL2022 and #SassenachKAL. For posting on Instagram, tag me @newleafdesigns.nl in your photo so I can see. For Facebook, post them in the Scheepjes Facebook Group and tag me (@ Carmen New Leaf) as well. Also, I would very much appreciate it if you create a project page on Ravelry and add your photos and thoughts there. Thank you so much!!
Ik wens je veel plezier met deze week van de Scheepjes KAL, en deel vooral je foto’s op Facebook of Instagram met de hashtags #ScheepjesKAL2022 en #SassenachKAL. Op Instagram kun je me taggen als @newleafdesigns.nl in je foto zodat ik hem kan zien. Op Facebook plaats je in de Scheepjes Facebook Groep en tag je mij (@ Carmen New Leaf). Ik zou het ook enorm op prijs stellen als je een projectpagina aanmaakt op Ravelry en daar je foto’s toevoegt. Alvast bedankt!!
You might also like


5 Comments
[…] Part 5 […]
[…] Part 5 […]
[…] Part 5 […]
[…] Part 5 […]
[…] Part 5 […]