Scheepjes KAL 2022 – Week One | Week Een
It’s time! It’s finally TIME for the start of the Scheepjes Knit-a-Long 2022, woohoo!! Many of you are eager to get started, and I’m so curious to see your progress during the knit-a-long! It has been so great seeing you knit practice projects such as the Finn Hat and the Home Hat, and to see your gauge swatches. If you haven’t knit a gauge swatch yet, please find all of the information you need in the Tips and Tricks blogpost.
If this is your first time reading about the Scheepjes KAL 2022, click here to catch up on all that’s happening and where the inspiration comes from.
In my weekly blogposts for the Knit-a-Long, I will point you to where you can download the free pattern; I have a black-and-white chart for you to colour in with your own colour palette when you’re not joining with one of the official colourways; and I will have some tips and tricks for you for the charts of this week.
Het is tijd! Het is EINDELIJK tijd voor het begin van de Scheepjes Knit-a-Long 2022, yes! Velen van jullie staan te springen om te beginnen, en ik ben zo benieuwd naar jullie vooruitgang tijdens de KAL. Ik vind het al zo leuk om jullie oefenprojecten voorbij te zien komen, zoals de Finn Hat en de Home Hat, en ook jullie proeflapjes natuurlijk. Als je nog geen proeflapje hebt gemaakt, dan kun je alle informatie vinden in de Tips en Tricks blogpost.
Als dit de eerste keer is dat je van de Scheepjes KAL 2022 hoort, klik dan hier om te lezen waar het allemaal over gaat en wat we gaan breien.
In mijn wekelijkse blogposts voor de Knit-a-Long ga ik je vertellen waar je het gratis patroon kan downloaden; ik heb een ‘kleurplaat’-versie van het schema voor je die je kunt inkleuren als je niet meedoet met een van de officiële kleurstellingen; en ik heb extra tips en advies voor de schema’s van deze week.
Pattern Parts |
Delen van het patroon |
|---|---|
| Part 2 | Deel 2 |
| Part 3 | Deel 3 |
| Part 4 | Deel 4 |
| Part 5 | Deel 5 |
| Part 6 | Deel 6 |
| Part 7 | Deel 7 |
| Part 8 | Deel 8 |
| Part 9 | Deel 9 |
| Part 10 | Deel 10 |
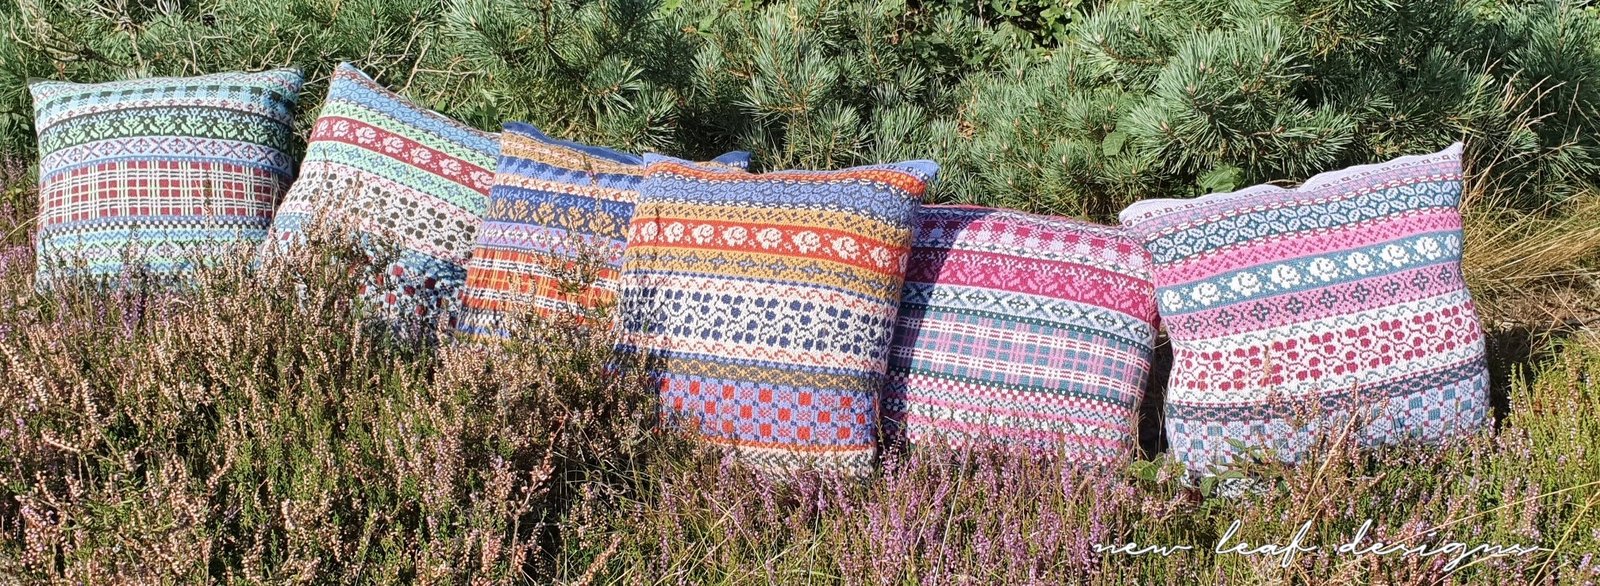
Pattern Part One | Patroon Deel Een
For Week One of the Scheepjes KAL, we are starting off with part one of Jamie’s Cushion. We will cast on, and knit the first three colourwork charts. Find the free downloadable pattern here on the Scheepjes website, or in the Scheepjes Facebook Group. If you’re using an official kit, please note that there are three versions of the pattern (Cirsium, Rosa, Erica) so that the charts match your yarns in colour. If you are using different colours, you may find the colouring-book version handy where you can print out and colour in the charts.
Voor Week Een van de Scheepjes KAL beginnen we met het eerste deel van Jamie’s Kussen. We gaan opzetten en de eerste drie kleurwerk schema’s breien. Vind het patroon hier op de Scheepjes website, of in de Scheepjes Facebook Groep. Als je een officiële kit gebruikt, kijk dan dat je de versie download van jouw kleurstelling (Cirsium, Rosa of Erica) want dan komen de schema’s overeen met jouw kleuren garen. Als je andere kleuren gebruikt, dan vind je wellicht de zwart-wit versie handig die je kunt uitprinten en in kunt kleuren.
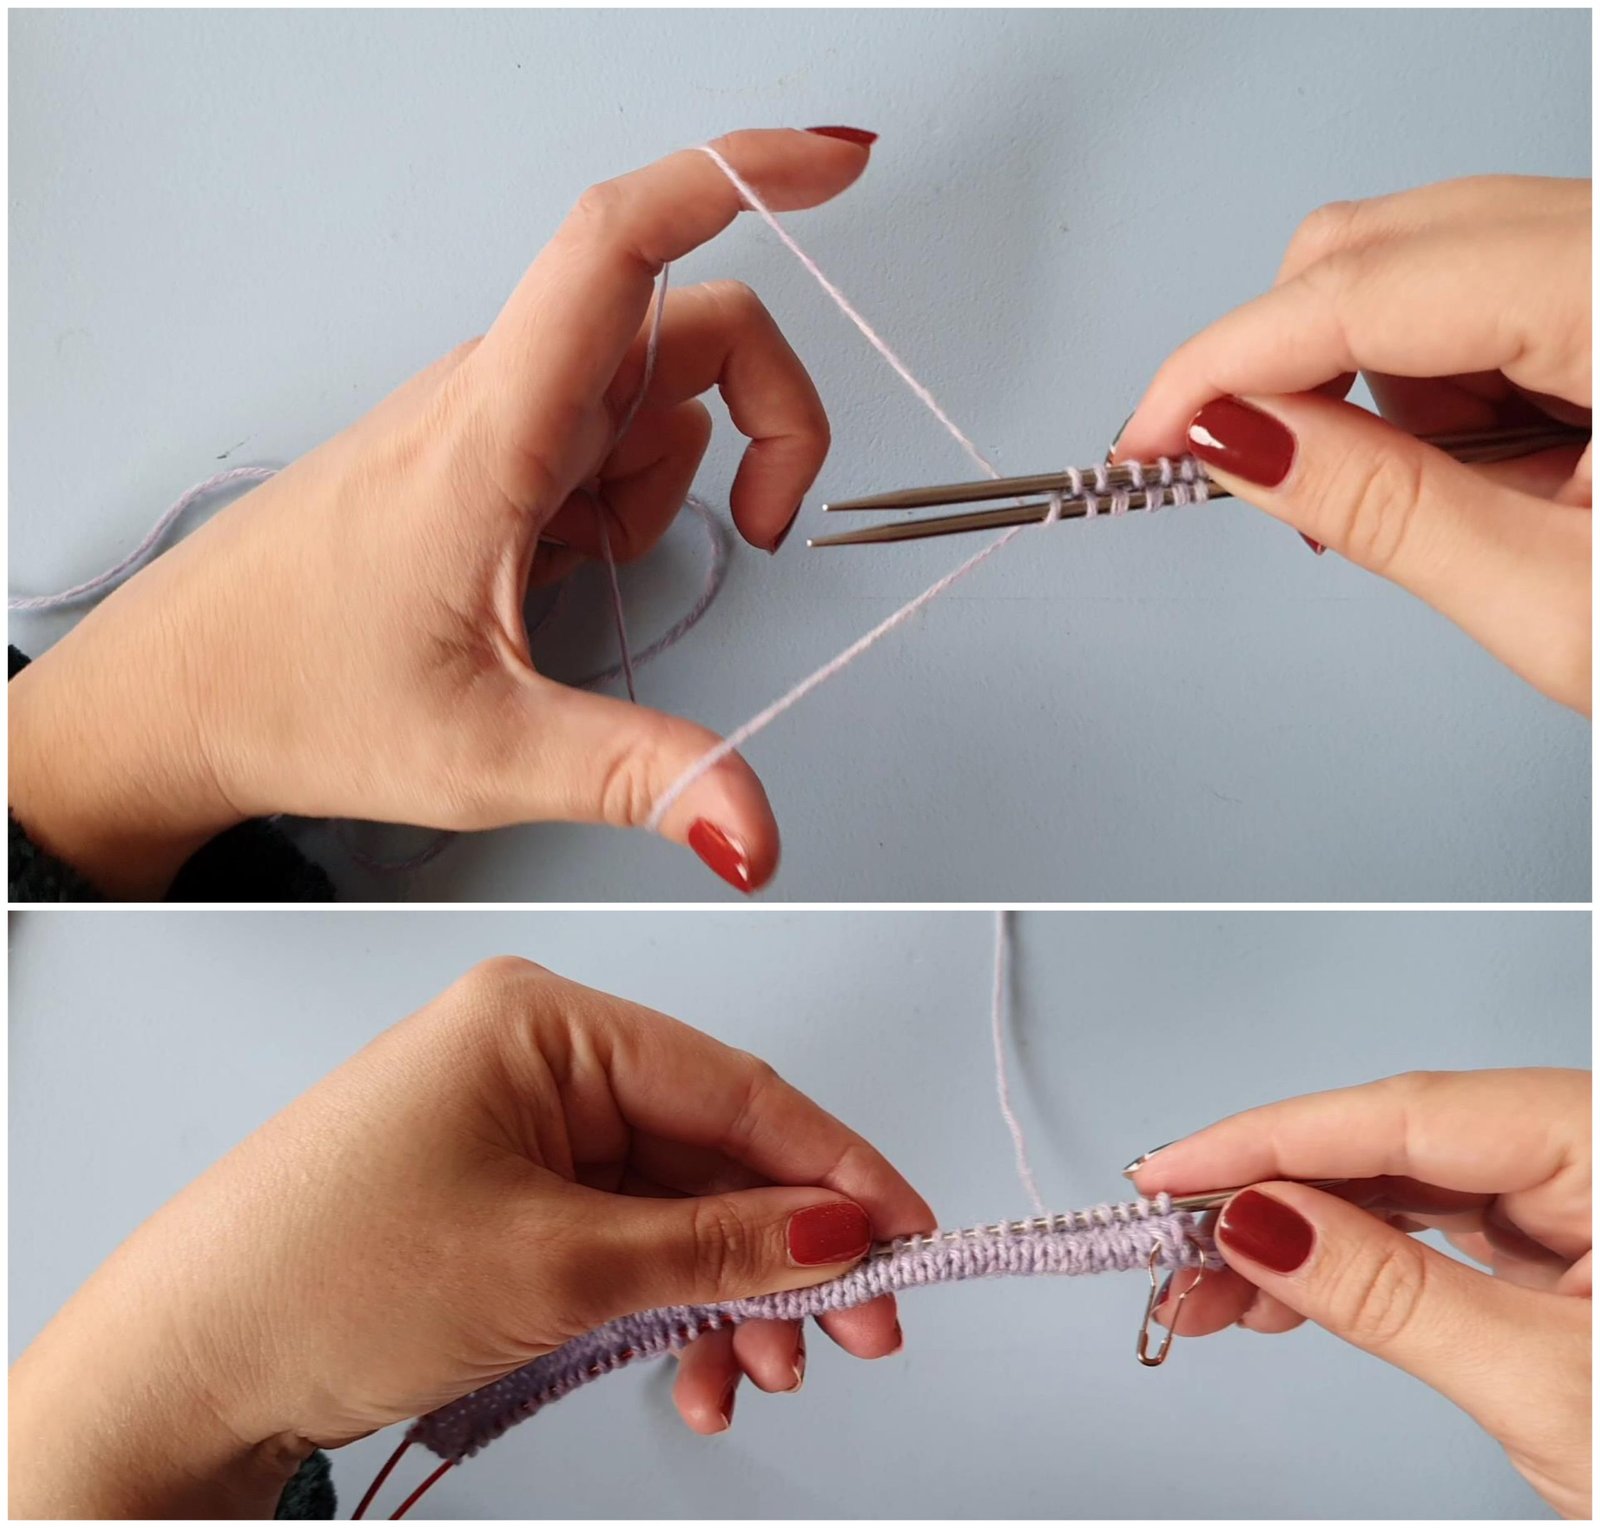
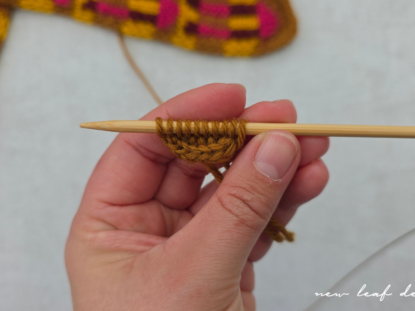
Casting On | Opzetten
For the Cast On, we are using Judy’s Magic Cast On method. If you are new to this method, please find the video instructions for it here. Further along in this same video I am showing you how to knit colourwork, so keep watching if you want a refresher.
Voor de opzet gebruiken we Judy’s Magic Cast On. Als je deze methode nog niet kent, dan raad ik je aan mijn filmpje hiervoor te bekijken. Verder in deze video laat ik je ook zien hoe je met twee kleuren breit, dus kijk lekker verder als je dat nog wilt zien.
Colour your Chart | Kleur je schema in
![]()
Here I have the Colour Sheet of this weeks chart for you. This is especially meant for the members of Team Free Spirit, who are joining with their own colour palette and might find it difficult to knit according to the charts for the official colourways. You can download it here and print it out, so that you can colour it in with the colours of your choice.
Als je meebreit aan de KAL met je eigen gekozen kleuren, dan ben je welkom bij Team Free Spirit! Deze kleurplaat-versie van het schema vind je dan vast ook handig omdat je die kunt inkleuren zodat het overeenkomt met jouw garens. Je kunt deze afbeelding hier downloaden zodat je hem kunt uitprinten.
Reading your chart | Het schema lezen
Read the charts from right to left, and from bottom to top. At the right, you start with your first stitch in the background colour. Then, you start the repeat, marked by a red outline. For the first side of your cushion, so the first half of your stitches, you continue knitting this repeat until you have the same amount of stitches left as is shown after the repeat. Then for the second side you repeat all of that. I’m aware that might sound difficult so let’s go through it for the first chart (Rounds 1-5). As Round 1 is just one colour, let’s look at Round 2. You have 1 stitch of Yarn D before the repeat starts. Then you have 8 stitches in the repeat. On the left side of the chart, starting from the left ‘end’ of the red outline, you have 5 more stitches. Keep knitting according to the repeat until you have 5 stitches left on the first side of the cushion. Then knit the last 5 stitches according to those 5 stitches in the chart. Turn to the second side of the cushion, now you start again from stitch 1 on the righthand side of the chart, and you knit this side the same as the first side.
Lees de schema’s van rechts naar links en van onder naar boven. Aan de rechterkant start je met de eerste steek in de achtergrondkleur. Daarna begin je aan de patroonherhaling die met rood omlijnd is. Voor de eerste helft van je kussen, dus de eerste helft van je steken, brei je verder in de patroonherhaling totdat je evenveel steken over hebt als dat je ziet aan de linkerkant van het schema. Dan herhaal je dat nog eens allemaal voor de tweede helft van het kussen. Dat klinkt misschien heel ingewikkeld, dus we gaan samen eens kijken naar het eerste schema (Toeren 1-5). Omdat Toer 1 slechts uit één kleur bestaat kijken we naar Toer 2. Je hebt één steek in Kleur D voordat de patroonherhaling start. De patroonherhaling bestaat uit 8 steken. Aan de linkerkant van het schema, vanaf het eind van de rode omlijning, heb je nog 5 steken over. Je breit dus volgens de patroonherhaling totdat je 5 steken van de eerste kant van het kussen over hebt. Dan brei je de laatste 5 steken volgens die 5 steken in het schema. Draai nu naar de tweede kant van het kussen, en je begint weer vanaf steek 1 aan de rechterkant van het schema, en breit deze kant hetzelfde als de eerste kant.
Tips for this Week | Tips voor deze Week
To make things easier on you, I have a list of tips for the charts of this week. Some charts may look difficult at first, but I have some handy tips and tricks to make it easy to remember which colour to use when. For Round 3, notice that you’re knitting 1 stitch in each colour? So it’s just 1 stitch of the one colour, 1 stitch of the next colour. Easy peasy! The same goes for Rounds 7, 11, 12, 16, 18, 22 and 23. Perhaps mark these with a pen. There are more repeats like this, such as the main repeat in Rounds 9, 14 and 20 being five stitches of the one colour, and five stitches of the other colour. And then again in Rounds 27, 29 and 31, where you’re knitting three stitches of the one colour, then three stitches of the other colour. Try to notice these kinds of repeats throughout the KAL charts and you will see it gets MUCH easier!
A word of warning for when you get to the ‘gingham’ portion of the pattern (Chart 2). Please pay attention to the rounds after the ‘1 stitch of this colour, 1 stitch of that colour’ rounds, like Round 8, because those are easy to trip up on. I found myself having to rip back one entire round because I ‘shifted’ the colourwork pattern. So just pay attention, have good lighting and a clear head when you knit those rounds. And above all: don’t knit when you’re tired! You have been warned 😉
Om het je wat makkelijker te maken, heb ik nog wat extra tips voor deze week. Sommige schema’s lijken misschien eerst lastig, maar zijn gemakkelijk als je er op een andere manier naar kijkt. Voor Toer 3, zie je dat je telkens één steek breit in elke kleur? Dus brei je 1 steek van de ene kleur, 1 steek van de andere, enzovoorts. Appeltje eitje! Hetzelfde geldt voor Toeren 7, 11, 12, 16, 18, 22 en 23. Markeer deze misschien even met een pen. Er zijn nog een paar toeren zoals dit, bijvoorbeeld Toeren 9, 14, en 20 waar je telkens 5 steken breit van de ene kleur, en dan weer 5 van de andere. En dan weer in Toeren 27, 29 en 31, waar je steeds 3 steken van elke kleur breit. Probeer deze herhalingen te herkennen in de KAL schema’s en het wordt ineens een stuk gemakkelijker.
En dan even een waarschuwing voor het ‘geruite’ schema (Schema 2). Let op de toeren na ‘1 steek van deze kleur, 1 steek van die kleur’, zoals Toer 8, want daar maak je gemakkelijk een foutje. Zelf had ik dat ook, en moest ik een hele toer terug uithalen omdat ik het kleurwerk patroon had ‘opgeschoven’. Dus let even op, zorg dat je goed licht hebt en dat je je hoofd erbij kunt houden als je deze toeren breit. En dan misschien wel de beste tip: brei niet als je moe bent! Je bent gewaarschuwd 😉
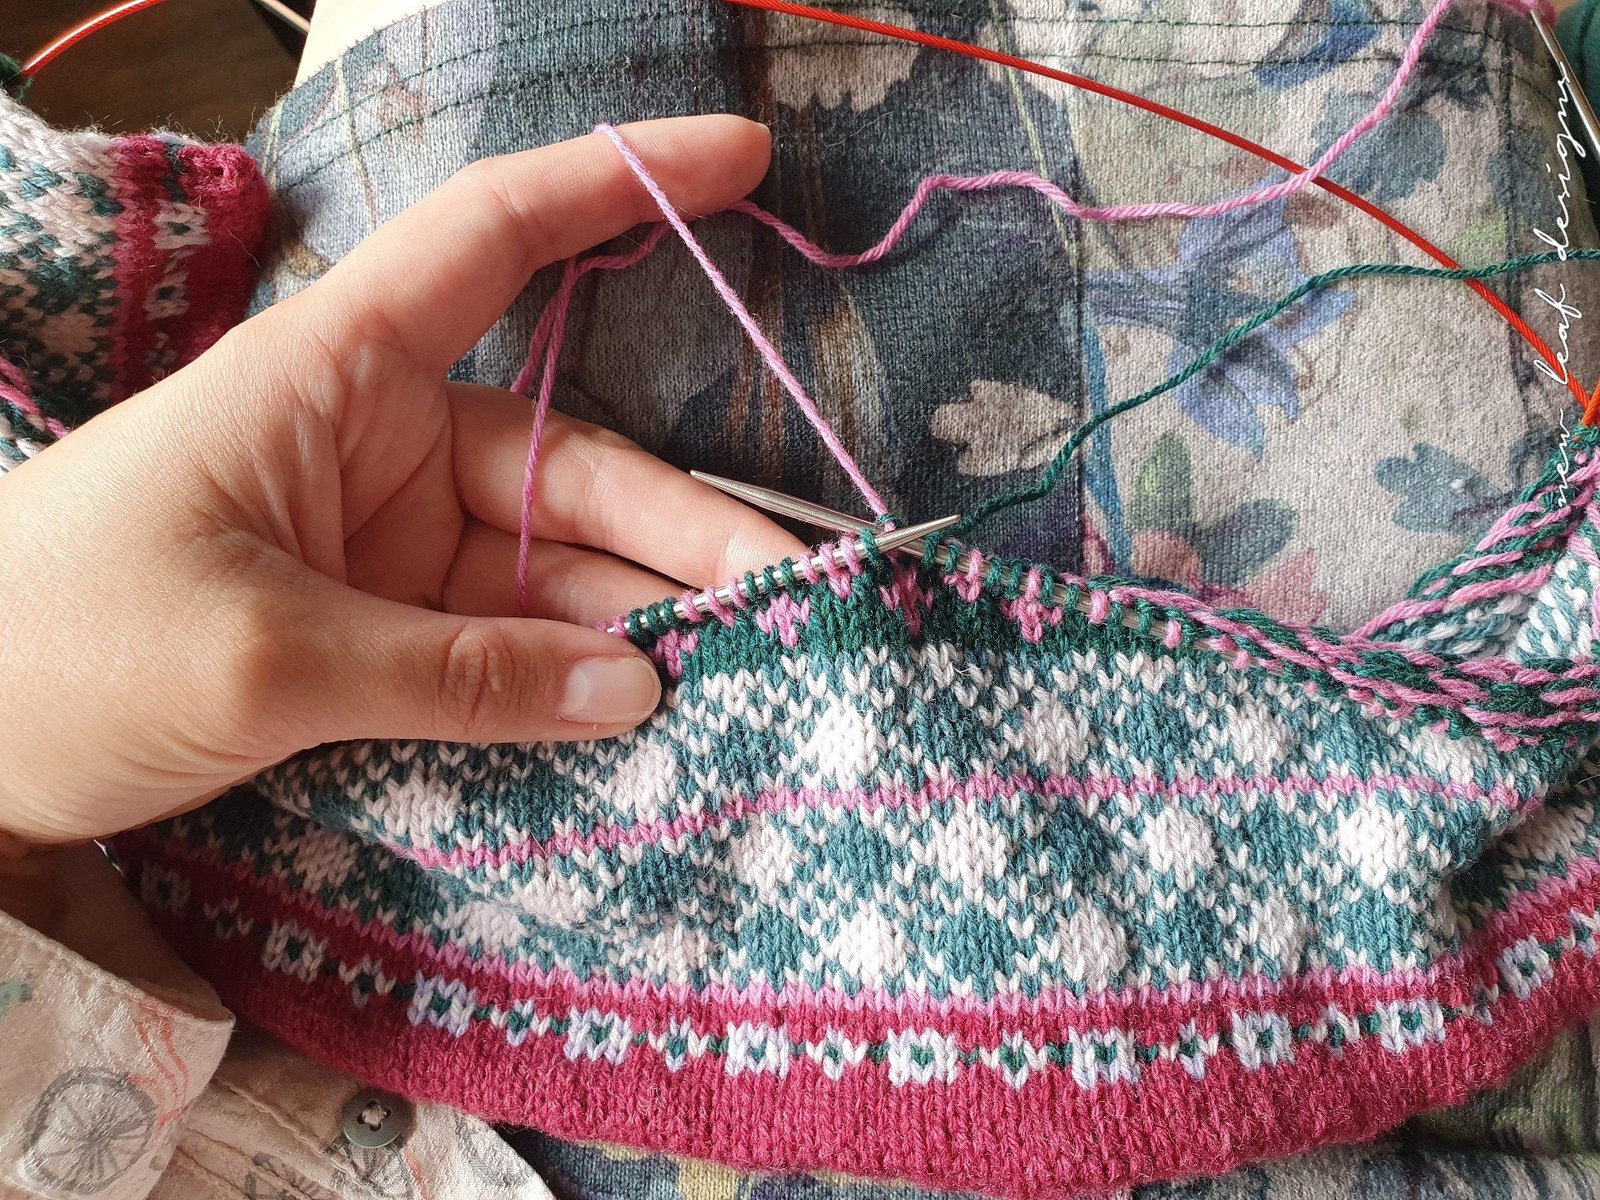
Carrying up your yarn | Garens mee omhoog nemen
In some parts of the pattern, it can be a good idea to carry your yarns up when you’re not using them. With carrying your yarns up, I mean when for example you are switching colours for one round, you carry the unused yarns up instead of cutting them each time. For example, in Chart 1, the middle round uses different colours. Instead of cutting the previously used Yarns B and D, just leave them at the back of your work, and pick them up again for Round 4. Yarns A and F that you use for Round 3 can be cut.
If you want to carry yarns up more than 1-2 rounds, for example if you want to leave Yarn A hanging so that you can pick it up again for Chart 2, you can wrap that yarn at the beginning of the round, similar to how you wrap floats. The benefit of carrying a yarn up is that you have less ends to weave in. The benefit of cutting your yarn whenever that colour is not being used for a couple rounds, is that your fabric will likely be less puckered. Something to think about!
In sommige delen van het patroon kan het handig zijn om je ongebruikte kleuren mee omhoog te nemen als je ze niet gebruikt. Als je bijvoorbeeld naar Schema 1 kijkt, gebruik je voor de middelste toer (Toer 3) andere kleuren. Je kunt dan Kleuren B en D meenemen naar Toer 4 in plaats van ze door te knippen. Je laat ze hiervoor simpelweg achter je werk hangen, en pakt ze weer op bij het begin van Toer 4. Kleuren A en F die je gebruikt voor Toer 3 kun je dan doorknippen.
Als je garens meer dan 1-2 toeren mee omhoog wilt nemen, bijvoorbeeld als je Kleur A wilt laten hangen zodat je het weer kan oppakken voor Schema 2, dan kun je deze kleur inpakken aan het begin van die toer, gelijk aan hoe je normaal garens inpakt. Het voordeel van een kleur mee omhoog nemen is dat je minder eindjes hoeft weg te werken. Het voordeel van de garens doorknippen en wegwerken als ze een paar toeren niet worden gebruikt, is dat je stof waarschijnlijk soepeler gaat zijn. Als je te hard trekt aan de garens die je mee omhoog neemt kan de stof namelijk gaan trekken. Iets om te overwegen!
Please share your photos | Deel je foto’s
I am absolutely dying to see your photos, so please do post them on social media with the hashtags #ScheepjesKAL2022 and #SassenachKAL. For posting on Instagram, tag me @newleafdesigns.nl in your photo so I can see. For Facebook, post them in the Scheepjes Facebook Group and tag me (Carmen New Leaf) as well. Also, I would HUGELY appreciate it if you create a project page on Ravelry and add your photos and thoughts there. Thank you so much!!
Ik kan niet wáchten om jullie foto’s allemaal te zien, dus plaats ze alsjeblieft op social media met de hashtags #ScheepjesKAL2022 en #SassenachKAL. Op Instagram kun je me taggen als @newleafdesigns.nl in je foto zodat ik hem kan zien. Op Facebook plaats je in de Scheepjes Facebook Groep en tag je mij (Carmen New Leaf). Ik zou het ook enorm op prijs stellen als je een projectpagina aanmaakt op Ravelry en daar je foto’s toevoegt. Alvast bedankt!!
You might also like | Misschien vind je dit ook leuk


20 Comments
Hi.
Amazing KAL. I’m #TeamRosa
I’ll be cutting my ends, could you show us a video of how you best like to weave in the cut ends?
Hi Inger, thank you! Weave your ends in so that it closes up any gaps you may have at the side. I do it somewhat like I did here: https://www.youtube.com/watch?v=jmt9KVVeUsM
Thank you for the beautiful instructions. But you did not mark which colour is the forground colour and which the background colour. Am I right the colour in the first row (outside the repeat) is the background colour?
I’m still on the gauge swatch so far – but loving it! I try to read ahead and watch all the videos. So although I’m nowhere near ready for Part 2, I can’t wait to see it! #TeamCirsium
[…] Part 1 […]
[…] Part 1 […]
[…] Part 1 […]
[…] Part 1 […]
Hallo Carmen,
Aller eerst wat een prachtige KAL. Ik geniet van elke toer.
Ik ben nog niet zover, maar heb wel een vraag.
Het lezen van het patroon. Ik ben bij breidiagram 3 (eerste week) en hou 3 steken over op de naald hoe moet ik nu verder? Hierboven leg je uit over diagram 1 de laatste 5 steken, maar hoe doe je dat bij deze?
Groetjes
Hoi Marian! Bedankt voor je vraag. Het klopt dat je bij driagram 3 drie steken overhoudt. Zie je het rode hokje in het diagram? Aan de linkerkant ervan zie je drie steken. Je breit de laatste drie steken volgens die drie hokjes in het diagram.
Succes en veel breiplezier!
Carmen
[…] Part 1 […]
[…] Part 1 […]
[…] Part 1 […]
[…] Part 1 […]
[…] Part 1 […]
[…] Part 1 […]
[…] Part 1 […]
[…] Part 1 […]
Hi Carmenta, ik ben nog maar net gestart maar heel blij met dit project. Ik ben van plan het mee te nemen als we vrijdag naar Schotland gaan. Jawel, we zijn in de buurt van Inverness,
Na heb ik een vraag:. Als ik met nieuwe draden begin, zoals in Cirsium week 1, diagram 1, toer 3, krijg ik dan uiteindelijk geen gat in de zijkant.
Ik lees graag je antwoord.
Hartelijke groet Annelies Tough
Hoi Annelies, bedankt voor je bericht! Wat leuk dat je project meegaat op vakantie 😀
Voor de randen heb ik een handige video hier: https://www.youtube.com/watch?v=6oRh0RDhKFQ
Veel breiplezier!
Groetjes,
Carmen