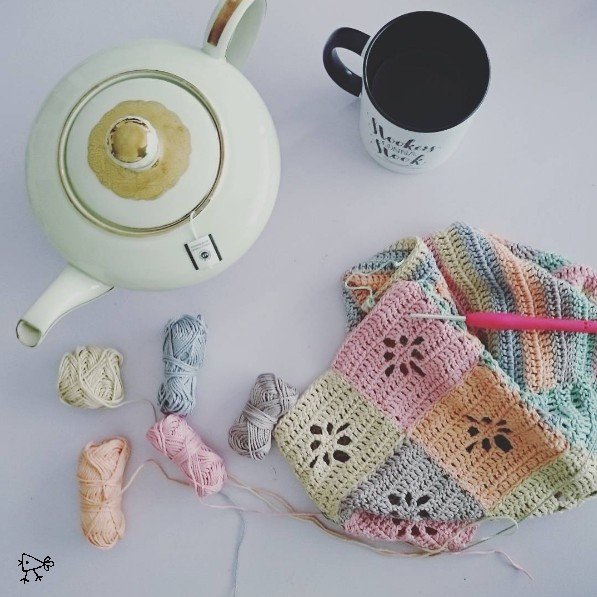
De laatste tijd ben ik jullie wat aan het plagen geweest met stiekeme foto’s van mijn nieuwste haakproject! Hoewel ik jullie nog niet het hele plaatje kan laten zien, maak ik wel stap voor stap het patroon beschikbaar voor jullie. Een soort mini-Mystery CAL (Crochet-A-Long)! Het heet Fleur-de-Lis omdat het bloemige ajourpatroon me doet denken aan Franse lelies. Bovendien vond ik dat het een Franse naam moest hebben omdat ik de pastelkleurtjes heel Marie-Antionette-achtig vond. Het enige wat ik jullie nu ga vertellen is dat we een tas gaan maken, en hoeveel garen je ervoor nodig hebt. De rest wordt stap voor stap onthuld! Spannend… doen jullie mee?
The past few weeks I’ve been teasing you with photos of my latest crochet make. I’m not showing you the finished item just yet… but I am going to release the pattern step by step here on my blog, kind of like a mini-Mystery CAL! It will be called Fleur-de-Lis since the lace pattern reminds me of French lilies. I’ve chosen the French name also because the pastel colours made me think of Marie Antionette. The only thing I’m telling you today is we’re making a bag, and how much yarn you will need. I’ll reveal the rest step by step as we go along. Are you excited? I am!
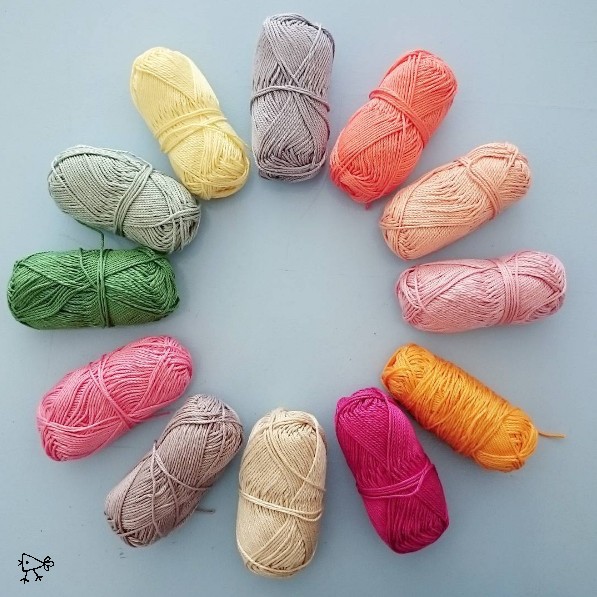
Dus, wat je nodig hebt is…
Scheepjes Catona 50 gram:
nr. 402 – 1 bol
Scheepjes Catona 25 gram:
nr. 414 – 1 bol
nr. 408 – 1 bol
nr. 402 – 1 bol
nr. 406 – 1 bol
nr. 404 – 1 bol
nr. 074 – 1 bol
Haaknaald maat 3 mm
Schaar
Stopnaald
So, what you’ll need is:
Scheepjes Catona 50 grams:
nr. 402 – 1 ball
Scheepjes Catona 25 grams:
nr. 414 – 1 ball
nr. 408 – 1 ball
nr. 402 – 1 ball
nr. 406 – 1 ball
nr. 404 – 1 ball
nr. 074 – 1 ball
Crochet hook size 3 mm
Scissors
Darning needle
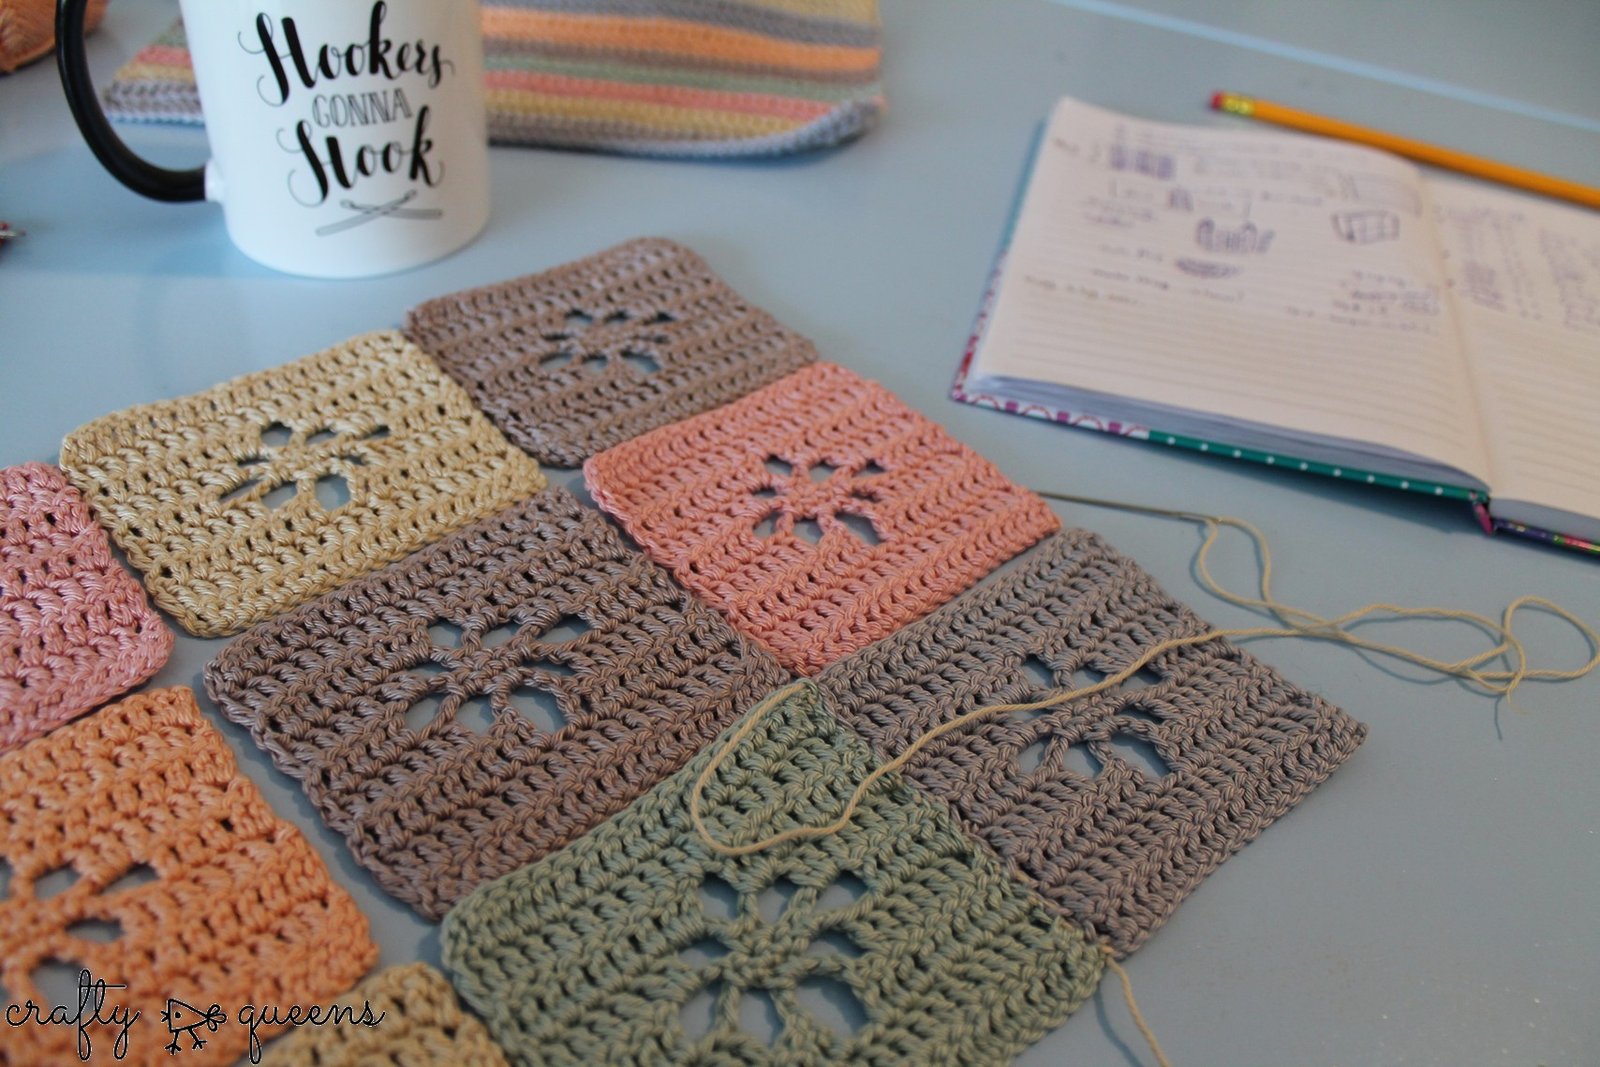
Het patroon deel 1- Voorkant
Voor de voorkant haak je 9 “Filet Flower” vierkantjes, het gratis patroon dat ik vorige week uitbracht. Vind het hier. Je haakt met elk 25 gram balletje één vierkantje, en dan kies je nog 3 kleuren waarmee je er elk nog eentje haakt. We hebben niet zo heel veel garen, dus het gaat uitmaken als je ervoor kiest om meerdere vierkantjes met dezelfde kleur te doen.
The pattern part 1 – Front
For the front, crochet 9 “Filet Flower” squares, the pattern I released for free last week. Find the pattern here. Crochet one square with each 25 gram ball, then choose 3 colours to crochet another 3 squares with. We don’t have much yarn, so it’s going to matter if you choose to do more squares in one colour.
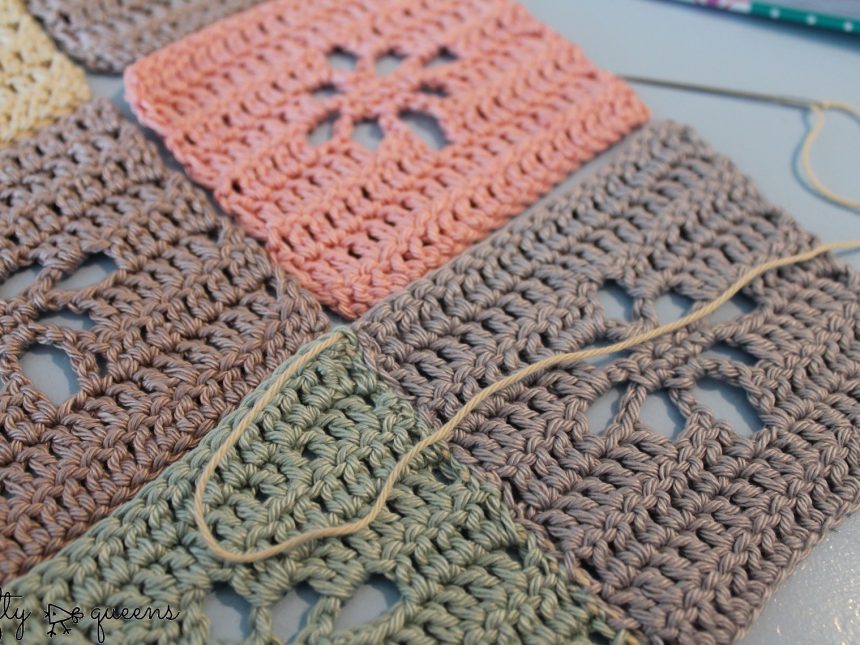
Ik ga je laten zien hoe je de vierkantjes mooi aan elkaar haakt door een serie van foto’s. Zorg dat je eerst de vierkantjes hebt geblockt en dat je de draadjes hebt weggewerkt. Neem een draad katoen – ik heb een restje Cotton 8 gebruikt – en rijg deze door een aantal steken op de achterkant. Rijg hem er niet helemaal door maar laat een stuk draad over, zodat je deze straks kan wegwerken zonder een knoopje te maken.
I’m going to show you how to sew the squares together nicely with a photo tutorial. First, make sure you’ve blocked the squares and have sewn in the ends. Take a strand of leftover yarn – I used some Cotton 8 – and pull it through some stitches on the backside. Don’t pull it all the way through but leave a long tail, so you can sew in this end later without making a knot.

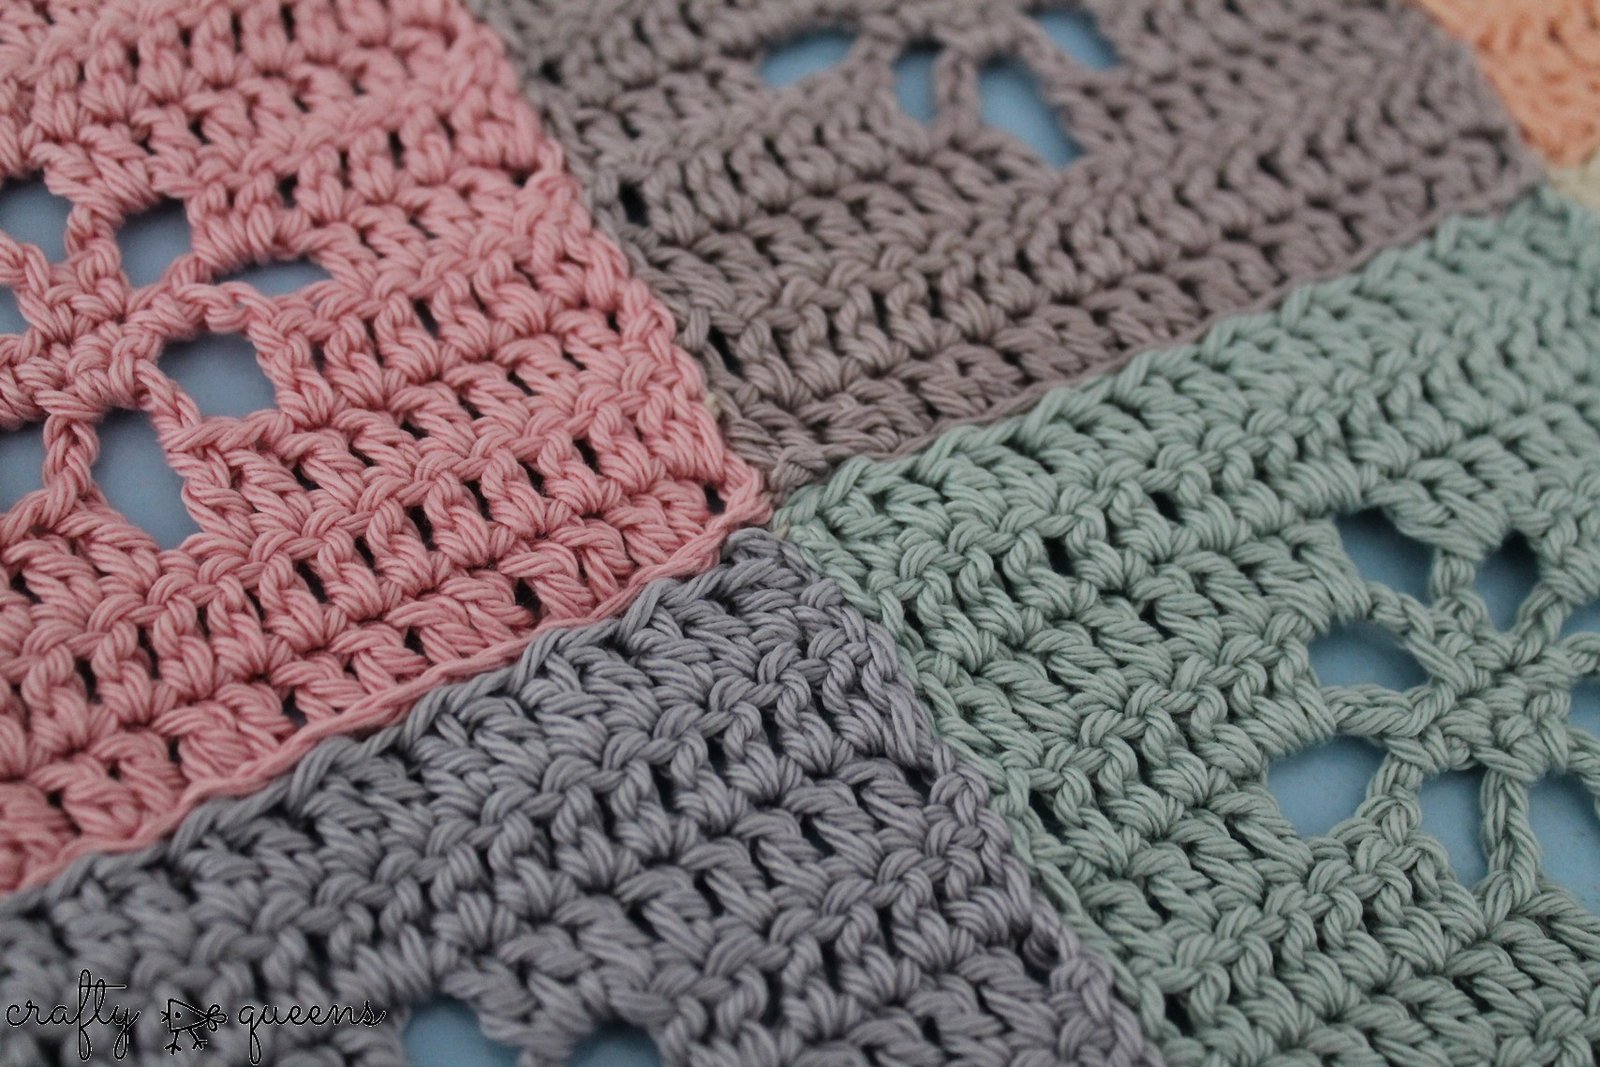
Nu ga je ‘zigzaggen’ met je draad. Haal een steekje op bij de ene kant, dan bij de andere kant. Het lijkt heel erg op de matrassteek, mocht je daar bekend mee zijn. Het verschil is dat je hier niet door de gehele steek gaat. Dat wil zeggen, je naald komt nooit door het werk heen zodat het aan de voorkant te zien is. Je splijt als het ware de steekjes met je naald. Belangrijk is dat je het niet strak trekt na elke steek, maar het een beetje losjes laat zoals op de foto.
Now you’re going to zig-zag your way up. Pick up a stitch on the one side, then on the other side. It’s kind of like the mattress stitch, maybe you know it. The difference is that you don’t go through the whole stitch here. Your darning needle will never poke through to the front side of your work. You’ll actually be splitting the yarn with your needle. It’s important to not pull tight after every stitch, but to leave it a bit loose like in the picture above.
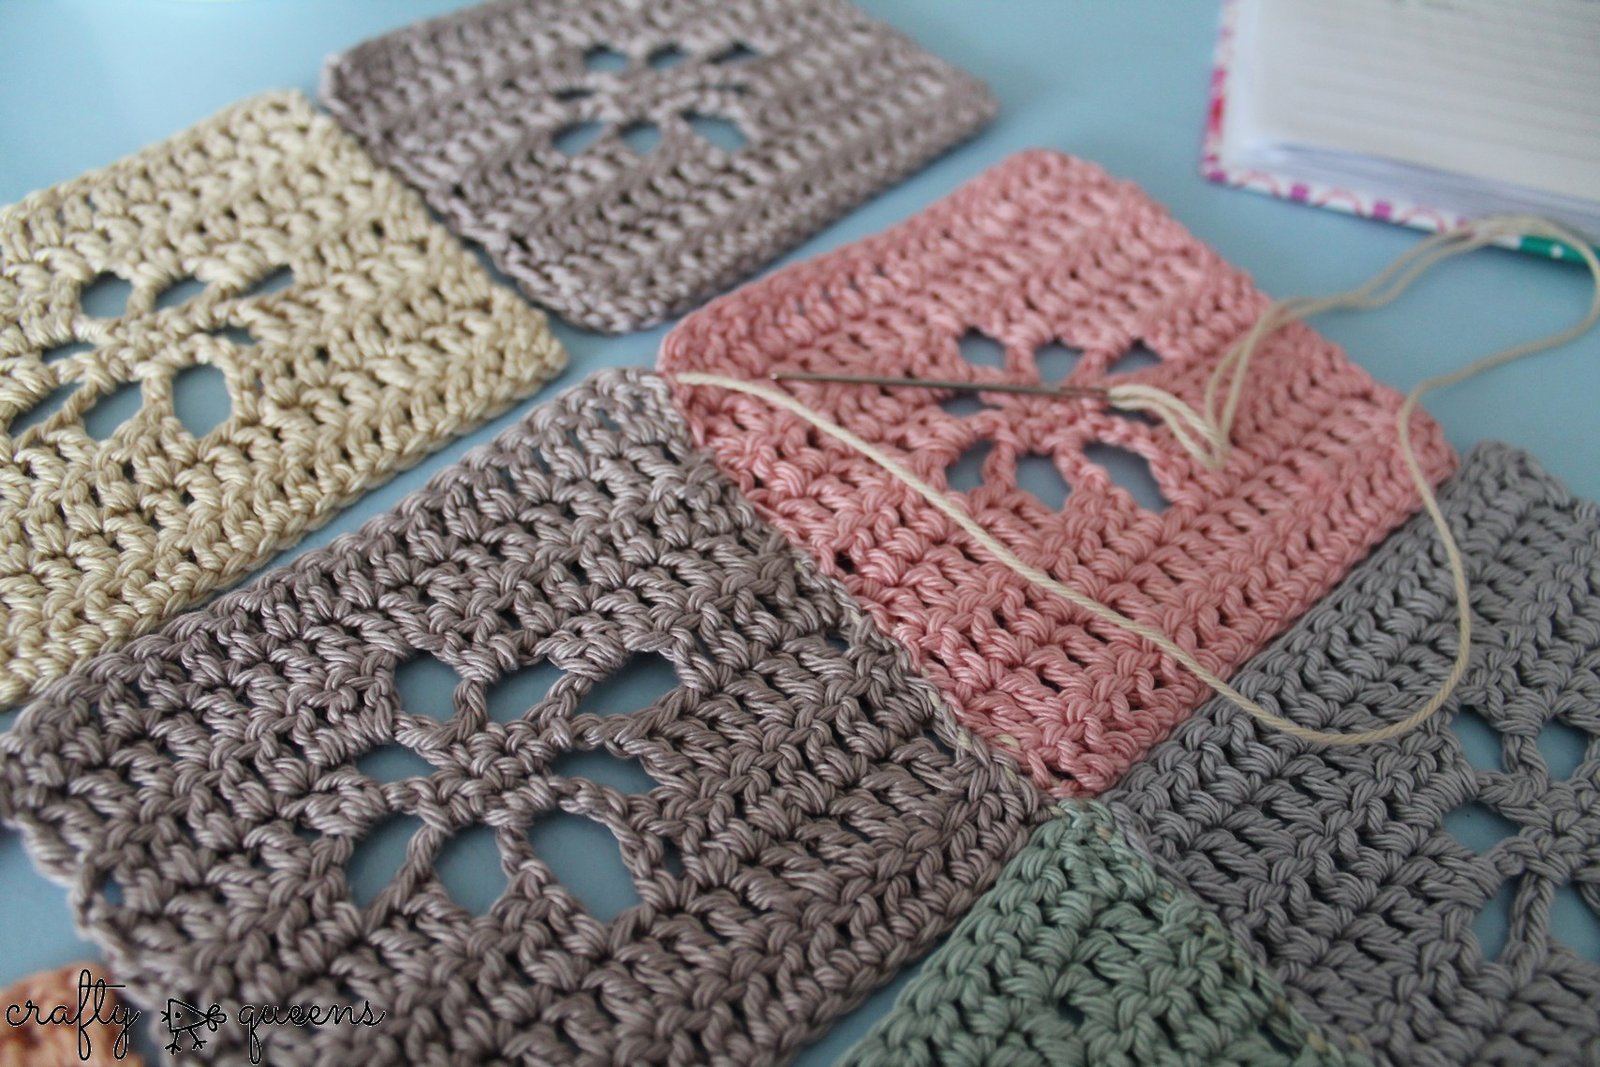
Nadat je een stukje hebt genaaid, trek je het strak. En zie de draad verdwijnen! Je ziet het misschien nog een klein beetje aan de achterkant, maar aan de voorkant zie je helemaal niets van deze techniek.
Naai eerst de vierkantjes verticaal aan elkaar, dan naai je ze horizontaal aan elkaar.
After you’ve done about 2 inches, pull tight and see the thread disappear! You might still see something on the back, but you won’t see anything on the front side for sure.
First sew the squares together vertically, and then horizontally.
Zo ziet de voorkant eruit!
This is what the front looks like!
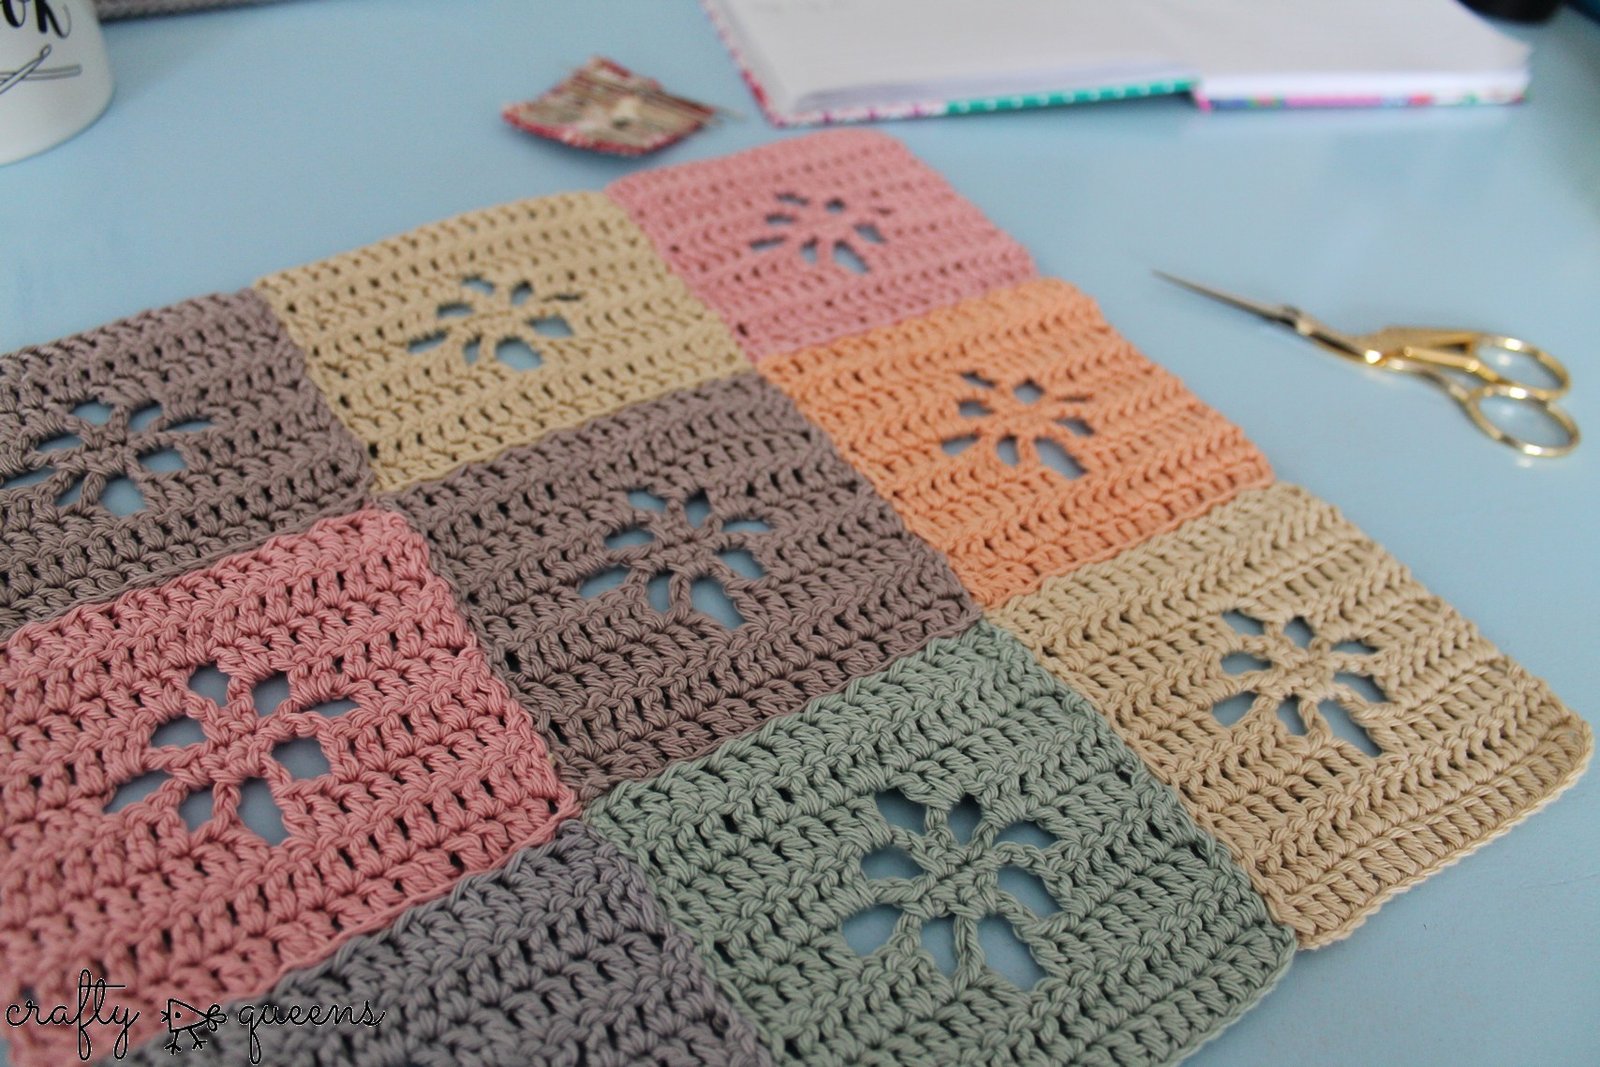
En je voorkant is klaar!! Ik vind hem nu al mooi.. Ik zie een kussensloop… een placemat misschien? Zoveel mogelijkheden voor dit patroontje!
Deel 2 komt volgende week op mijn blog te staan, schrijf je in op Bloglovin’ als je het niet wilt missen!
And the front is done! I like it already.. I’m seeing a pillowcase.. a placemat maybe? So many options for this pattern!
Part 2 will be released next week, subscribe to my blog on Bloglovin’ if you don’t want to miss it!
** Dit patroon wordt mede mogelijk gemaakt door Scheepjes. Zij stellen het garen beschikbaar zodat ik leuke patronen voor jullie kan blijven ontwerpen. Copyright wordt tevens beschermd door Scheepjes // This pattern is made possible by Scheepjes. They kindly provide the yarns so that I can keep designing patterns for you. Copyright is protected by Scheepjes **


7 Comments
Weer super mooi.
Wat een leuk idee! Ik heb helaas geen tijd om (nu) mee te doen. Maar het ziet er nu al superleuk uit.
Ontzettend mooi en leuk idee! 🙂 `k Ben net begonnen met een tas, maar sla dit patroon zeker op om nog eens in elkaar te zetten..;)
Lieve-groetjes,
Verie
Wat gaaf deze CAL
Ik ga je volgen via Bloglovin
Groet
Manon
Dit is op adornosmalulu herblogd.
wat mooi..ik zag hem en ben meteen garen gaan halen..dus vanavond ermee beginnen
[…] Deel 1 // Part 1 + materialen lijst // + list of materials Deel 2 // Part 2 Deel 3 // Part 3 Deel 4 // Part 4 Deel 6 // Part 6 […]