![]()
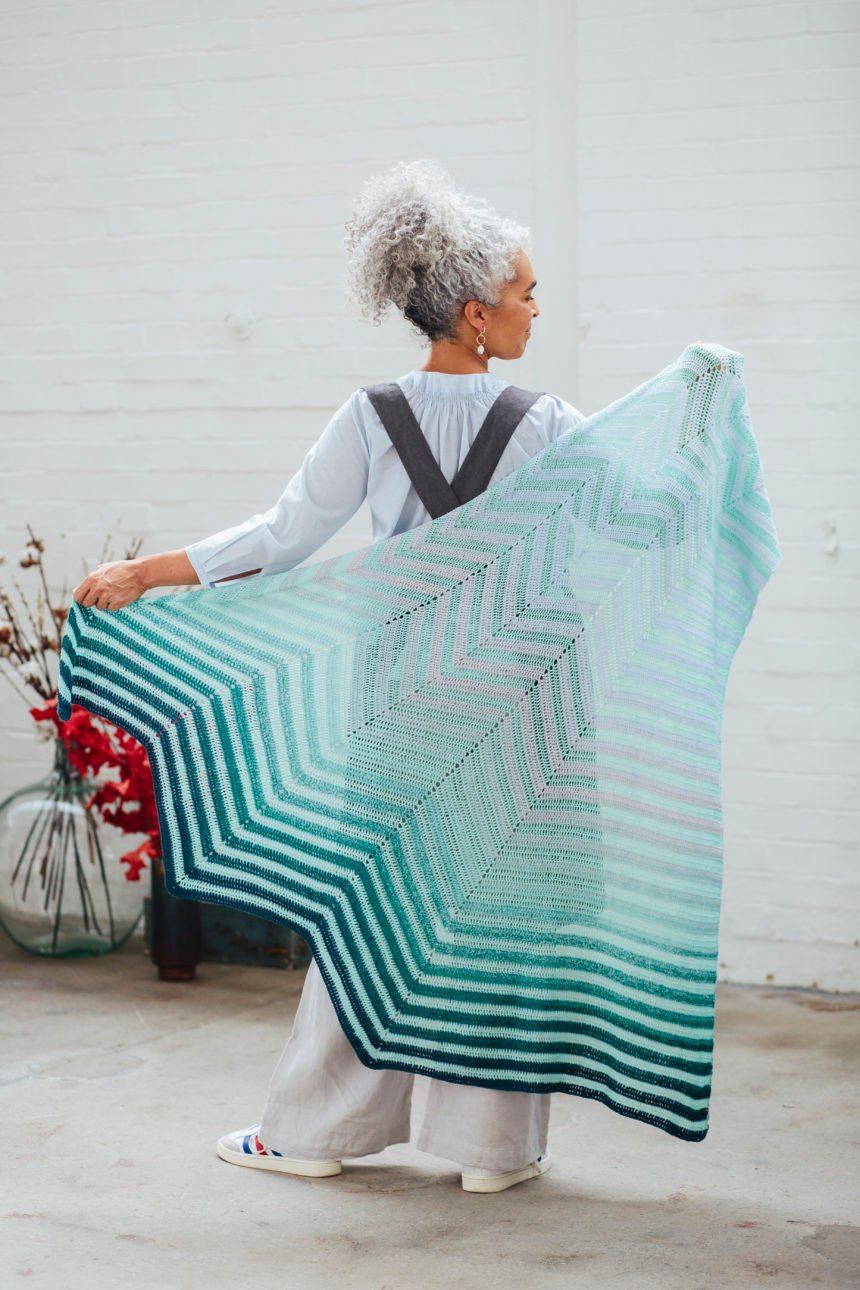
Next Step Blanket
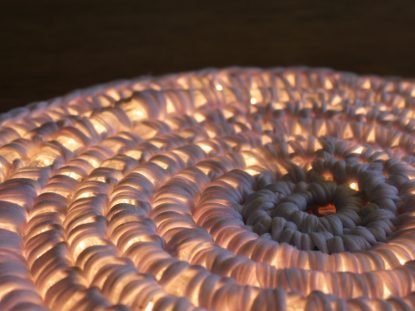
Please welcome my newest design: the Next Step Blanket! Do you see stitches going up a staircase, or waves cascading off a waterfall? You decide 😉 This blanket is a fun make for beginner and more experienced crocheters. It only uses a small amount of stitches, making it very suitable as a ‘next step’ project for beginner crocheters who have already tried their hand at the basic stitches. Experienced crocheters will also find this an addictive project since it requires just enough attention to keep your mind from wandering. Ready? Set… Crochet!
Een applausje voor mijn nieuwste ontwerp: de Next Step Blanket! Zie jij ook steken die een trap op lopen, of zie je kolkende golven van een waterval naar beneden storten? Jouw keus 😉 Deze deken is leuk om te maken voor beginnende hakers maar ook voor de gevorderden. Je hoeft maar een paar steken te kennen, waardoor het perfect is als ‘volgende stap’ voor haakbeginners die al één of twee haakprojectjes hebben gedaan. Ervaren hakers zullen dit ook een verslavend werkje vinden omdat het precies genoeg aandacht vergt zodat je niet over andere dingen gaat piekeren. Klaar voor de start? Haken maar!
PDF version
In addition to the free version here on my website, I also offer a paid PDF. The PDF has several benefits: it is easy to print, does not include any advertisements, and it is separate per language. On my website, I found the easiest way to publish a pattern is to have one paragraph of English text, then one paragraph of Dutch text. There are separate PDFs for each language, making it much clearer to read. There are PDF files for the English UK version, English US version, and Dutch version. Find them in my Ravelry store here, or my own webshop here. Each purchase supports me as an independent designer, many thanks to all who purchase PDF patterns!
Naast de gratis versie van het patroon op mijn blog bied ik ook nog een betaalde PDF versie aan. De PDF versie heeft verschillende voordelen: het is gemakkelijk te printen, er staan geen advertenties in, en er zijn aparte PDFs voor Engels en Nederlands. Hier op mijn website vind ik het gemakkelijkst om eerst een alinea Engelse tekst te plaatsen, dan een alinea Nederlandse tekst. De PDFs zijn dus apart voor elke taal, wat wel duidelijker is. Vind de PDF hier in mijn Ravelry winkel of hier in mijn eigen webshop. Met elke aankoop steun je ook nog eens mij als onafhankelijke ontwerper, veel dank daarvoor!
Purchase on Ravelry Purchase in New Leaf Webshop
![]()
Yarn | Garen
This blanket uses 16 balls of Scheepjes Colour Crafter yarn (100g/300m, 100% Acrylic). For the original version, use 2 balls each of the colours below:
Deze deken gebruikt 16 bollen Scheepjes Colour Crafter (100gr/300m; 100% Acryl). Voor de originele versie heb je 2 bollen nodig van elk van de onderstaande kleuren:
Yarn A – 1003 Middelburg
Yarn B – 1422 Eelde
Yarn C – 1034 Urk
Yarn D – 1001 Weert
Yarn E – 1241 Den Bosch
Yarn F – 2004 Brussel
Yarn G – 1263 Leerdam
Yarn H – 1117 Delft
Stockist information | Verkooppunten
Shop your yarn at the Scheepjes retailers listed here, or support my work by shopping via any of the links below! These are affiliate links, which don’t cost you anything extra, and the shopkeeper rewards me with a small fee if you decide to buy. Win-win! Thank you so much for considering.
Wool Warehouse (UK)
Knitting Network (UK)
Caro’s Atelier (NL)
Finished Size | Afmetingen
190 x 190cm
75 x 75 inches
Used Abbreviations (US) | Gebruikte Afkortingen
| Abbreviations (US) | Afkortingen (NL) |
| beg – beginning
blo – back loop only ch(s) – chain stitch(es) rep – repeat RS – right side ss – slip stitch st(s) – stitch(es) dc – double crochet dc2tog – double crochet 2 sts together yrh – yarn round hook |
AL – achterste lus
beg – begin GK – goede kant gon – garen om de naald herh – herhaal hv – halve vaste l – losse(n) s/stn – steek/steken st – stokje 2st smh – 2 stokjes samenhaken |
Hook Size | Haaknaald
4mm crochet hook, or a size that gives you the best gauge.
4 mm haaknaald, of de maat die je de beste stekenverhouding geeft.
Gauge | Stekenverhouding
One column of 2 waves measures 13-14cm in width, depending on how much you stretch it. 8 rows measure 10cm in height.
Eén kolom van 2 golfjes meet 13-14 cm breed, afhankelijk van hoeveel je het oprekt. 8 rijen meten 10 cm in lengte.
Pattern Notes | Patroon Opmerkingen
The Next Step Blanket is worked in rows, always starting from the same side. You will never have to turn your work and will always crochet on the RS. It is constructed diagonally. First, we construct the lower left corner until the full width of the blanket has been reached, this can also easily be customized. Then, we crochet diagonally over the entire width of the blanket, until the desired length has been reached. Finally, we fill in the blanket by crocheting the top right corner.
De Next Step Blanket haak je in rijen, altijd beginnend vanaf de rechterkant. Je keert je werk niet en haakt altijd aan de GK. Je haakt deze deken diagonaal. Eerst maken we de hoek linksonder, en haken hieraan tot de volledige breedte van de deken is bereikt. De totale breedte kan je gemakkelijk aanpassen. Daarna haken we diagonaal over de hele breedte van de deken, tot hij lang genoeg is. Daarna vullen we de rechterbovenhoek in.
![]()
The schematic is simplified so it shows less rows and less columns, but hopefully it will give you an impression. You start in the lower left corner which is shown in medium blue, then the light blue row is added from right to left, then the orange row, and so on.
Het schema is wat versimpeld dus laat minder rijen en kolommen zien, maar hopelijk geeft het je een goed beeld. Je begint dus linksonder bij het blauwe hokje. Daarna haak je de lichtblauwe toer er van rechts naar links aan vast, dan de oranje toer, enzovoorts.
Stitch Explanation dc2tog | Stekenuitleg 2st smh
To make the dc2tog: yrh, insert into first st, yrh, pull up loop, yrh, pull through 2 loops, yrh, insert into second st, yrh, pull up loop, yrh, pull through 2 loops, yrh, pull through 3 loops.
Please note the first picture below shows the ch3 from the start of a row, it is not part of the dc2tog.
Voor de 2st smh: gon, steek naald in de 1e s, gon, haal lus op, gon, haal door 2 lussen, gon, steek naald in 2e s, gon, haal lus op, gon, haal door 2 lussen, gon, haal door 3 lussen.
Let op, de eerste foto hieronder laat de 3l aan het begin van een rij zien, dit is geen onderdeel van de 2st smh.

The Pattern | Het Patroon
With Yarn A, make a slipknot and ch26.
Row 1 (RS): Starting from 3rd ch from hook, (dc2tog) 2x, (2dc in next st) 4x, (dc2tog) 4x, (2dc in next st) 4x, (dc2tog) 2x.
Cut Yarn A.
With Yarn B, attach to bottom of first dc2tog on previous row, ch26. Please note that all sts are worked in back loop only from now on.
Row 2 (RS): Rep instructions for Row 1, then: ss to topmost ch of Row 1, ch3 (does not count as st), dc2tog BLO over first 2 dc2tog of Row 1, dc2tog BLO, (2dc BLO in next st) 4x, (dc2tog BLO) 4x, (2dc BLO in next st) 4x, (dc2tog BLO) 2x. Cut Yarn.
You will make Rows 3-14 in the same manner, taking your yarn and attaching it underneath the first dc2tog of the last row, crocheting chain stitches and then crocheting dc’s into those, and then ‘moving up the stairs’ of the previous rows.
By the end of Row 14, you will have 14 ‘columns’ of waves next to each other. Your blanket should be around 185-190cm wide at this point. If you want to make your blanket even wider, you can choose to add more columns to the width.
Colour-wise, you will use Yarns C-H (in order) for Rows 3-8, and then starting over again at Yarn A for Row 9.
From Row 15 onward, we will not be making the blanket any wider, but only higher.
Row 15 Attach yarn in 3rd ch of beg previous row, ch3, dc2tog **dc2tog, (2dc in next st) 4x, (dc2tog) 4x, (2dc in next st) 4x, (dc2tog) 2x**, then ‘climb up the stairs’ by ss to top of ch3, ch3, dc2tog, rep instructions between **. Continue in this way until you reach the left side of the blanket.
Keep repeating Row 15, making sure to follow the colour order of Yarn A-H, until the leftmost column of waves is 190cm high. If you want to change the length of the blanket, continue until the leftmost column of waves reaches your desired length.
Then, repeat Row 15 again, but stop after you ss to the leftmost column, then fasten off. For the next row, do the same, but stop 1 column earlier, and so on, until all columns have the same height.
![]()
Nederlandse versie:
Maak met Kleur A een opzetlus en haak 26l.
Rij 1 (GK): Vanaf de 3e l van de haaknaald, (2st smh) 2x, (2st in volg s) 4x, (2st smh) 4x, (2st in volg s) 4x, (2st smh) 2x.
Knip Kleur A af.
Hecht Kleur B aan onderin de eerste 2st smh van de vorige rij, en haak 26l. Let op dat vanaf nu alle stn in de achterste lus worden gehaakt.
Rij 2 (GK): Herh de instructies van Rij 1, dan: hv in bovenste l van Rij 1, 3l (telt niet als s), 2st smh AL over eerste twee 2st smh van Rij 1, 2st smh AL, (2st AL in volg s) 4x, (2st smh AL) 4x, (2st AL in volg s) 4x, (2st smh AL) 2x. Knip garen af.
Haak Rijen 3-14 op dezelfde manier. Je neemt je garen, hecht het aan onder de eerste 2st smh van de vorige rij, haakt lossen waarna je daarin stokjes haakt, en dan ga je ‘de trapjes omhoog’ over de vorige rijen heen.
Na Rij 14 heb je 14 kolommen van golfjes naast elkaar. Je deken is nu ongeveer 185-190cm breed. Mocht je hem breder willen maken kun je nog meer kolommen toevoegen.
Voor Rijen 3-8 gebruik je Kleuren C-H (in volgorde), en vanaf Rij 9 start je weer van voren af aan bij Kleur A.
Vanaf Rij 15 maken we de deken alleen nog maar langer, niet breder.
Rij 15 Hecht garen aan in 3e l beg vorige rij, 3l, 2st smh **2st smh, (2st in volg s) 4x, (2st smh) 4x, (2st in volg s) 4x, (2st smh) 2x**, klim dan ‘de trap op’ door een hv te haken bovenin de 3l, 2l, 2st smh, herh instructies tussen **. Ga zo verder tot je aan de linkerkant van de deken bent.
Blijf Rij 15 herhalen in de kleurvolgorde A-H, tot de meest linkse kolom 190cm lang is. Als je de lengte van de deken wilt aanpassen, ga je door totdat de meest linkse kolom de gewenste lengte heeft.
Herhaal dan Rij 15 nogmaals, maar stop nadat je een hv hebt gehaakt in de meest linkse kolom. Voor de volg rij herhaal je dit, maar stop je 1 kolom eerder, enzovoorts, totdat alle kolommen dezelfde hoogte hebben.
Finishing | Afwerking
Fasten off all ends, wash and block to measurements.
Hecht alle draadjes af, was de deken en span op naar afmetingen.
Share your creation | Deel jouw creatie
Share your blanket with the world by making a project page on Ravelry or by tagging Instagram pictures with #NextStepBlanket and #NewLeafDesigns.
Deel je deken door een projectpagina te maken op Ravelry, of door je foto’s op Instagram te taggen met #NextStepBlanket en #NewLeafDesigns. Bedankt!
You might also like


5 Comments
[…] Crafty Queens – deze site is zowel in Nederlands als Engels, bevat hele mooie patronen van bijvoorbeeld een deken […]
[…] this free pattern on newleafdesigns.nl , or read more on […]
[…] Die kostenlose niederländische Häkelanleitung von The Subsequent Step Blanket finden Sie auf der Web site von Neue Blattdesigns. […]
[…] Next Step Blanket – Crochet pattern […]
[…] I bet you’re wondering when the pattern will be on my website 😉 I just have a little more tweaks to do, and I need to write up the Dutch translation. It will be ready in two weeks time, so on Wednesday July 21st. In the meantime, I will also be taking some nice pictures of the finished blanket to show you next week. Find the pattern here. […]