What is an Afterthought Heel?
For knitted socks, you have several kinds of heels you can do. One type of heel is the ‘Afterthought Heel’. You finish the sock ‘tube’ first, either from toe to cuff or cuff to toe, and put in the heel afterwards. I hear you asking “is that even possible?” – Yes it is! You’ll be opening a hole in your sock – stay with me, it’s not that scary – and knit your heel here.
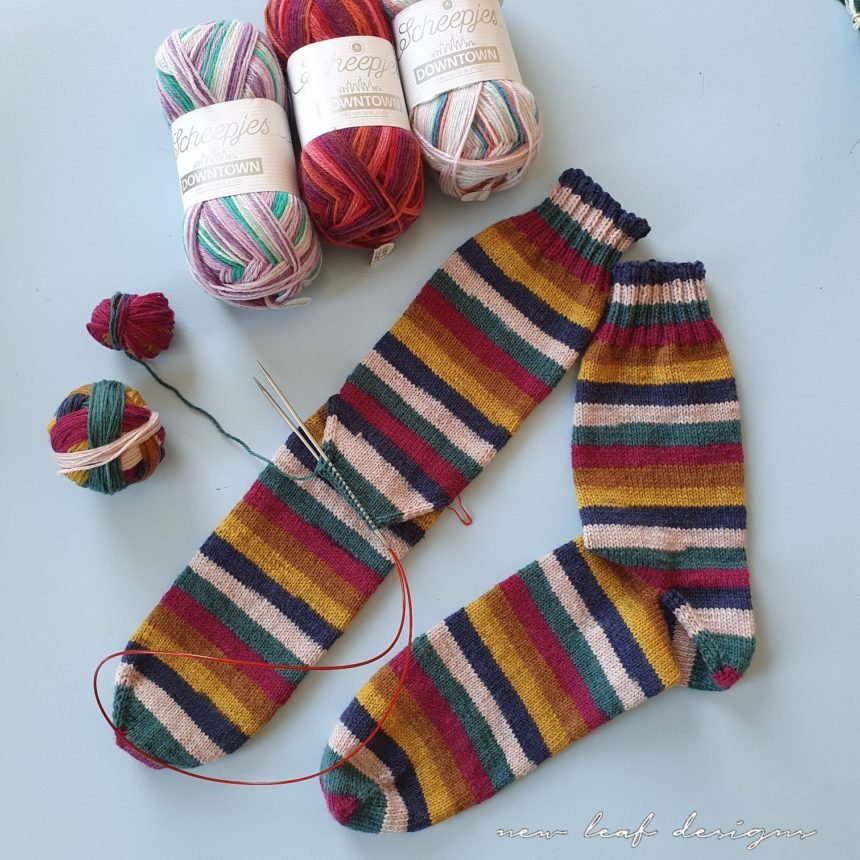
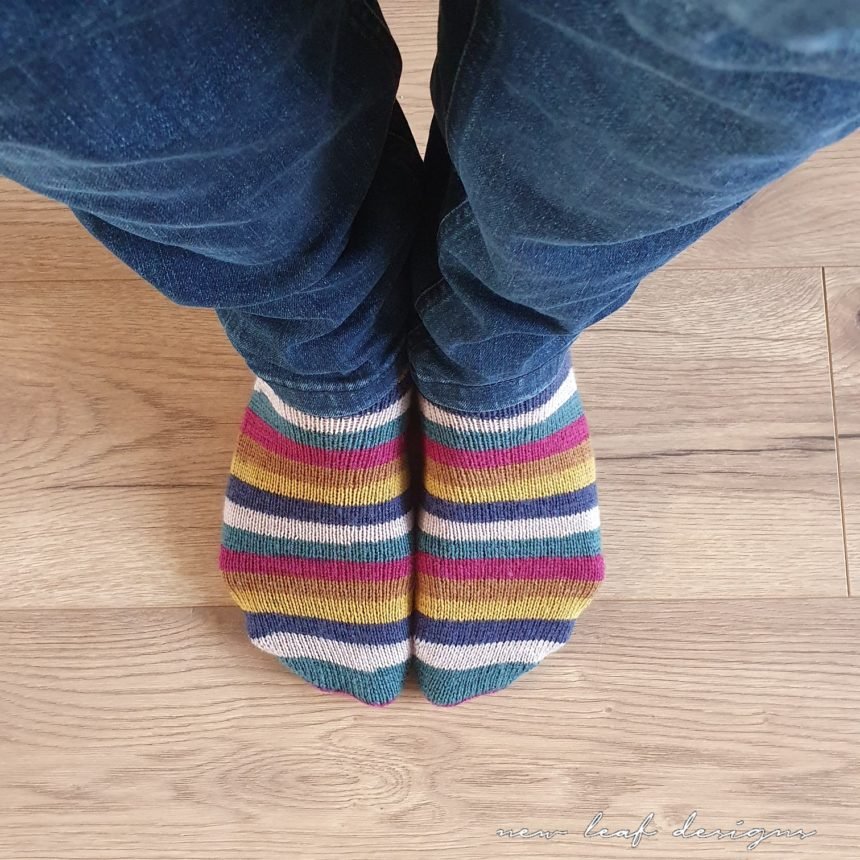
You’ll find the tutorial for an Afterthought heel below. Do also check out the City Stripe Socks pattern which is the pattern for the socks pictured in this blogpost.
What are the benefits of an Afterthought heel?
Why on earth would you cut into your knitting, right? There must be a really good reason to do it this way, since it seems like such a scary thing? Actually, cutting into your sock for an afterthought heel isn’t all that scary, trust me. But yes, there are quite a few benefits to this method of knitting heels.
An afterthought heel is perfect for when you just want to keep knitting on the ‘sock tube’ for the moment. Perhaps you’re watching a movie while knitting and you don’t want to stop and check your sock every five minutes because you’re worried you might pass the ideal place to put your heel. Or perhaps you forgot your measuring tape.
This type of heel is also convenient if you’re knitting for someone else, but you don’t know their foot size yet. While you are waiting to find out their foot size, why not complete the sock tube first and measure for the correct heel placement later?
Or maybe you’re knitting socks to sell in your Etsy shop, and you don’t know which sizes will sell well. So instead, you can create a listing for the socks, have the customer choose their size, and then knit the heel at the correct placement for their size. After all, it’s not the width of the sock that is MOST important for a well-fitting sock, it is the heel placement.
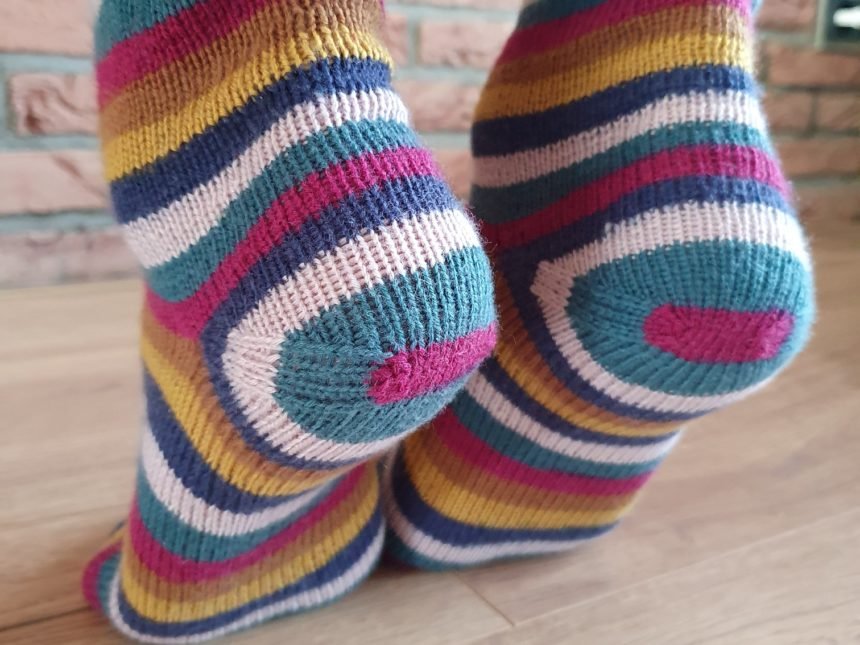
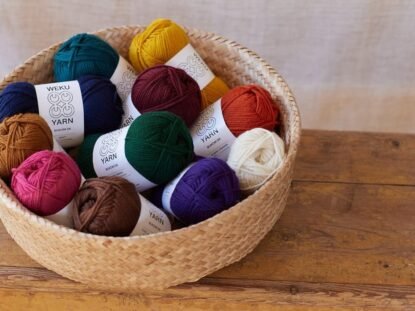
The Afterthought heel is especially clever to use for selfstriping sockyarns. If you were to knit a shortrow heel, or gusset and heelflap for selfstriping socks, you will lose the striping effect on the heel. Instead, each block of colour will be shaped more like a pizza slice. If you choose to do an Afterthought heel instead, you end up with this fun ‘bulls eye’ effect on the heel. The yarn I’ve used here is Scheepjes Downtown. Find shops selling Scheepjes in your area here, or shop online via the affiliate links below.
So, have I convinced you yet of the benefits of an Afterthought heel? Let’s dig a little deeper into this method.
Is it the same for toe-up and cuff-down?
Yes, it’s exactly the same.
Forethought or Afterthought heel
You have two kinds of Afterthought heels. One is where you finish your sock tube, and CUT into your sock to make the heel. This is called the Afterthought heel, also referred to as the ‘True Afterthought Heel’. There is also a less scary version, where you knit a piece of scrap yarn into your sock at the placement of the heel. After finishing your sock tube, all you have to do is take out that piece of scrap yarn, and knit from there. That is called a ‘Forethought Heel’, but it is also referred to as an Afterthought heel as well. The Forethought heel is a great stepping stone to the Afterthought heel.
If you are looking for instructions for the Forethought Heel, click here.
How to knit an Afterthought Heel
Heel Placement
The first thing you want to know before knitting an Afterthought heel, is: Where should I place this heel? Please look at the sizing table below, where you will find the correct heel placement for your size. If you’re looking for the full City Stripes Sock pattern, look here.
| Shoe Size (EU) | Shoe Size (US) | Heel placement measured from toe tip |
| EU 35-36 | 5 – 6 | 18 cm (7.1in) |
| EU 37-38 | 6.5 – 7.5 | 19 cm (7.5in) |
| EU 39-41 | 8 – 9.5 | 20 cm (7.9in) |
| EU 42-43 | 10 – 11 | 21 cm (8.3in) |
| EU 44-45 | 12-12.5 | 22 cm (8.7in) |
| EU 46-47 | 13-14 | 23 cm (9.1in) |
With this sizing chart, determine the heel placement on your sock and put a stitch marker here. Whether you’ve knitted your sock tube from the cuff down, or from the toe up, you can use this same heel placement chart.
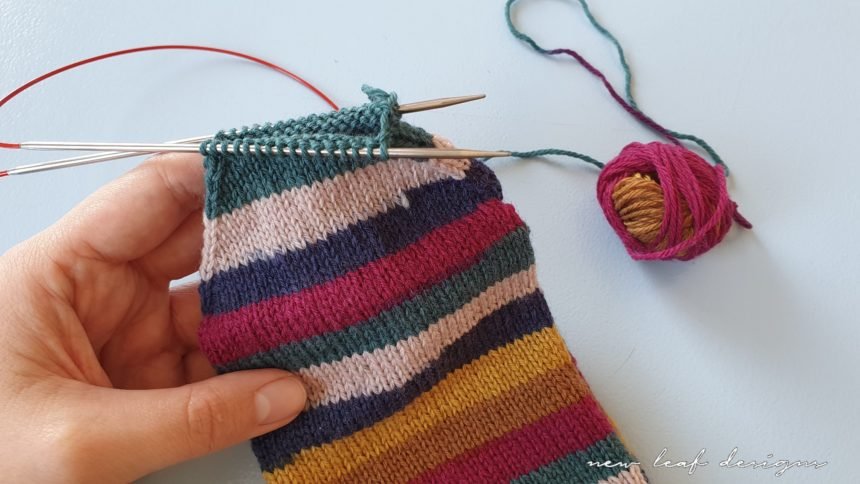
Picking up stitches
Pick up sts for the row ABOVE the stitch marker, and the row BELOW the stitch marker. Make sure you pick up half of your total st count on each row. We’re not entirely sure WHERE to start picking up sts to end up with exactly half of the st count. To be sure, just pick up from the stitch closest to the edge, and work your way to the other edge. Then count your sts and see if you have half your stitch count, or more. Be careful not to pick up stitches from a row below or above. If you don’t have the correct stitch count, say you have 1 stitch too much, look at your sock, and which side of the heel might be a bit ‘off’. Also take a look at your toe, this is a good measuring point. You don’t want your heel to be skewed.
Then skip the row where the st marker is, because we’re going to be cutting away that row, and pick up sts for the row BELOW that. This one is actually easier because you can look at the sts you picked up for the row ABOVE the marker, count down 2 sts and pick up that one.
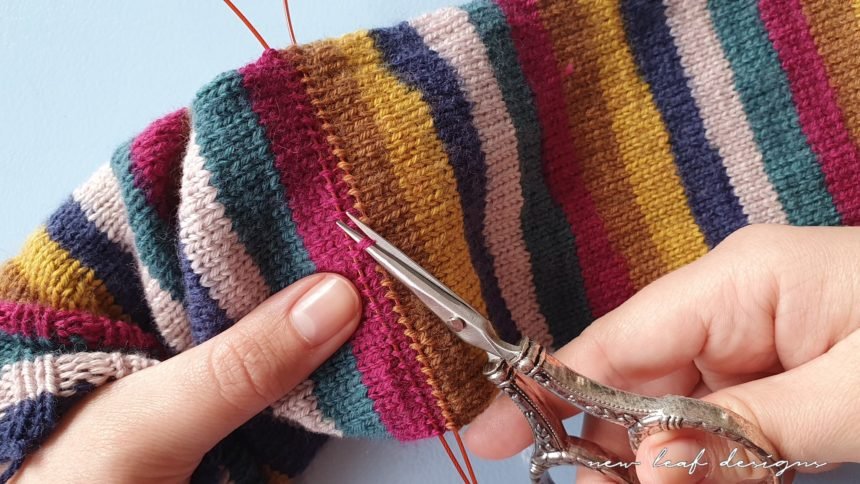
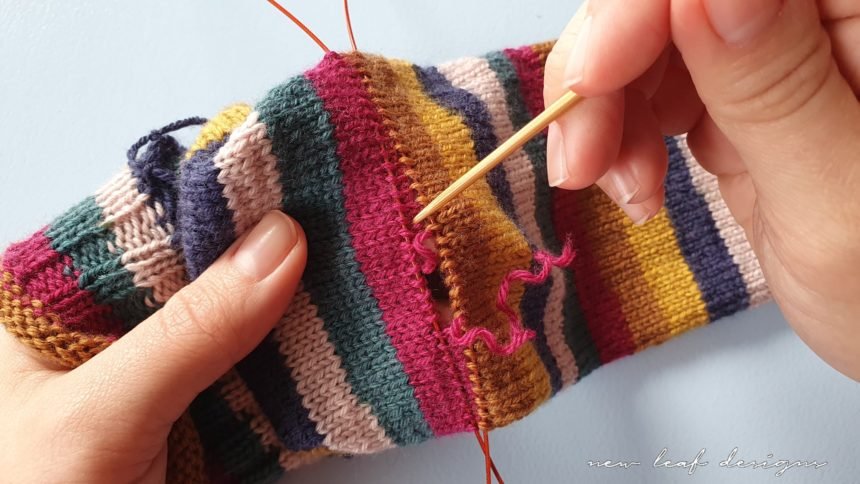
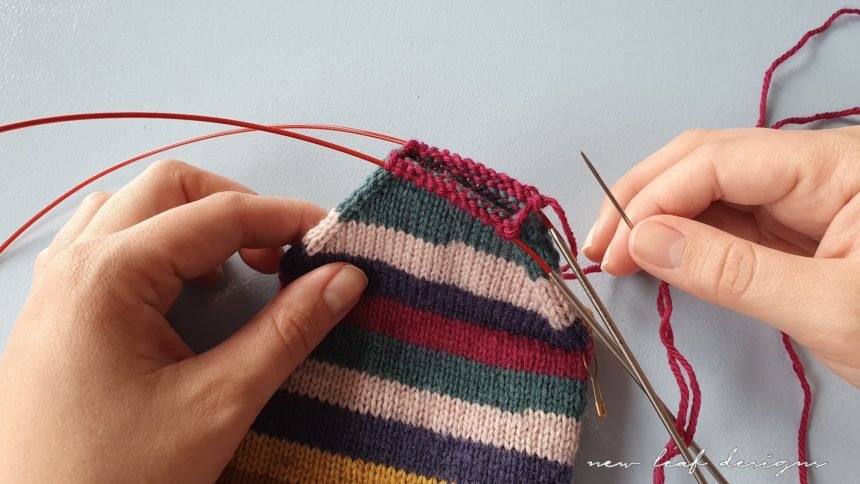
Cutting time!
You only want to cut ONE stitch, in the MIDDLE of your row. Do NOT cut at the side of your sock, otherwise you won’t have enough length to sew in. Unravel the yarn at both sides of where you cut it, until you reach the edge. You do not want to cut these ends any further, just to make it easier to weave in these ends. Just take the tip of a knitting needle or a blunt sewing needle and tug at the stitches left and right of the cutting place to unravel the yarn. Unravel to the edge. Tuck those ends into the sock and weave in later to close up gaps.
PRO TIP: don’t unravel the yarn ALL the way, this helps with closing up the gap at the corners.
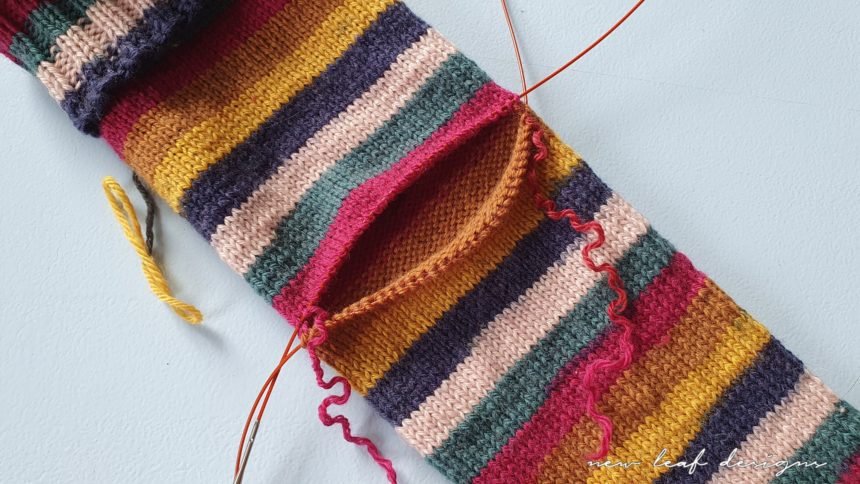
Knitting the heel
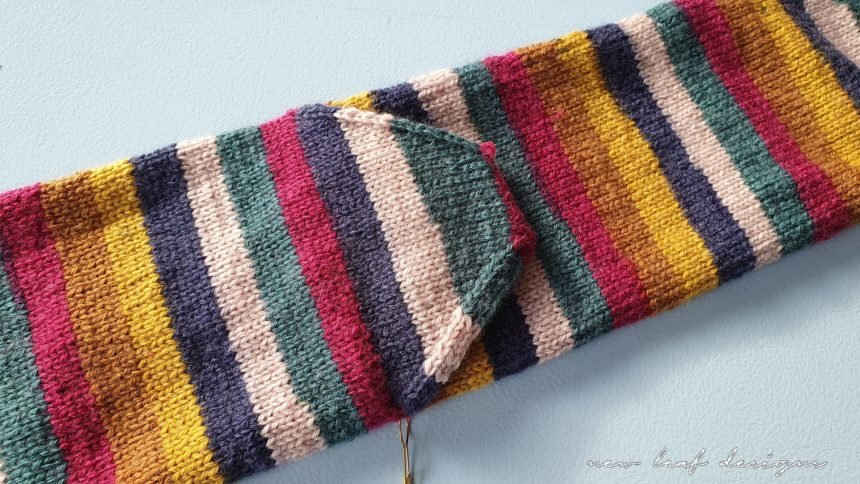
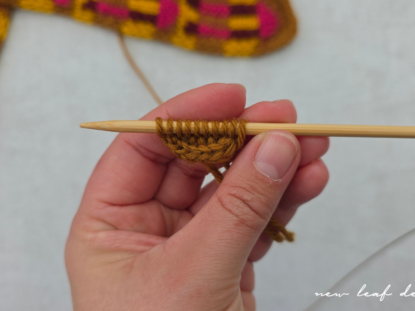
You can see there’s a nice gap to put in your heel. Take your yarn. First we are going to knit across one side of the heel, and then we’ll pick up stitches on the corner. Watch my tutorial video or the photos below for extra guidance. Try to pick up stitches that won’t leave any holes.
Pick up two stitches for this side. Then knit across the other side of the heel, and pick up the same amount of sts on the other corner. Extra tip: I like to pick up two bars (shown in top middle pic of collage) and knit those together for 1 stitch. Then I do the same for the other stitch on that side.
PRO TIP: place a stitch marker into the fabric at the start of the round, so it’s easier to keep track. If you have already lost your place: the beginning of the round is where you can still see the beginning tail of the heel yarn.
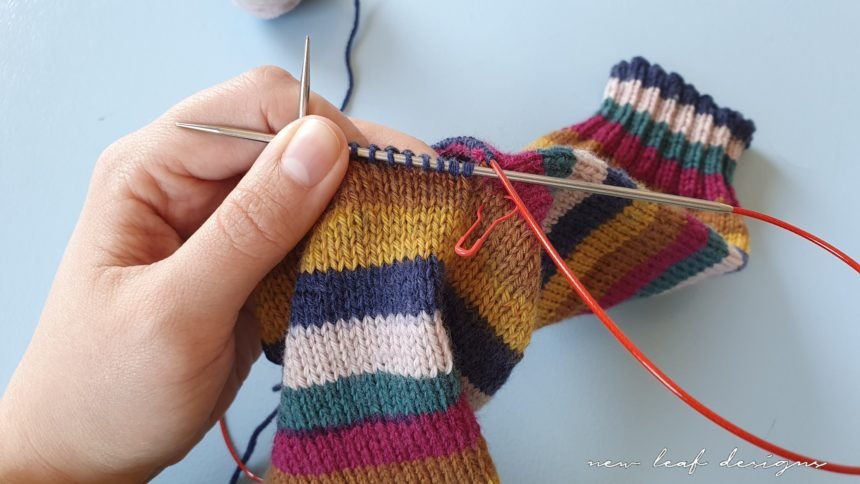
Decreases
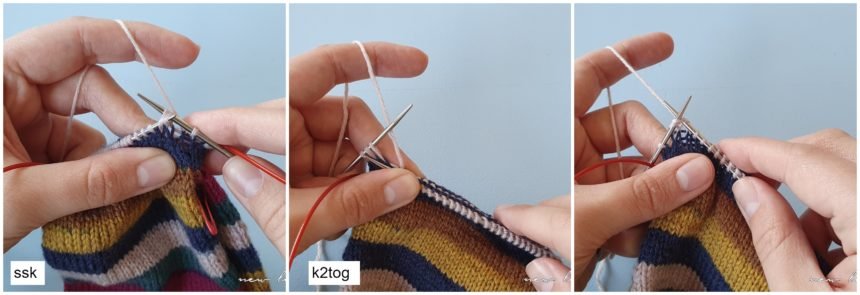
Knit two rounds plain, then start alternating decrease and plain knit rounds. On the start of a needle: k1, ssk. On the end of a needle: k2tog, k1. The following round is a plain knit round, then another decrease round, and so on. In my City Stripes Sock pattern, you do this until you have 20 stitches left.
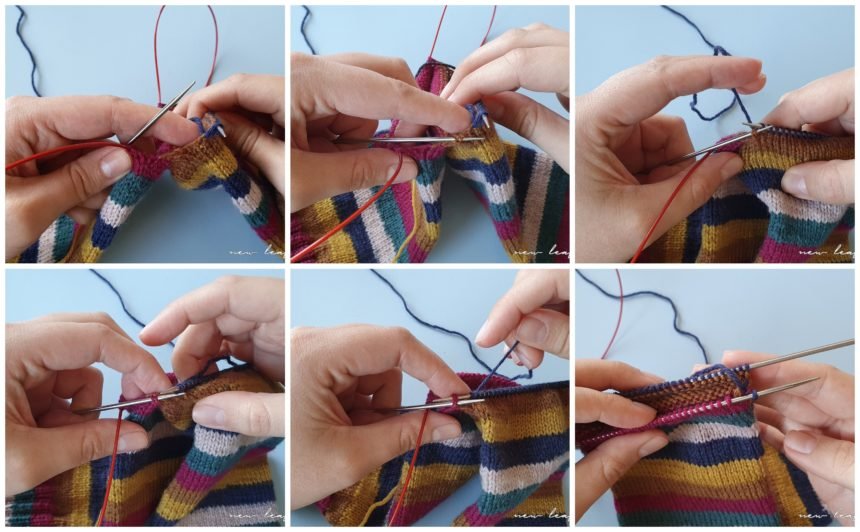
Kitchener stitch
Cut yarn leaving long tail, and thread onto tapestry needle. Hold work up with both needle tips facing to the right. You have two sets of sts, 10 sts on each needle. With tapestry, go through first st of bottom needle knitwise and take off knitting needle, go through second st purlwise and leave on. Go through first st of top needle purlwise and take off, go through second st knitwise and leave on.
For remaining sts, remember the following sequence. For bottom needle: k off, p on. Then for top needle: p off, k on. Rep until last 2 sts on each needle. Then, for bottom needle: k off, p off. For top needle: p off, k off.
Tug gently on each Kitchener st from right to left to neaten.
You’re done!
And voilà, your Afterthought heel is done! Was it as scary as you thought it would be? I hope I made it at least a little bit easier. Do let me know what you think in the comments, and be sure to subscribe to my newsletter for more patterns.
You might also like
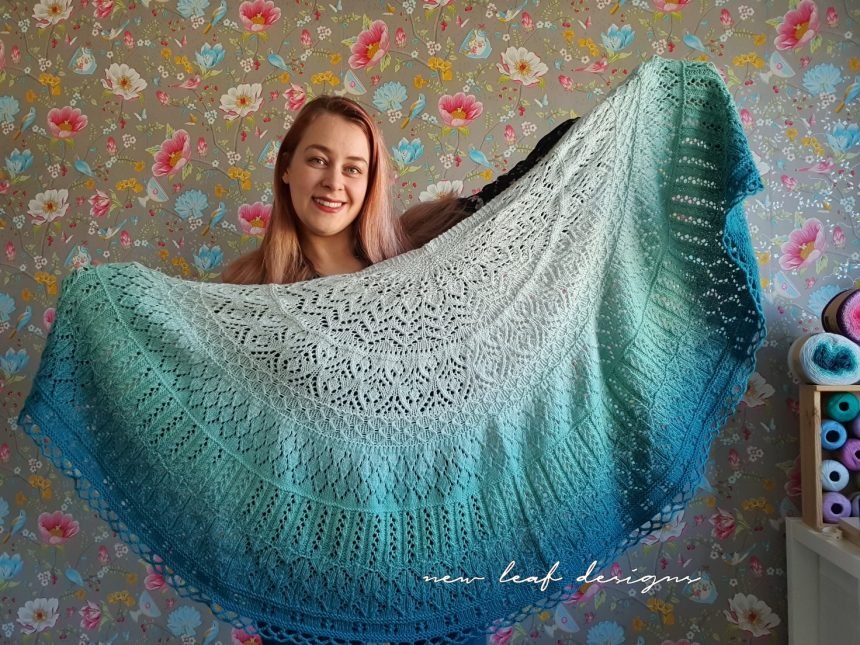
Learn how to knit lace with the Cosy Moments Shawl


4 Comments
Love the yarn you used here! Any recs for how much yarn to save for the afterthought heel? I’ve almost got one tube done but not sure how much yarn to leave for the other sock and the heels. My sock is 42g and what’s left of my yarn is 64g. Want to make them as tall as possible but not sure about how many grams of yarn to save for the heel and all. I know yarns are different weights so you may not have any tips here. 🙈
Interesting technique, and clearly illustrated. I’m not sure I’ll ever actually do this, but it is nice to understand how it’s done. Thanks.
Thank you so much for the very clear instructions! Fantastic!
Thanks for clear instructions, much appreciated.