GET YOUR YARN / GAREN KOPEN
For one pair of adult sized socks, you will need 2 balls of Scheepjes sock yarn. You can use either Scheepjes Invicta Extra, or the new Scheepjes Metropolis with 80 colours!! Get your yarn via Scheepjes retailers or via these shops*:
Voor één paar sokken in een volwassen maat heb je 2 bollen Scheepjes sokkengaren nodig: Scheepjes Invicta Extra of het nieuwe Scheepjes Metropolis sokkengaren in wel 80 kleuren! Koop je garen via Scheepjes retailers of deze webshop*:
Wool Warehouse (UK)
Caro’s Atelier (NL)
Welcome to Part 2 of the Simple Toe Up Socks Knitting Pattern!
Oh, the ever so daunting heel! Let me tell you, knitting a heel is one of those things that freaked me out when I first had to do it. I did not have a clue how I was going to do it, and I only had a written pattern so I was basically doing it ‘blind’. Lucky for you, I have filmed a tutorial video which will guide you through the whole thing.
Oei, de gevreesde hiel! Nouja, dat was in ieder geval het gedeelte van de sok dat ik het engst vond toen ik pas begon met sokken breien. Ik had geen idee hoe ik het zou moeten doen! De eerste keer gebruikte ik een geschreven patroon, terwijl ik bij nader inzien veel beter een filmpje had kunnen raadplegen daarvoor. Gelukkig hoeven jullie daar al niet meer naar te zoeken, de instructie video heb ik namelijk voor jullie opgenomen!
The heel I have in store for you today is my FAVOURITE heel EVER. It’s called the German Short Row heel, and it’s quick, easy to memorize, and doesn’t need fancy maths or anything like that. Easy peasy lemon squeezy. Shockingly, there are about zero instruction video’s on how to do this heel. There are tutorials on how to do the particular stitch, but you need much more information than that in order to do a heel. But fear not, I have come to the rescue 😉 However, if you’re more into written patterns than video patterns, or you have done it before and would just like a quick refresher, I do have the pattern written out for you as well.
De hiel die ik je laat zien in dit patroon is mijn favoriete hiel ooit! Het heet de ‘German Short Row’ hiel, oftewel de Duitse hiel met verkorte toeren. Het is gemakkelijk te onthouden, breit zich snel, en je hoeft er geen ingewikkelde berekeningen voor te doen. Supergemakkelijk! Voor degenen die hem wel al eens hebben gedaan maar een korte opfrisser zoeken, heb ik ook het patroon uitgeschreven.
Shop the PDF version here Purchase on Ravelry
YARN / GAREN
Scheepjes Invicta Extra (75% wool, 25% nylon) – 50 gram ball
1x 1300 Dark Green / Donkergroen
1x 1443 Variegated Beige / Gemeleerd Beige
NEEDLES / NAALDEN
Depends on gauge, I used 2.25 mm Knitpro Royale DPNs
Hangt van draadspanning af, ik gebruik 2,25 mm Knitpro Royale DPNs (dubbelpuntige naalden)
ABBREVIATIONS
K – Knit
P – Purl
Wyif – With yarn in front
Sl1p – Slip 1 stitch purlwise
AFKORTINGEN
R – Recht
AV – Averecht
1.av.afh – 1 steek averecht afhalen
CLICK HERE FOR PART 1 OF THIS PATTERN
VOOR DEEL 1 VAN DIT PATROON KLIK HIER
Watch the video below. As always for my sock tutorials, I’m showing you how to do this on DPNs (double pointed needles) as well as on circular needles. Just skip to the timestamp it says in the video.
Bekijk de video hieronder. Zoals ook bij de vorige video’s heb ik aparte instructies voor dubbelpuntige naalden en voor rondbreinaalden. In de video staat naar welk tijdstip je moet doorspoelen voor de instructies op rondbreinaalden.
THE PATTERN / HET PATROON
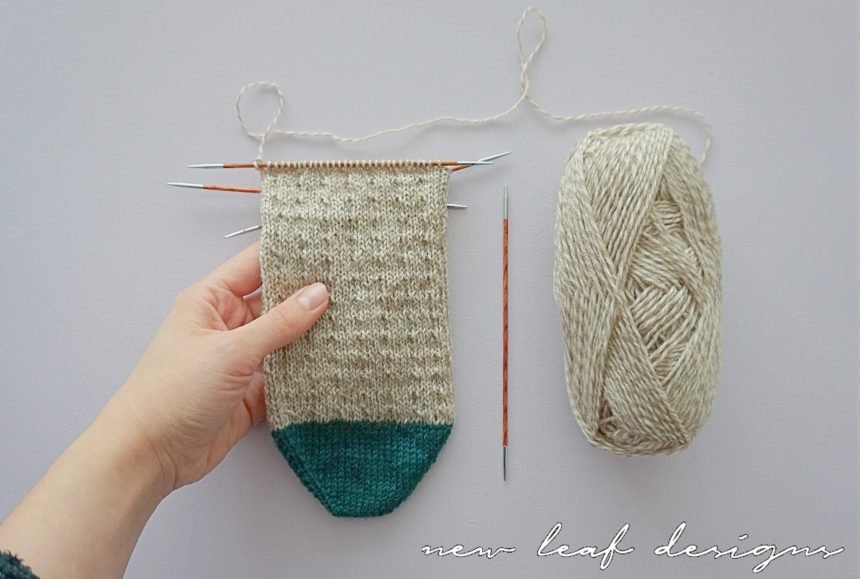
Step 1: Knit your foot until it has the desired length. Mind you, this is the length of your foot MINUS the heel part, so you’ll have to stop knitting when you’re about 6cm / 2,5 inches away from the end of your foot. If you’re not knitting your own size or are in any way unable to check for size on the actual foot, please view the table below for an indication of how long you need to knit for.
Stap 1: Brei de voet tot de gewenste lengte, dat wil zeggen de lengte van jouw voet minus de onderkant van de hak. Hieronder in de tabel staan lengtes die je kunt aanhouden, maar houd er wel rekening mee dat het indicaties zijn van de correcte lengte, het beste is om het te proberen op de daadwerkelijke voet.
| SIZE | Women S | Women M | Women L /
Men S |
Men M | Men L |
| sts | 56 | 60 | 64 | 68 | 72 |
| Cm of foot before heel | 18 | 20 | 21 | 22,5 | 24 |
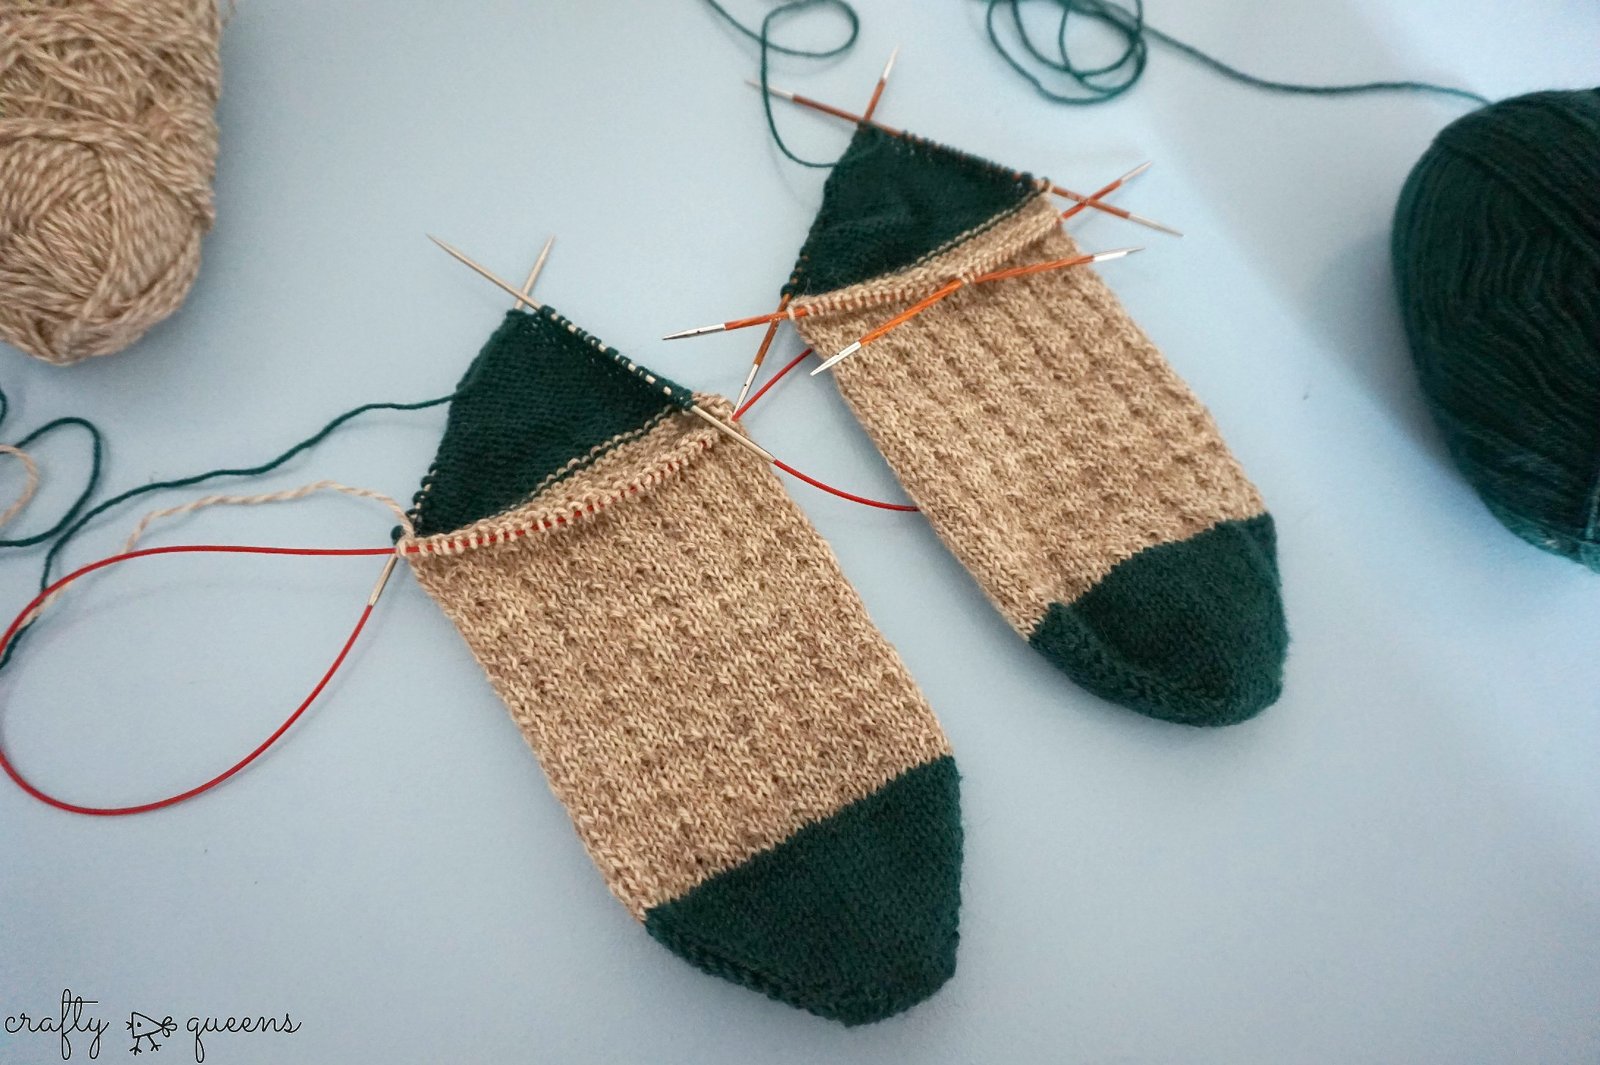
Step 2: End on an instep row. This is sock knitting vocabulary for the part of your foot in front of your ankle joint. So basically, end on a row where you did the textured stitches.
Stap 2: Eindig op een rij waar je de steken van de bovenkant van de sok hebt gebreid. De volgende naald die je zou gaan breien houdt dus de steken van de voetzool.
For DPNs only: Transfer sts so that the sole sts are on one DPN, and the instep sts (top foot sts) are divided across 2 DPNs.
Alleen voor dubbelpuntige naalden: Verschuif de steken zodat de steken van de voetzool op 1 naald komen te staan. De steken van de bovenkant van de voet zet je dan op 2 naalden.
Step 3: Knit the sole stitches with your contrasting yarn, if you’re doing a contrasting heel like I am. If you’re not doing a contrasting heel, just knit this row with your main colour yarn.
Stap 3: Brei de steken van de voetzool met de contrasterende kleur, als deze van toepassing is. Zo niet, brei deze naald dan met de hoofdkleur.
Step 4: Start the short row heel
Stap 4: Begin met de verkorte toeren hiel
The heel is worked in rows, turn after every row.
Voor de hiel breien we in rijen verder, keer je werk na elke rij.
Row 1(WS): Wyif, sl1p and lift to back (called “double stitch”), wyif, p all sts
Row 2(RS): Wyif, sl1p and lift to back, k all sts until you reach the next “double stitch”
Row 3: Wyif, sl1p and lift to back, wyif, p all sts until you reach the next “double stitch”
Rij 1 (VK): Met garen aan de voorkant van je werk, 1.av.afh en breng het garen over de naald (niet tussen de naalden) naar achteren. Dit heet een “dubbele steek”. Breng garen tussen de naaldpunten naar voren, brei alle resterende st op de naald av.
Rij 2 (GK): Met garen aan de voorkant van je werk, 1.av.afh en breng het garen over de naald naar achteren, brei alle steken r tot aan de eerste dubbele steek.
Rij 3: Met garen aan de voorkant van je werk, 1.av.afh en breng het garen over de naald naar achteren, breng garen naar voren, brei alle steken av tot aan de eerste dubbele steek.
Repeat Rows 2 and 3 until you have (10 for womens sizes, 12 for mens sizes) stitches left in between the double stitches. Then:
Herhaal rijen 2 en 3 totdat je tussen de dubbele steken nog maar 10 st over hebt voor vrouwenmaten, 12 st voor mannenmaten. Daarna:
Row 1 (RS): After counting that you have only (10, 12) stitches left, continue to knit on this same row without turning. Knit the first double stitch as if it were one stitch. Turn work.
Row 2 (WS): Sl1p, p until next double stitch, p as if it were 1 singular stitch
Row 3 : Sl1p, k until next double stitch, k as if it were 1 singular stitch
Rij 1 (GK): Nadat je nog maar (10,12) steken over hebt tussen de dubbele steken, ga je gelijk op die laatste rij verder met het breien van de eerste dubbele steek. Brei de eerste dubbele steek r alsof het één steek is. Keer je werk.
Rij 2 (VK): 1.av.afh, av tot volgende dubbele steek, brei deze av alsof het één steek is.
Rij 3: 1.av.afh, r tot aan volgende dubbele steek, brei deze r alsof het één steek is.
Repeat Rows 2 and 3 until you have knit all double stitches on your heel, and you have (28, 30, 32, 34, 36) live sts on your heel again, a.k.a. the same amount of stitches you had before doing the heel.
Herhaal rijen 2 en 3 totdat je alle dubbele steken hebt gebreid, en je weer het originele stekenaantal op je naalden hebt staan.
If having done a contrasting heel, continue with main colour from now.
Als je een contrasterende hiel hebt gebreid, brei je vanaf hier weer verder met de hoofdkleur.
LEG / BEEN
Continue in texture pattern. If you did not end with a full repeat on the foot, be sure to continue from there when doing the leg.
Rounds 1-3: Knit all sts (3 rounds)
Round 4: purl every 4th stitch, also along the back of the heel now
Repeat these 4 rounds until the leg reaches the desired length. Keep in mind that ribbing will be added to the length.
Ga verder in het textuurpatroon. Let op: als je bij het eindigen van de voet geen volledige patroonherhaling hebt gebreid, ga dan vanaf dat punt verder.
Toeren 1-3: Brei alle steken R (3 toeren)
Toer 4: Brei elke 4e steek averecht, nu helemaal rondom.
Herhaal deze 4 toeren totdat het been de gewenste lengte heeft. Houd er rekening mee dat er ook nog een boord komt.
You might also like
Simple Toe Up Socks Part 1 Here

*Affiliate links are used in this blogpost. If you choose to purchase materials via this link, you will not pay anything extra, but the shopkeeper will reward me with a small fee. It’s how I keep my website running! Thanks in advance for considering to shop via affiliate links
*In deze blogpost gebruik ik affiliate links. Als je via deze link materialen koopt, betaal je niets extra, maar dan beloont de winkelier mij met een klein percentage van je aankoop. Zo houd ik mijn website gaande! Bedankt voor het overwegen om via affiliate links te kopen.


11 Comments
I cannot find the video on closing the gap between the heel and the first round of the leg. You mentioned it at the end of part 3, but part 4 doesn’t cover it. Would you please send me the link?
Thank you!
Hello Nancy, the video is included as a bonus video, you can find it here: https://www.youtube.com/watch?v=wgLA4eoeKhA
Happy knitting!
Hello. If I have a high instep, should I increase the number of stitches on the sole or on the instep before I start the heel?
Thanks in advance for your help.
Hello Janique, thank you for your question! For a high instep, leave more stitches for the instep. I made the wrong decision once, leaving more stitches for the heel, and ended up with a very long and pointy heel! The best fit for a high instep however is to do a gusset & heelflap heel.
Hi – thank you so much for this pattern; it is my go to pattern for socks 🙂
In the table where you mention the centimetre of foot before heel, what sizes would a M and L be for a man’s foot? I am making a pair of socks for a man’s size 10.5 and wondering if that’s M or L?
Cheers
Hi! I’m afraid I’m not familiar with US sock sizes, but the mens sizes M and L in the pattern refer to roundabout EU43 and EU45, respectively.
Easiest heel I have done so far! Thanks for some great video .
Tiny question,
I see you’re using German short rows, maar favorite method but I’ve been wondering if you do them the same way if you’re knitting toe up instead of toe down because I’ve knitted toe down the same way you describe it for toe up.
Hi Elfrieda! Yes, I knit the German Shortrow Heel exactly the same for toe-up socks and cuff-down socks 🙂
Geweldig!! Dankjewel!
The German short row heel works exactly the same for toe up and cuff down socks… so if I knit toe up once I have found where I have to start my heel you have the same amount of sts. in the instep and in the sole?
Alvast bedankt,
[…] Toe Up Socks Part 2 here Simpele Sokken Deel 2 hier […]