Easy Crochet Rabbithole Cardigan
FOR FRENCH TRANSLATION CLICK HERE
Dutch and English pattern down below
Shop the PDF version here Purchase on Ravelry
GET YOUR YARN / GARENS KOPEN
You’ll need:
10 balls of Scheepjes Secret Garden *- 2 balls each of: 731-732-733-735-738
4mm crochet hook (US size G)
Darning needle
Scissors
Stitch markers
Wat heb je nodig:
10 bollen Scheepjes Secret Garden – 2 bollen elk van: 731-732-733-735-738
Haaknaald 4mm
Stopnaald
Schaar
Een aantal steekmarkeerders
Retailers – Verkooppunten
If your local Scheepjes yarnstore doesn’t carry this yarn, please consider to shop via the affiliate links below. Shopping via affiliate links does not cost you anything extra, but the shop gives me a small percentage of your purchase in return for the publicity.
Vind jouw lokale Scheepjes verkooppunt hier. Als jouw lokale garenwinkel dit garen niet in het assortiment heeft, denk er dan alstublieft over na om mij te steunen het garen via een van de volgende links te kopen. Hiermee betaal je zelf niets extra, maar de winkeleigenaar geeft mij een klein percentage van de aankoop in ruil voor de publiciteit.
Wool Warehouse (UK) Caro’s Atelier (NL)
Crochet an easy cardigan – Haak een gemakkelijk vest
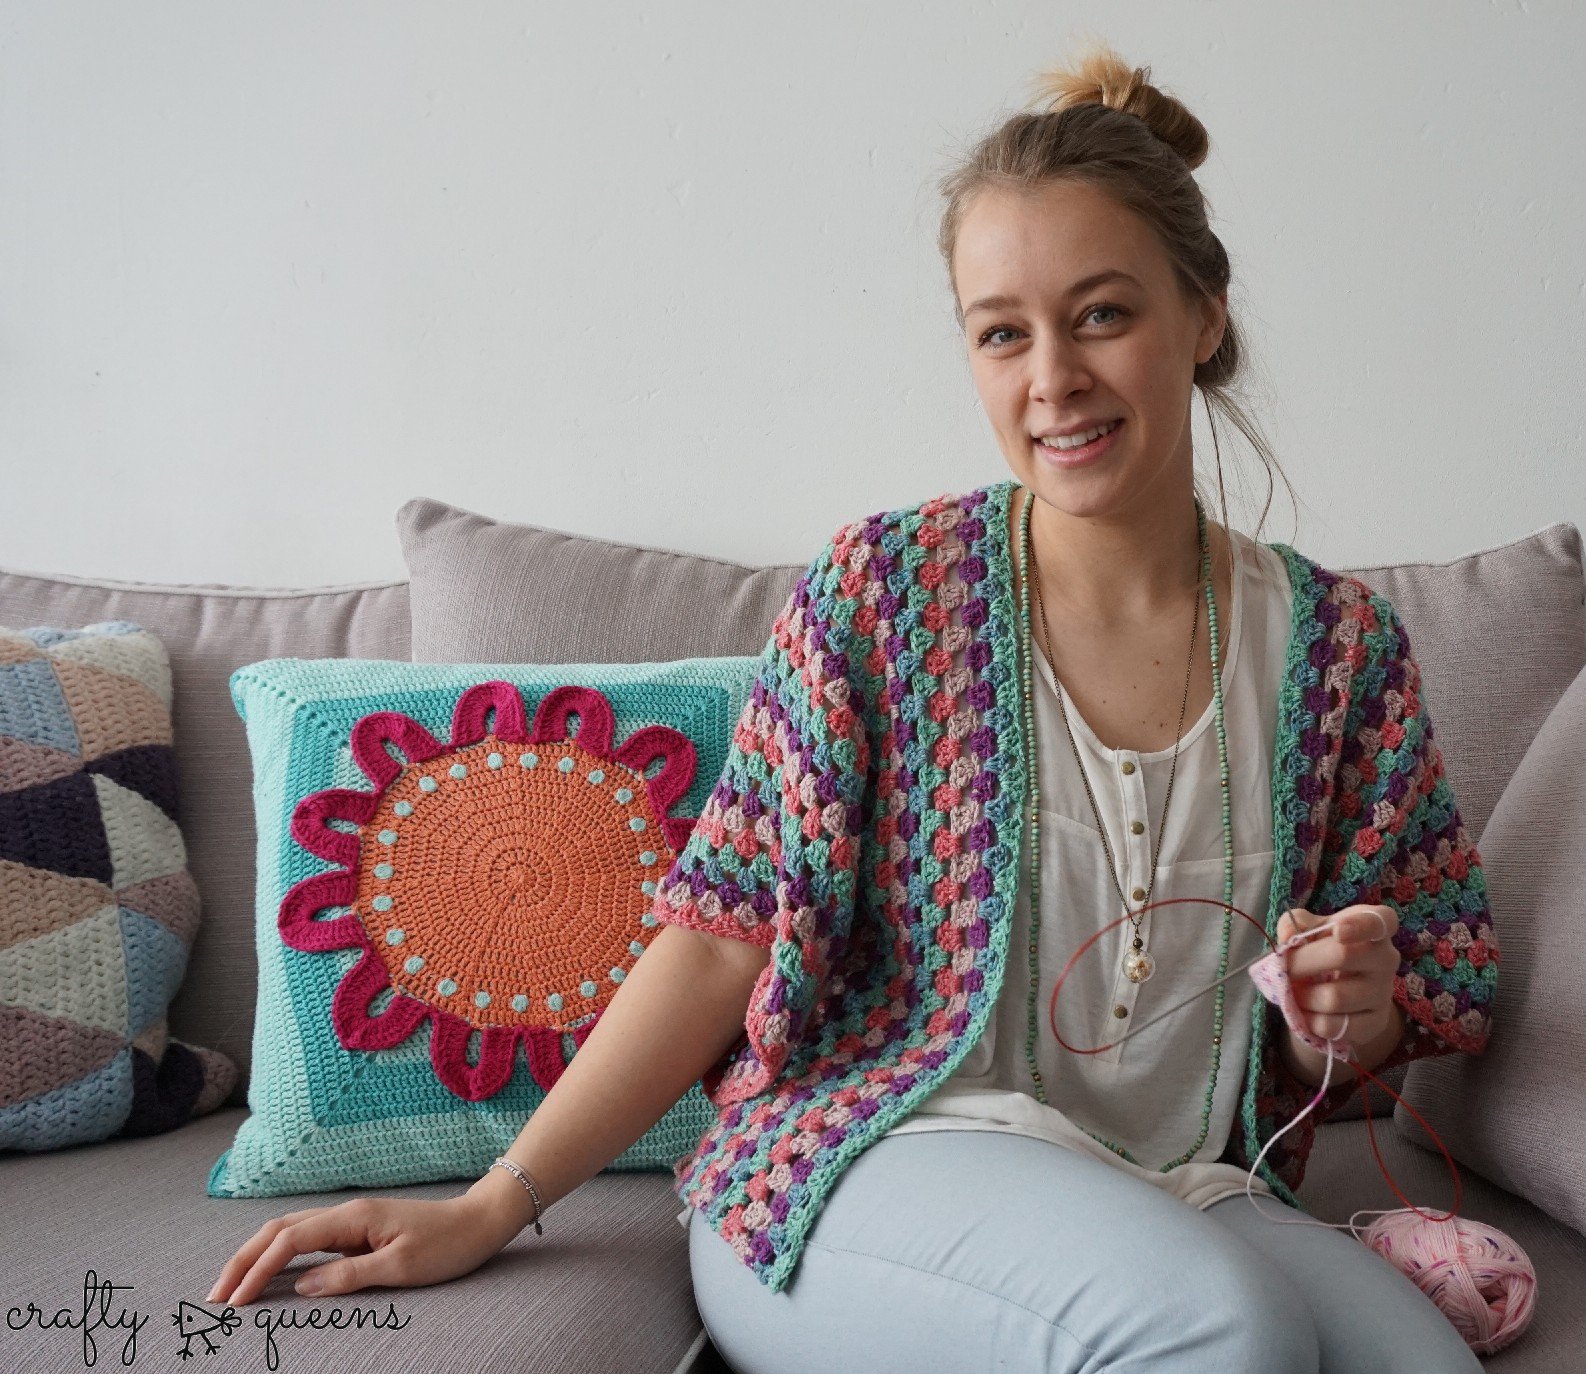
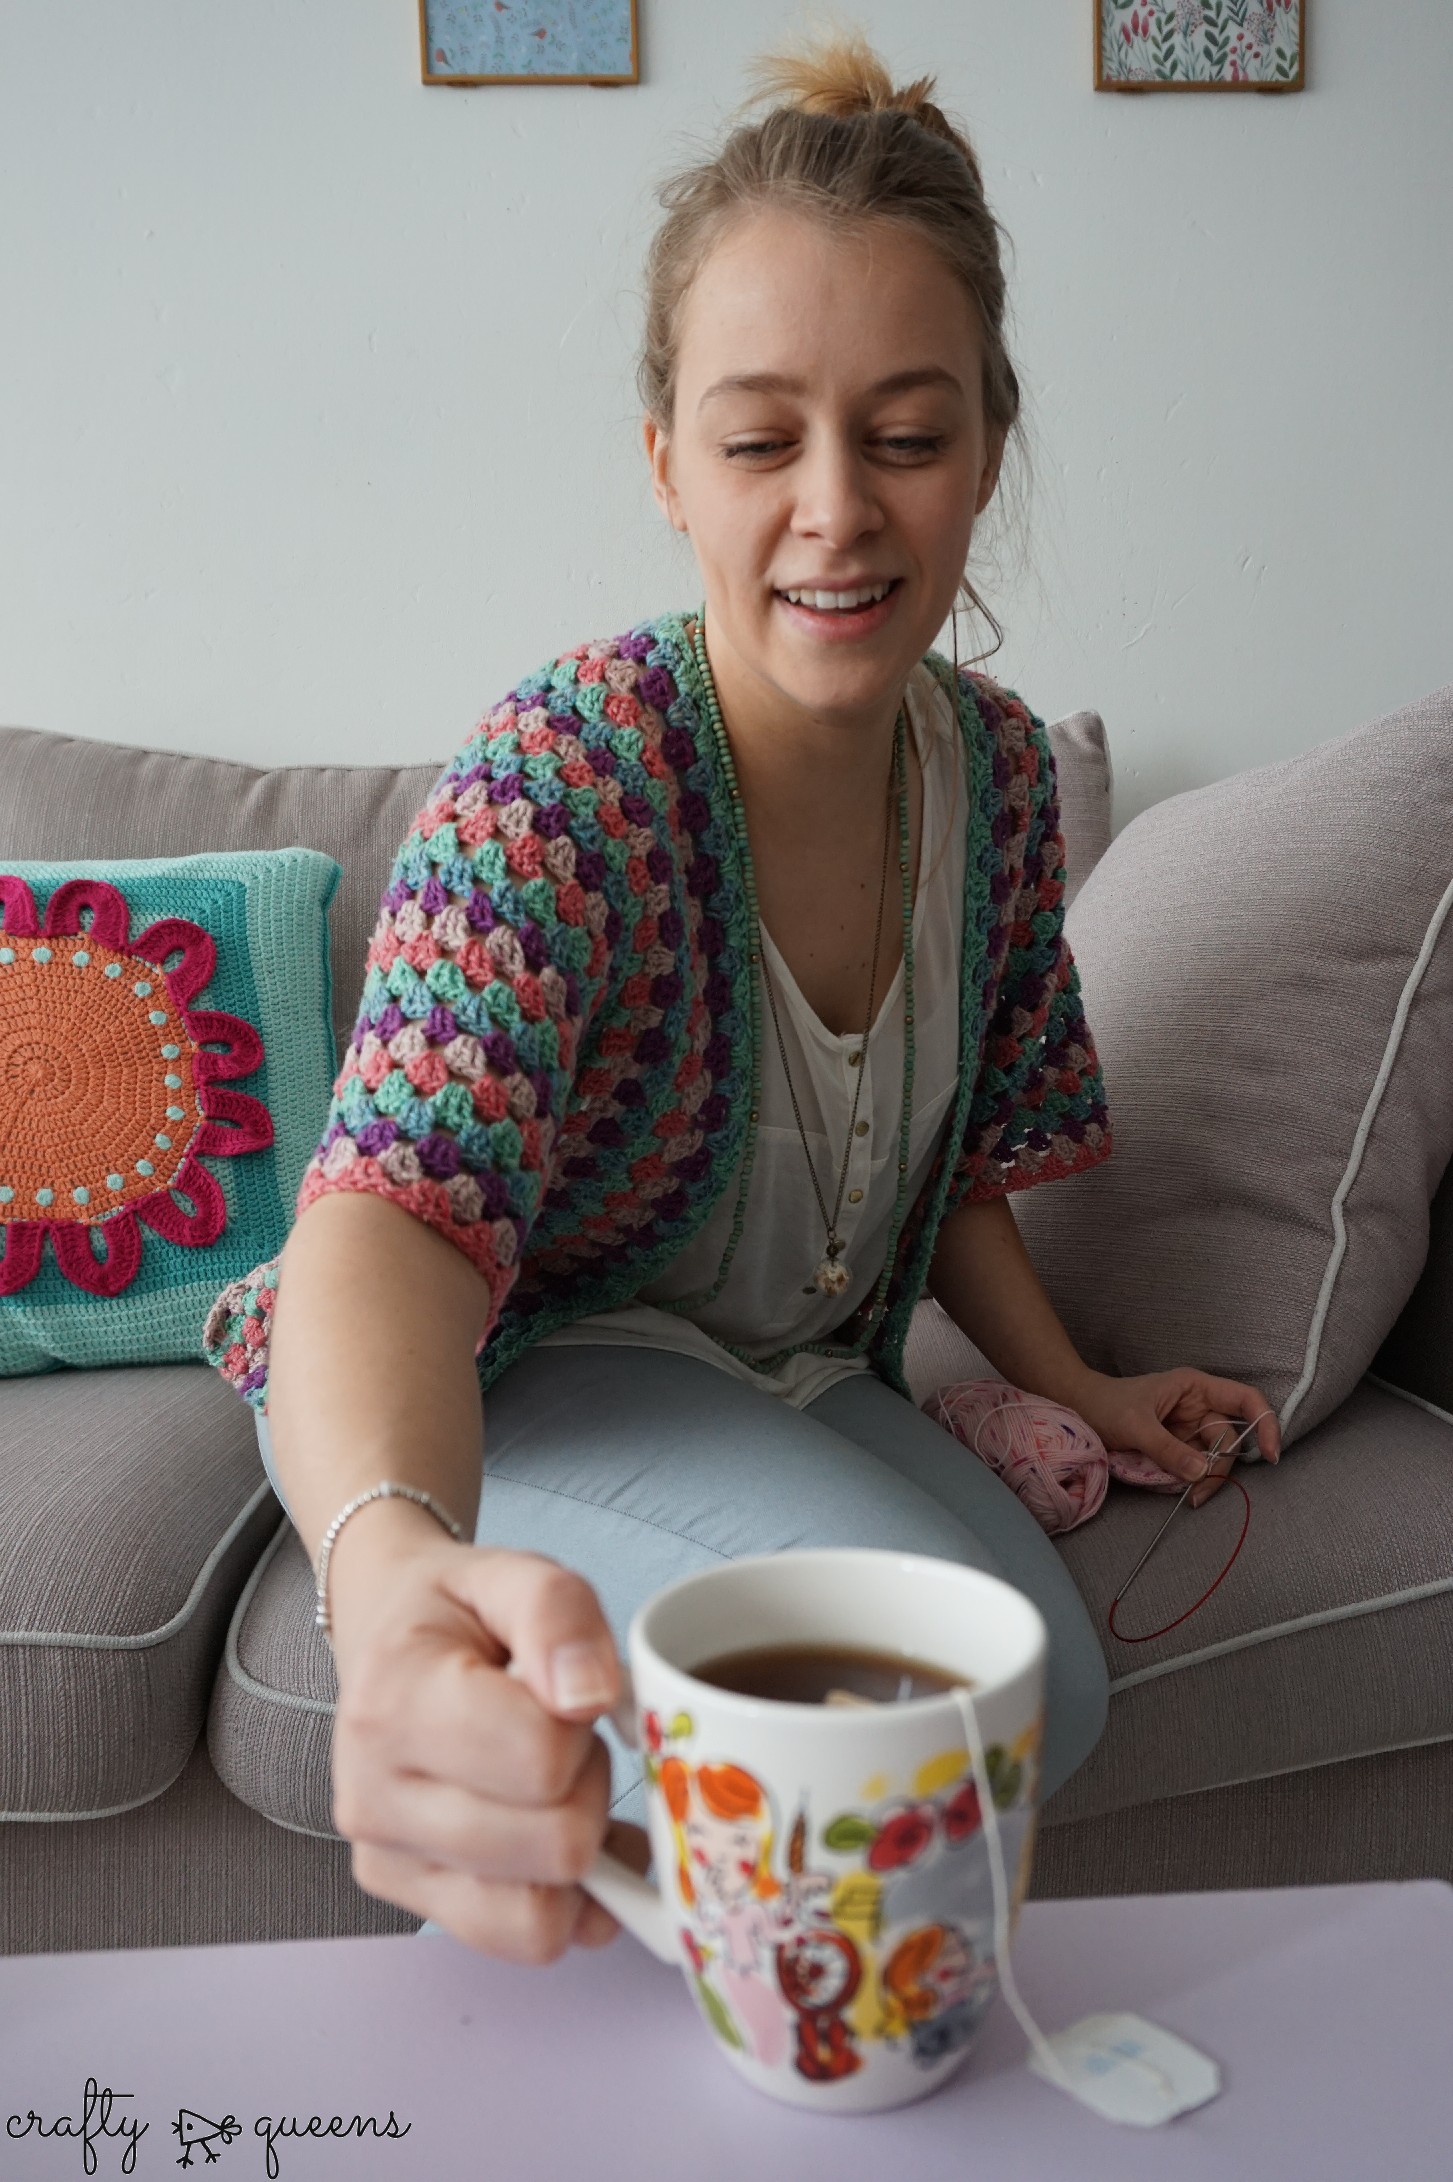
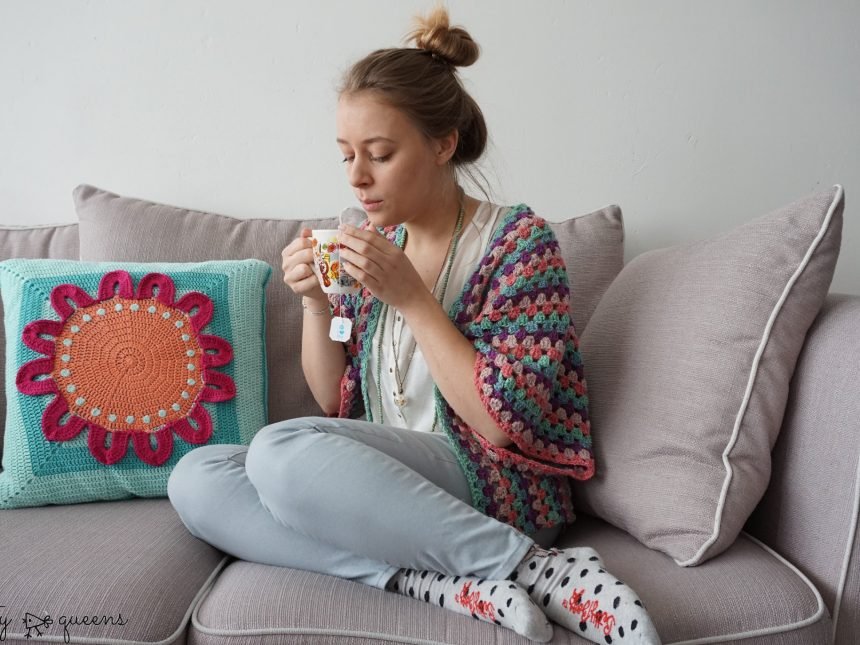
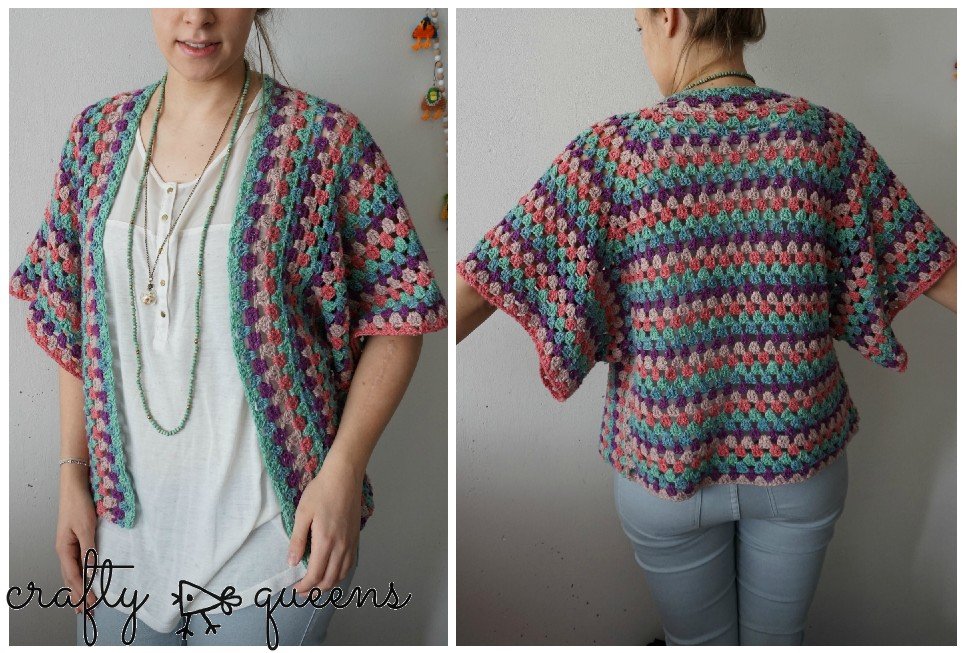
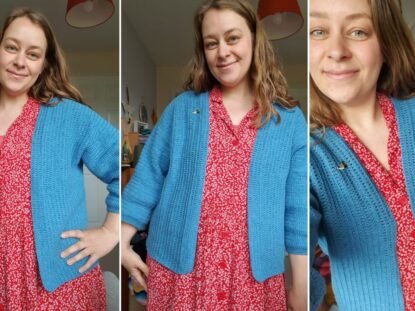
The Crochet Rabbithole cardigan is probably the easiest cardigan you’ll ever make! With the iconic granny stripe stitch, this is a blanket you can wear! Curious to know where the name ‘the Rabbithole Cardigan’ came from? Well, during 2017, the whole online knitting community fell down the so-called ‘crochet rabbithole’, everyone started to make a granny stripe blanket! I was inspired too, but instead of a blanket I crocheted this cardigan. Et voilá, the crochet Rabbithole Cardigan was born.
This pattern is actually more of a recipe. I’ll show you how to start, and I’ll give you directions to make your own size. The yarn I used for this project was lovingly sponsored by Scheepjes, I’m so thankful!
Zoals jullie weten heb ik de afgelopen weken flink doorgehaakt aan mijn granny stripe vest, die ik de Rabbithole Cardigan noem. Waarom de Rabbithole? Omdat recentelijk zowat de héle breicommunity in het zogeheten ‘crochet rabbithole’ gevallen is, en iedereen een granny stripe deken begon. Ik werd ook geïnspireerd, maar in plaats van een deken maakte ik dit luchtige vest. Benieuwd hoe je hem maakt? Lees snel verder! De Nederlandse tekst in dit patroon is grijskleurig en schuingedrukt, zo is het makkelijk te vinden.
Dit patroon is eigenlijk een soort ‘recept’. Ik geef je het begin, en gaandeweg beschrijf ik hoe je het vest passend kunt maken voor jou, zodat je je eigen maat kunt maken. Het garen dat ik voor dit vest gebruikte is met liefde beschikbaar gesteld door Scheepjes, waar ik ze heel dankbaar voor ben!
Used abbreviations (US)
CH/CH ST(S) = chain / chain stitch(es)
DC = double crochet
() = instructions between brackets are all made into the same stitch
** = repeat instructions between asterisks
Gebruikte afkortingen
L = losse
ST = stokje
() = instructies tussen haakjes worden allemaal in dezelfde steek gehaakt
**= herhaal de instructies tussen asterisken
Het patroon // The pattern
Chain 195 stitches
**Change colour every row to get the striped effect!
Haak 195 lossen
**Verander elke rij van kleur om het gestreepte effect te krijgen!
Row 1. 1dc in the 3rd ch st from the needle, *ch1, skip 3 ch sts, 3dc into next ch st* 21 times. Then: skip 3 ch sts, (3dc, ch2, 3dc) into the next ch st, *ch1, skip 3 ch sts, 3dc into the next ch st* 3 times, skip 3 ch sts, (3dc, ch2, 3dc) into the next ch st. Now you’ve made the two corners which will shape the neckline. *ch1, skip 3 ch sts, 3dc into the next ch st* 21 times, skip 3 ch sts, 2dc into the last ch st.
Row2: ch3, *3dc into the next ch-1 space, ch1* repeat until right before the corner; (3dc, ch2, 3dc) into the ch-2 sp of the corner, repeat instructions from * once more for the second corner, *ch1, 3dc into the next ch-1 space* repeat until last ch-1 space, 1dc into last stitch (first stitch of previous row, usually top of chain stitches)
Row 3: ch3, 1dc in last stitch of previous row, *ch1, 3dc into next ch-1 space*, repeat until right before the corner, (3dc, ch2, 3dc) into ch-2 space of the corner, repeat instructions from * once more for the second corner, *ch1, 3dc into next ch-1 space* until the very last ch-1 space, then: ch1, 2dc into last stitch.
Repeat rows 2 and 3 until the short side of your work is at least the width of your shoulders. With Scheepjes Secret Garden yarn on a 4mm hook, I reached this size after doing 15 rows (but of course this may be different for you!)
Rij 1. 1st in de 3e losse vanaf de naald, *1l, sla 3 lossen over, 3st in volgende l* 21 keer. Dan: sla 3 lossen over, (3st, 2l, 3st) in de volgende l. *1l, sla 3 lossen over, 3st in de volgende l* 3 keer, sla 3 lossen over, (3st, 2l, 3st) in de volgende l. Nu heb je ronding voor de nek gemaakt. *1l, sla 3 lossen over, 3st in de volgende l* 21 keer, sla 3 lossen over, 2st in de volgende l.
Rij 2.
3l, *3st in volgende 1-l opening, 1l* herhaal tot voor de hoek, in hoek (2-l opening): (3st, 2l, 3st), herhaal instructies nogmaals zodat je ook voorbij de tweede hoek bent, *1l, 3st in volgende 1-l opening* herhaal tot en met laatste 1-l opening, 1st in laatste steek (eerste steek van de vorige rij, meestal de top van de lossenketting)
Rij 3.
3l, 1st in laatste st van vorige rij, *1l, 3st in volgende 1-l opening* herhaal tot voor de hoek, 1l, in hoek (2-l opening): (3st, 2l, 3st), herhaal instructies vanaf * nogmaals tot voorbij de tweede hoek, *1l, 3st in volgende 1-l opening* tot en met laatste 1-l opening, dan: 1l, 2st in laatste steek.
Herhaal rijen 2 en 3 totdat de korte zijde minimaal even breed is als je schouderbreedte. Met het Scheepjes Secret Garden garen op 4mm haaknaald was dit voor mij na in totaal 15 rijen (maar kan voor jou natuurlijk anders zijn!)
Continue working on the short side of your work only, to complete the back of the cardigan. Attach yarn in one of the corners (ch-2 space), then:
Row 1. ch3, 1dc in the same space, *ch1, 3dc into next ch-1 space* until next corner, ch1, 2dc into ch-2 space.
Row 2. ch3, *3dc into next ch-1 space, ch1* repeat until just before the last ch-1 space, 3dc into last ch-1 space, 1dc into last stitch.
Row 3. ch3, 1dc into last dc of previous row, *ch1, 3dc into next ch-1 space* repeat until en of row, ch1, 2dc into last stitch.
Repeat rows 2 and 3 until the back matches the front in length.
Nu ga je alleen aan de korte zijde verder werken om het achterpand langer te maken. Hecht aan in een van de hoeken (in de 2-l opening), dan:
Rij 1. 3l, 1st in dezelfde opening, *1l, 3st in volgende 1-l opening* tot aan volgende hoek, dan 1l, 2st in de 2-l opening.
Rij 2:
3l, *3st in volgende 1-l opening, 1l*, herhaal tot vóór de laatste lossenopening, 3st in volgende 1-l opening, 1st in laatste steek.
Rij 3:
3l, 1st in laatste st van vorige rij, *1l, 3st in volgende 1-l opening* herhaal tot en met laatste 1-l opening, 1l, 2st in laatste steek.
Herhaal deze rijen 2 en 3 tot het achterpand even lang is als het voorpand.
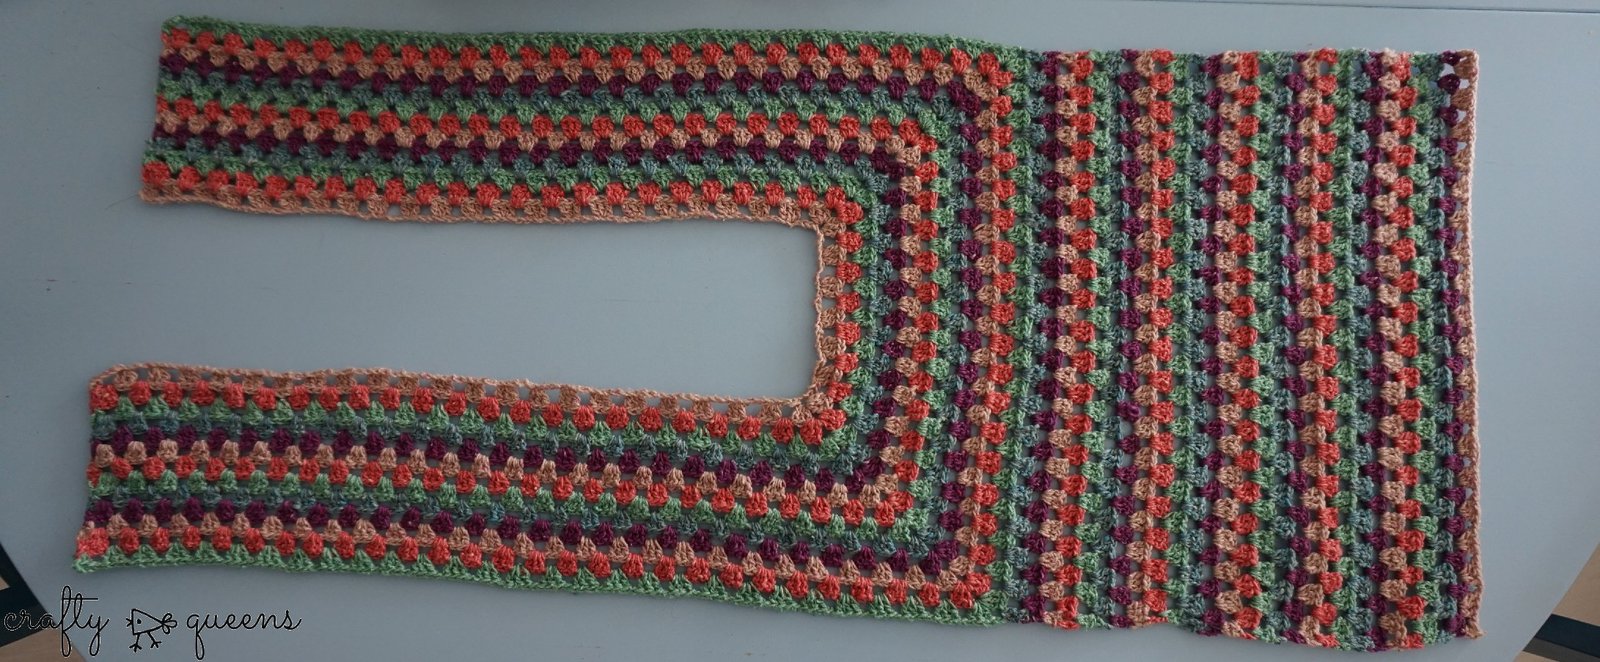

If you haven’t yet, weave in all ends you have so far. With stitch markers, pin the sides together leaving holes for the sleeves so you can try on your cardigan. Determine how big you want the armholes to be, and place a stitch marker there. The other markers can be removed.
Werk alvast alle draadjes weg mocht je dat gaandeweg nog niet gedaan hebben. Speld met behulp van sluitende stekenmarkers de zijkanten even aan elkaar, zodat je het vest al kan passen. Laat natuurlijk een gat voor de mouwen. Bepaal zo hoe groot je het gat van de mouwen wilt laten, en zet daar een stekenmarkeerder, aan beide zijden. De rest van de markers kun je nu verwijderen.

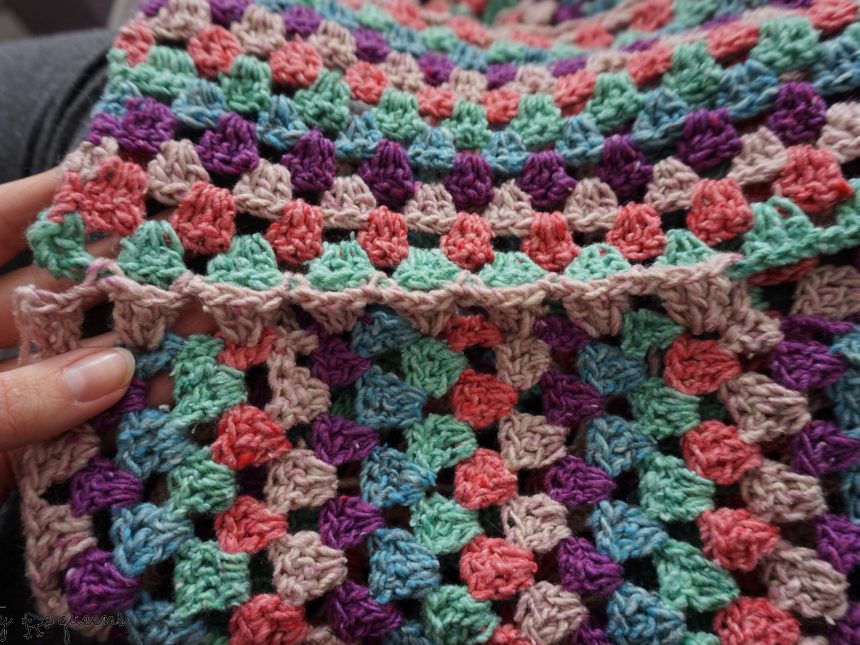
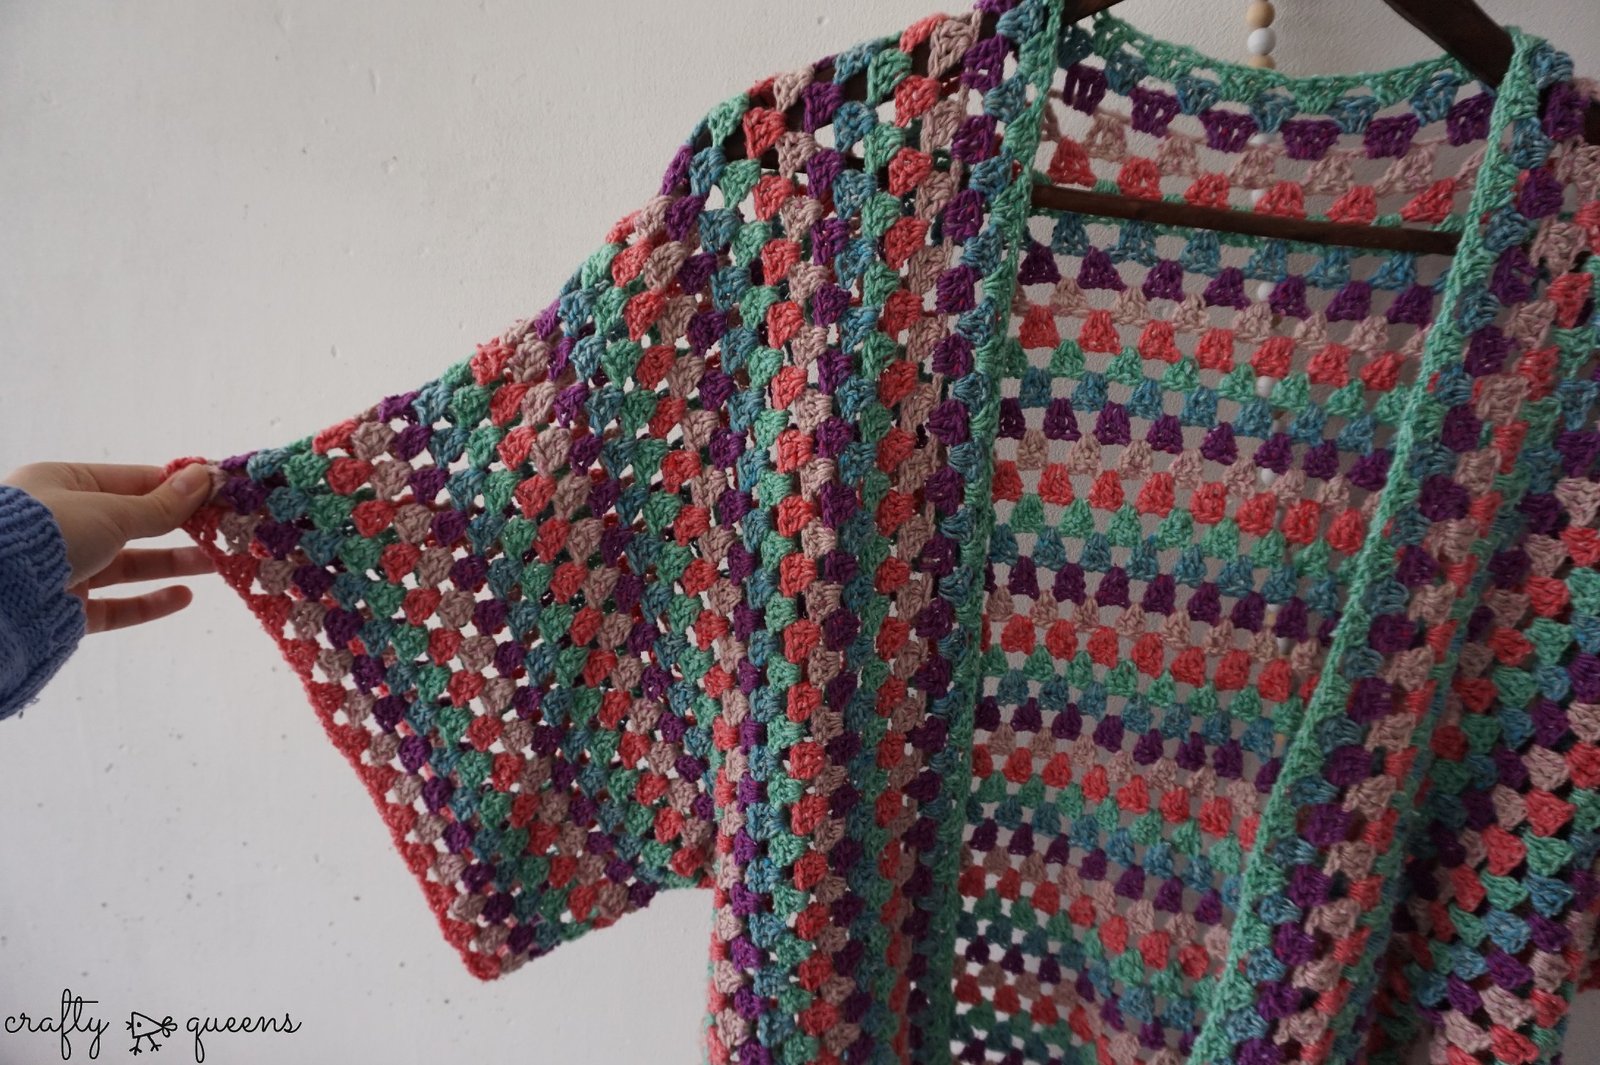
Attach yarn at the same place where you attached the stitch marker. I started on the left side of the cardigan. The easiest way to do so is to attach the yarn with a slip stitch to the side opposite of you. Crochet 3dc into the bottom, and instead of a ch1 do a slip stitch into the ch-1 spaces of the opposite side. Check the picture above for more guidance.
Hecht bij de stekenmarker garen aan, ik begon aan de linkerkant van het vest. Het makkelijkst is om aan de zijde die van je af ligt een halve vaste te haken, en van daaruit begint met schelpjes (3st in dezelfde steek) haken. Gebruik de 3-l openingen langs de onderzijde om je schelpjes in te haken. In plaats van 1l tussen de schelpjes, haak je 1 halve vaste in de 1-l opening tussen de schelpjes langs de bovenzijde. Bekijk bovenstaande foto’s voor meer duidelijkheid.

Do the same on the right side of the cardigan. It looks a bit different, because now the ch- spaces are along the side facing you. I attached the yarn to this side, chained 3, and slip stitched into the opposite side, then I did 1dc into the same spot I attached the yarn. Now you can continue with: *slip stitch to opposite side, 3dc into ch-1 space of side facing you*.
Aan de rechterkant van het vest doe je hetzelfde, maar het ziet er wat anders uit. Bekijk de bovenstaande foto. Hier hechtte ik de draad aan in de zijde die naar je toe ligt, haakte 3 lossen, dan een halve vaste in de tegenoverliggende zijde, en dan 1 stokje in dezelfde opening waar ik had aangehecht. Dan doe je hetzelfde als bij de andere zijde, namelijk 1 halve vaste in de bovenste zijde, 3 stokjes in de onderste zijde, dit kun je nu doen in de lossenopening tussen de schelpjes, zoals je het gewend bent.

To create the sleeves, attach the yarn to a ch-1 space of the armholes, and crochet *3dc, ch1* around. A portion of the round does not have ch-1 spaces for you to crochet into, like you see in the picture above. You’ll have to find places to crochet the 3dc, but it’s not that hard. Just make sure the 3dc stitches are evenly placed.
Nu heb je aan beide zijkanten van het vest een gat voor de mouwen. Hecht je garen in een willekeurige 1-losse opening aan, en haak schelpjes rondom. Zoals je op bovenstaande foto ziet, heb je voor een gedeelte van deze toer geen 1-l openingen om in te haken, maar zie je zijkanten van stokjes en lossenkettingen. Hier zul je zelf de plaatsen moeten vinden waar je de schelpjes in haakt. Zorg ervoor dat er evenveel ruimte zit tussen de schelpjes als voorheen, waar je nog in de lossenopeningen haakte, dan is het makkelijker te bepalen waar de schelpjes moeten komen.
For the Rabbithole Cardigan you can make the sleeves as long as you want, I crocheted for 14 rounds per sleeve. You can fit your cardigan on as you go to make sure you have the correct length. If the sleeves appear slightly ‘stiff’, don’t worry, the yarn will soften up after blocking and it will drape much better. Blocking is done by soaking the cardigan in Eucalan or another gentle wool wash, using a towel to squeeze out most of the water, and laying it to dry flat. No pinning required.
Weave in all of the ends after blocking and voilà, you’ve crocheted a cardigan!!
Haak de mouwen van je Rabbithole Cardigan zo lang als je wilt, ik haakte 14 toeren in totaal per mouw. Je kunt gaandeweg je vest passen om de goede lengte te bepalen. Het kan zijn dat de mouwen nog niet mooi soepel vallen, dit zal goed komen na het blocken. Blocken doe je door kort te weken in Eucalan of ander wolwasmiddel, in een handdoek uit te knijpen en plat te drogen. Je hoeft niets vast te spelden.
Werk na het blocken alle draadjes weg, et voilà, je hebt een vest gehaakt!!
I hope you enjoy the Rabbithole Cardigan pattern! If anything is unclear, please don’t hesitate and ask away in the comment section. If you’ve completed a cardigan with this pattern, I’d love to see it on Facebook or Ravelry! If you share your pictures on Instagram, be sure to tag with #rabbitholecardigan and tag me @newleafdesigns.nl
Ik hoop dat jullie veel plezier hebben met het Rabbithole Cardigan patroon! Mocht er iets niet duidelijk zijn, aarzel dan niet hieronder een vraag te plaatsen. Mocht je een vest hebben gehaakt met dit patroon, dan zou ik het superleuk vinden deze terug te zien op Facebook of Ravelry! Plaats een foto op Instagram met de tag #rabbitholecardigan en tag mij er ook in @newleafdesigns.nl



70 Comments
Wat gaaf! Je kan het zelfs zelf dragen. Zeer creatief en zeker de moeite waard om te bekijken. Ik vind mijn haakpatronen hier http://www.haakpatronen.net misschien interessant om eens naar te kijken!
Dankjewel Daan!
Staat je supermooi! Bedankt voor het patroon 🙂
Your cardigan is beautiful and the directions are very nicely written. Thank you for sharing your pattern!
Wauw, ik vind het vest echt super leuk gelukt. Lekkere vrolijke voorjaarskleurtjes: staat je goed! Dit patroon komt op mijn today lijst (lijstje in het inmiddels niet meer…) Liefs Inge
Really cool pattern. Thank you so much.
Laura in Houston
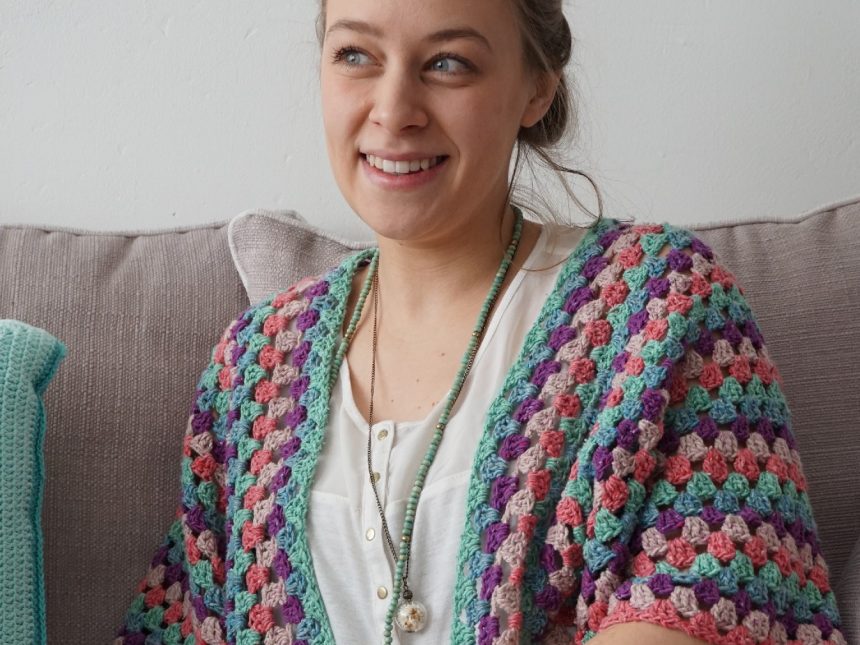
Bedankt voor het mooie patroon! Nog even een vraagje: klopt het dat je voor de nek maar 3 groepjes hebt? Op de foto zie ik er nl 5. En 3 lijkt zo smal.
Hoi Silvia, dankjewel! Klopt, ik heb zelf 5 groepjes van 3 gehaakt maar hij rekte ontzettend uit na het toevoegen van de mouwen. Op de uiteindelijke foto zie je dat ik er aan de binnenkant een paar rijen bij heb gehaakt. Omdat ik jullie gelijk het goede patroon wilde geven heb ik het aangepast 🙂
Bedankt voor je snelle reactie! Dan haak ik vrolijk verder volgens je leuke patroon :))
Word dit geen over si ze. Lijkt me te veel lussen voor maar 40. Wat denk jij ervan
Love it – its simple and looks great 🙂 Thank you so much for sharing.
Hi thanks for this! Do you continue in rounds on the sleeves? If so how did you change colour?
Hi Linda, you’re very welcome! The sleeves are made in closed rounds, not in spirals or continuous rounds. That means you bind off after every round and start a new round with a new colour. Hope this helps!
Thankyou so much !!
Le patron de la veste est vraiment intéressant….merci pour cette belle idée !
[…] had also bought it in gray, and made this cute cardigan based on this pattern (same thing, made some changes since this yarn was thicker than the yarn the pattern calls […]
[…] Här hittar ni beskrivningen (engelska) om ni vill ta en titt. Det är inget direkt mönster utan mer en förklaring till hur hon har gjort. Jag insåg (när jag var nästan klar) att jag skulle bli tvungen att riva upp alltihop för den skulle absolut inte passa mig utan snarare 6-åringen här hemma 😛 […]
Hi – really love this cardigan pattern. I’m wondering what the gauge is for the yarn as it is doubtful I can find it at my local yarn store. I’m not really good at crochet but I belong to a lovely group of knitters and crocheters and I’m sure I’ll be able to get help if I need. In the meantime, I really appreciate you posting this.
Sincerely,
TEMA
Looks great…thank you x
Thank you, Sarah!!
[…] Crafty Queens, blogg, craftyqueens.nl (mönster på engelska). Direktlänk till mönstret finns här. Mönstret är relativt enkelt och koftan kan göras hur stor eller liten man vill. Jag valde att […]
I can’t stop looking at that cute pillow next to you on the sofa! Did you make that? And if so, have you shared the pattern?
Thank you! I have made the pattern, it is in the final stages of checking right now 😉 It will be a paid pattern added to my Ravelry shop soon!
Dc inEnglish = double crochet… komt niet voor in de vertaling
Beste Manou, Double Crochet is Stokje in het Nederlands en staat er wel bij in de vertaling van de gebruikte afkortingen.
Hi. I don’t get the pattern as it starts with the neckline, dc 3x in a ch and skip 3 3x is noted, it seems to small, but when I look at the picture sample, there are 5x 3dc stiches between the corners. But if I do this, the 21 x 3dc skip 3 ch doesn’t round up. Then 195 ch is to little required. I am a advanced crocheter but I don’t get this simple pattern. Can anyone tell me what I don’t see.
Hi Carina, the sample from the picture has 5 groups of 3dc, correct. However, the sample turned out to be too big, the neckline would stretch a lot. For the sample in the picture I crocheted a few rows on the other side of the cast-on chain, but for the pattern I decided to correct it, so that the pattern states that there are only 3 groups of 3dc in the back of the neck, which should be fine. Hope this helps!
I would love to do this cardi – but, I am having trouble downloading the English version – is there a link for English pattern please!??
Hello Donna, thank you for your comment! This pattern is not available for download, the English instructions are given in light grey italics text.
You didn’t state the size for this pattern or how to adjust for different sizes.
Hello Barbara, you can make this cardigan to fit your size. As it states in the pattern, repeat rows 2 and 3 of the front until the shorter side is as wide as your shoulder width.
I would like to make this cardigan a little longer, which means a longer starting chain. Could you give recommendations on how to do that. This is a beautiful cardigan. It is very striking. 😀
Ana
Hello Ana! Thank you for your comment and your question, customizing the pattern to your desired fit is highly encouraged, so of course I’d like to help. To add a scallop on each side, you would need to add 2×4 sts to the starting chain: 1 repeat is 4 sts, and you’d need an equal addition of stitches on each side, so the minimum to increase is 8 chain stitches. If you’d like to add 4 scallops on each side, you’d need to add 4x 8ch sts to the starting chain. Then of course in row 1 you’d need to change the number of repeats ( in the pattern it states repeat 21 times), just add the number of added scallops to that. So if you added 4 scallops on each side, repeat for 25 times instead of 21. I hope this isn’t too much information at once! Please feel free to comment if you have any more questions.
This is lovely. I can’t wait to try it!
Thank you Lori!
I had to write and thank you for this lovely pattern. I have been searching for some time and this is exactly what I was looking for. It is beautiful… and I know I will make it a few times. Thank you once again, its gorgeous.
Are you using English or American terms for the crochet? I ask as normally I would do granny stripe using English treble not DC. I love the colours of your cardigan, simple but effective
Hi! This pattern (and all of my other patterns) use American crochet terminology, so yes, the DC in the pattern is the same as a UK treble.
Thank you for sharing this amazing pattern. Approximately what size is the standards pattern? Would love to try and make one.
Hi! This pattern is customizeable for your size, there is no standard size. Just give it a try 🙂
Hello, tried to do the math and when I add the 21+21+5 I get 47 which, I multiply by four but I get 188 not 195, like you can please help me to understand it? thank you .
Hello Cindy! I’ll get back to you as soon as possible, I’m in the middle of a craft fair and don’t have my pattern notes with me. Thank you for your patience.
Hi trying to get the pattern why have still not to the end of second row is possible I have made a. mistake can you help
Hi Beverley, I’m not sure I understand your question. Could you be more specific?
Hi, i have a question. I want to make this cardigan, but I’m tall and want it longer. I did my beginning chain, and kept adding until it was as long as I wanted. It is 280 chains. How do I figure in the stitches for the neck?
Hi Betty, for the neck I suggest leaving 3-5 groups of 3dc in between the two corners. Each group of 3dc takes up 3 chain stitches, so you’ll have to allow 9-15 chains for the neck.
Happy crocheting!
x Carmen
Hi, I love this pattern and I would like to try it, but I have a question. Maybe this is obvious but I am relatively new to crochet. Are we supposed to turn after each row or are we supposed to cut the yarn and go back to the beginning to keep working on the same side? I hope that makes sense. Thank you!
Hi Sara, so sorry for my late reply! Yes, for the body you are turning after each row, for the sleeve you are working in rounds. Technically you could also start each row from the same side if you’re cutting the yarn, but granny stripe stitch has a tendency to go askew when only worked on the right side, turning after each row avoids that 🙂 Happy crocheting!
Hi was just wondering would this work with 100 per cent cotton double knitting wool
Thanks
Hi! Yes it would work! 100% cotton is heavier so it will give a lovely drape to the fabric
Oh thanks for your reply
I have done 10 rows so far
Can you tell me how long the sides should measure approximately
Just looks rather long
Thanks
Gill
Hello Gillian, my cardigan is 53cm long, the sides (not including the sleeves) are 17cm long. Happy crocheting!
Oh thanks for the response
Hi Carmen,
I’m loving your design. I’m up to the sleeve part of the pattern and have crocheted the first round doing three double crochet, one chain. However, I’m now having a problem figuring out how to join in the round.
Can you help me out please.
Thank you, Susie
Hello Susie, thank you for your message! You join in the round by crocheting a slip stitch into the beginning of the round, this will be in the top of the first double crochet (or 3rd chain st if you started with a ch-3). Happy crocheting!
Carmen
Hi Carmen,
Thank you so much for the quick reply. I’m all set now. I can’t wait to wear (after blocking) my Rabbithole cardigan!
Susie
Hello Carmen,
I was just wondering if you have a written PDF version of this pattern I could purchase? I love the way it is set out on the webpage but it isn’t very practical for me to follow using the laptop and internet all the time.
I absolutely love this pattern and cannot wait to try it out!
Steph
Hi i have question will you do video tutorial on cardigan rabbithole pattern thank you
Hello Maria,
At the moment I have no plans for a video tutorial on the Rabbithole cardigan. If you’re interested in tutorial videos, be sure to follow my Patreon page, as they are the first to know if there’s a new video: http://www.patreon.com/newleafdesigns.
Happy crocheting!
Carmen
Thank you for this pattern it will make a perfect work sweater, easy on and off, many of the people I work with, wrap small blankets around their shoulders, this is so much better, I also have a friend that needs her clothing adapted due to special needs,
This will work perfect for her with the easy changes.
Thank you so much, I’m so glad you like the pattern 🙂
I really love this Crochet Rabbithole Cardigan, but for some reason, now that I’m at the part where I should be attaching the sleeves I’m stumped as to how to proceed. I think I am experiencing crocheter’s block and need help. Do I mark for the sleeves, then connect the sides and then add the sleeves? Connecting the sides looks hard too, and I know it’s probably easy and once I figure it out, I’ll be like “duh, why couldn’t I get that?” but for now it’s a mental block.
Earlier today I commented that I had a mental block on how to connect the sides and add the sleeves. Suddenly when I re-read the pattern, it all made sense and I’ve finished it completely. I added 3 rows of clusters to the bottom to make it a little longer, and a button for closure as requested by the person I made it for. It’s quite a fun pattern and I’ll be making one for myself next! Thank you so much for sharing!
Dear Carmen,
Please could you help. In rows 2 and 3 (repeat) at the beginning of the pattern, do I ch1, between all shells, or not at the corners which shape the neckline.
Thank you,
Mary
Hi Mary, thank you for your message! Yes, ch1 in between all the shells, except in the corners where you crochet ch2.
Happy crafting!
Carmen
Hi Carmen wondered if you could help please. Am making cardigan but would like to make back stripes go down rather then across, like the front. Its more slimming lol 🙂
How many stitches do you think I would need to make piece to attach to back of neck do you think are needed?
Have you played around with arms too so stripes could go downwards?
I am using Boho Spirit festival yarn so colourful 🙂
Many thanks
Anne
Hi Anne, thank you for your comment! I appreciate that you want to make the Rabbithole Cardigan, but I can’t help you with the calculations as you’re basically asking me to write up a whole new pattern. You are of course free to experiment with customization yourself. Happy making! x Carmen
Hello,
I want to make this amazing cardigan longer. What is your advice for making the starting chain longer? Does the increase have to be an even or odd numbered stitches or does it not matter? At the current 195 starting number, it’s a bit too short.
Thank you so much for your response.
Hello,
I want to make this amazing cardigan longer. What is your advice for making the starting chain longer? Does the increase have to be an even or odd numbered stitches or does it not matter? At the current 195 starting number, it’s a bit too short.
Thank you so much for your response.
Is this one size fits all? I can’t see any adjustments for size and I’m a larger girl.