
Selfstriping Yarns
Working with selfstriping yarns is so much fun! Whether you’re knitting or crocheting, making socks or other items, selfstriping yarns always add a whole new level of enjoyment. I especially like knitting socks with selfstriping yarns. It keeps me motivated – “ooh, look how many stripes I’ve knit today!” – and I also just really love the look of striped socks. For most projects though, one ball will not be enough. So how do you add a new ball of selfstriping yarn? Do you just carry on knitting or do you find the same stripe colour to continue?
Curious about the socks in the picture above? They are my Tornado Toes socks, socks without heels!
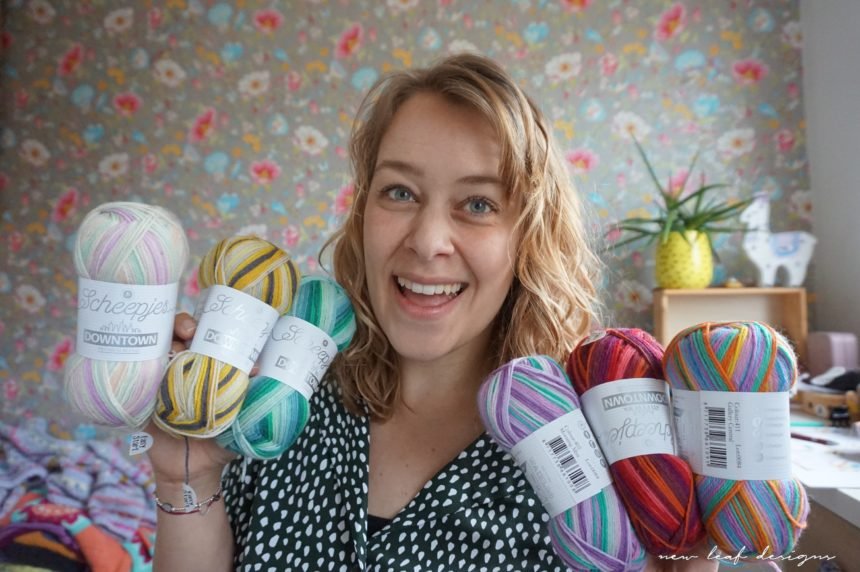
Scheepjes Downtown
Scheepjes has released their own selfstriping yarn this year: Downtown! The fiber content is 75% merino and 25% nylon, which means it’s soft enough for baby knits, but also sturdy enough for socks. Head on over to the Scheepjes website to find shops in your area, or shop via the affiliate links below.
Shop at KnitKat Shop at Caro’s Atelier
How to change to a new ball
When you run out of yarn and you want to start a new ball to continue your work, you have two options with selfstriping yarns. Either you find the exact same colour in the stripe repeat, or you just carry on with the next stripe. This is a matter of personal preference of course, and I prefer to keep the striping sequence exactly the same. In this blogpost, I will share some tips and tricks for doing that.
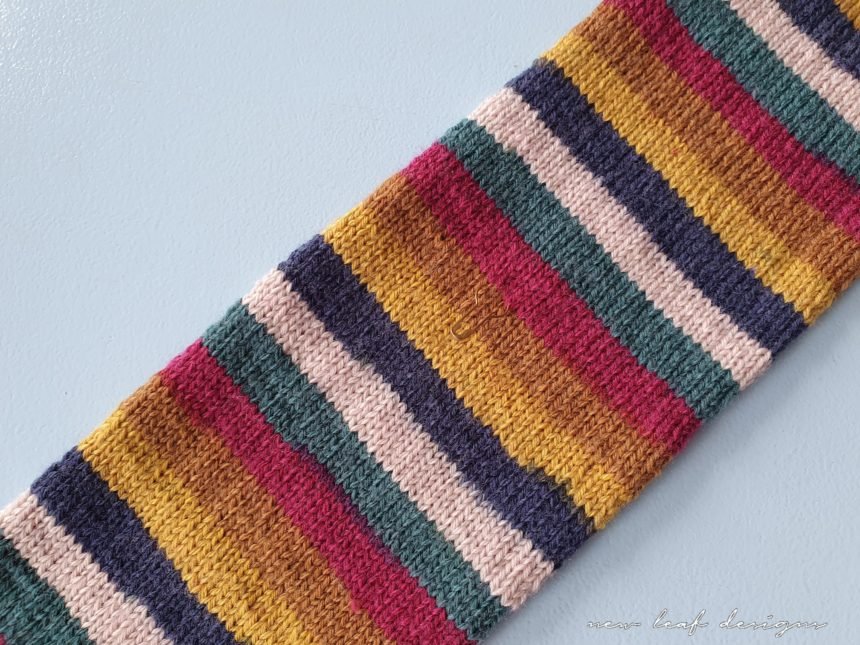
Step 1: Determine the stripe sequence
The first step is looking at your work at determining the stripe sequence. For the sock I am knitting with Scheepjes Downtown [see picture above], it has a sequence of six stripes: red, green, white, blue, yellow, and brown. So when we add in the new ball, please note that it has the same stripe sequence. The ball will have two strands: the outer and the inner strand. Beware that ONE of these will have the stripe sequence in reverse, so you want to pick the correct one that will continue your stripe sequence as it is now.
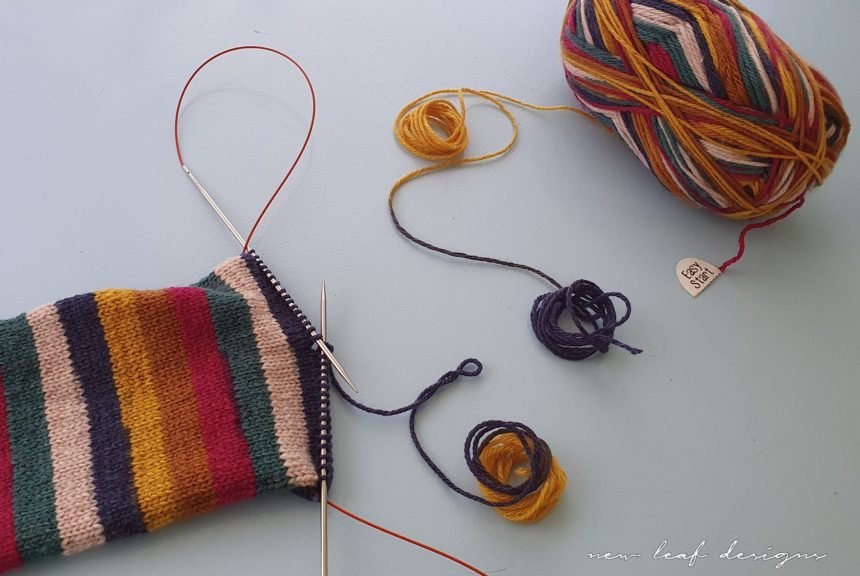
Step 2: Look at your last colour change
When you are running out of selfstriping yarn, look at the very last colour change. In my sock, the last colour change of the current ball is from blue to yellow.
Step 3: Locate the same colour change in your new ball
For the new ball, I am going to look for the same colour change: blue to yellow. Luckily, this is the very first colour change I see at the outside of the ball. Please do remember: if this colourchange would be going from yellow to blue, it would be in reverse! In that case, I should have started with the inner thread coming from the inside of the yarn ball.
Sometimes you will need to wind off some yarn in order to get to the matching colour change. No need to worry about wasting this yarn, because you can still use it for knitting an afterthought heel, darning your sock later on, or save it for scrappy socks!

Step 4: Work up to the colour change and switch to new ball
Knit or crochet until the exact point of the colour change, then continue with the new ball starting from that colour change. So I am knitting the last stitch from my current ball in blue, then I’m knitting the first stitch from the new ball in yellow.
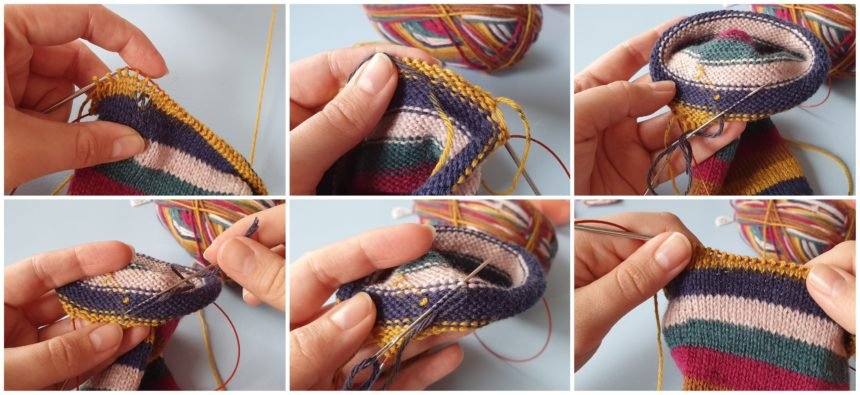
Step 5: Weave in ends
At the colour change you might have some loose stitches [see top left pic in collage above]. To remedy this, tie both ends ONCE (called a ‘half knot’), and then weave in both ends. You might want to trim the ends to about 15cm/6in before weaving them in.
Weave in your ends on the wrong side of your work. I use a sharp sewing needle and go through the purl bumps, making sure I’m splitting the strands. This way, the ends will not show on the right side. In the collage above, you can see I’m making two ‘turns’ while weaving the strand in. I go in the one direction, then in the other, then back in the first direction.
This is the weaving in ends method I use 99% of the time, and it’s virtually invisible from the right side (see last pic collage).
Whatever you do, don’t do this:
Whether you are keeping the colour sequence intact, or simply continuing to work starting from the next stripe, you want to make sure you are changing to a new ball at a colour change. If you were to change in the middle of a stripe, this MAY result in that stripe being either narrower or wider. For example, say I ran out of yarn in the middle of a green stripe. I could just find the next green bit in my new ball and start knitting there. Chances are though, that this green stripe will be double as wide as the other stripes in my project.


No Comment