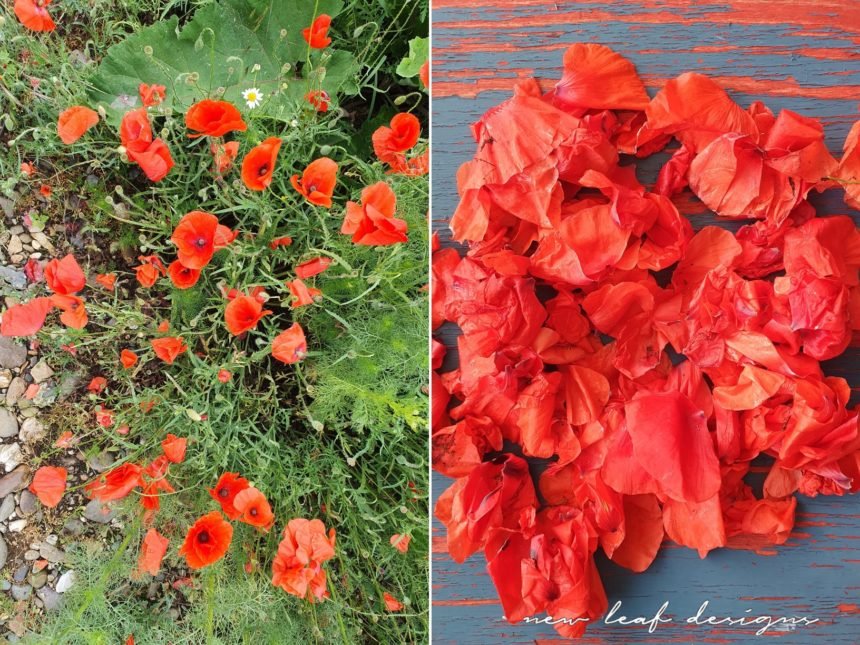
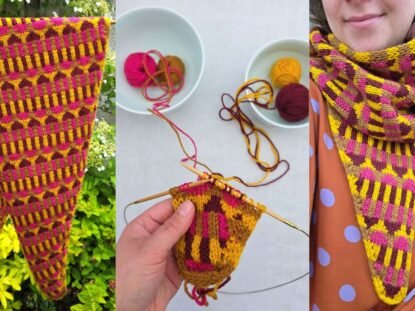
Today I’ve got something fun to share! The past few weeks I’ve been doing some small crafty experiments that actually have nothing to do with knitting or crocheting. In fact, I got some wrist pains from crocheting lately, so I decided to put my needles down for a while and get creative in other ways. With… poppy flower petals! I found a poppy ink recipe by Sonja Tara, from Atelier Sun Sen. The recipe is in Dutch, but perhaps you’ll be able to read it with a translator. Find it here. The first step is collecting petals, and I was lucky to find lots of poppies around. They usually bloom for about a day, so you’ll find the petals on the ground soon enough. Since they only bloom for such a short while I thought it was a waste to pick the petals off the flowers, so instead I got them off the ground.
Vandaag heb ik toch iets leuks met je te delen, ik kan bijna niet wachten! Allemaal leuke experimentjes die ik de laatste tijd heb uitgevoerd. Ik kreeg namelijk wat last van mijn polsen van het haken en breien, dus heb ik de naalden even neergelegd en ben ik op andere manieren creatief bezig geweest. En dan wel met… klaproosblaadjes! Dit alles naar aanleiding van een idee van Sonja Tara, van Atelier Sun Sen. Ze deelde een recept voor klaproos inkt, die vind je hier. Eerste stap: blaadjes verzamelen. Klaprozen bloeiden volop, en ze bloeien meestal maar voor één dag. Dat betekent ook dat er al veel blaadjes op de grond liggen, dus die heb ik verzameld. Juist omdat ze maar zo kort bloeien vind ik het zo zonde om de blaadjes direct van de bloem te plukken. Die laat ik mooi nog even staan.

Sonja’s recipe is for solar dye, so using the sunlight to extract dye from the petals. It was very sunny a few weeks ago, so I poured some water over the petals and left them out in the sun, in a closed jam jar. Even after a couple hours, the water had turned a deep red! After a while, I put the petals and the water in a stainless steel pot and heated it slightly on the stove to extract even more dye. Don’t let the water come to a boil, or you’ll lose some of the saturation. When the petals are completely pale, strain the liquid and continue to simmer the liquid only. I added a spoon of citric acid, which modifies the dye so that it becomes a bright red. Sonja lists some other modifiers in her recipe, such as baking soda, vinegar, pot ash and iron.
Het recept van Sonja is voor ‘solar dye’, dus om met behulp van de zon verf te maken. Nu was het een paar weekjes geleden érg zonnig en warm, dus deed ik de klaproosblaadjes overgoten met water in een glazen potje met deksel erop en liet dat in de zon staan. Al na een paar uur zag ik dat het water dieprood geworden was, spannend! Daarna deed ik de blaadjes met het water in een roestvrijstalen pan, en verwarmde ze op het fornuis om er nog meer kleur uit te trekken. Let hierbij op dat je de vloeistof niet laat koken, want dan gaat er wat van de kleur verloren. Als de blaadjes helemaal bleek zijn zeef je ze eruit. Toen deed ik er nog een schepje citroenzuur bij, wat een felrode kleur geeft. In het eerder genoemde recept kun je vinden wat je allemaal nog bij de verf kunt toevoegen, zodat je steeds andere kleurtjes krijgt.
DIY #1 – Dyeing yarn with poppy ink
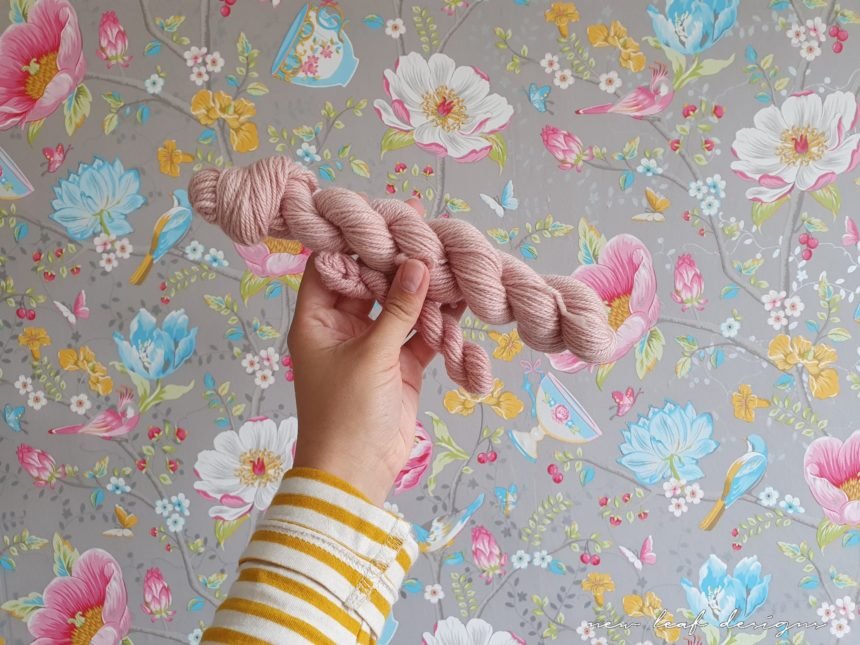
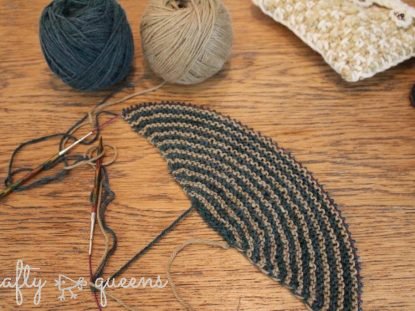
Because it would still take a while for the liquid to reduce to a thick ink, I thought to put in a skein of yarn in the meantime. I hadn’t thought about what I could use the ink for and was worrying that I would make way too many, but nicely dyed yarn on the other hand I’ll always have a use for! I used a 80% wool and 20% ramie yarn. The high wool content usually provides for a nice and rich colour, but this time it turned out quite a bit paler than I had expected. The dye liquid in the pot was fire engine red, but after squeezing the water out of the skein, it left a soft pink. I still like it very much, it’s just a surprise! Another funny thing happened when I left the yarn out to dry on my wooden garden fence. As the water was dripping out of the yarn, it left a big red stain on the fence! Whoopsie, haha. Luckily it came off easily enough with a bit of cleaning.
Omdat het nog wel even zou duren voordat de vloeistof ver genoeg inkookte tot een dikke inkt, dacht ik: ik doe er een strengetje garen bij in de tussentijd! Ik wist ook nog helemaal niet wat ik met de inkt zou gaan doen, maar met mooi geverfd garen kan ik altijd wel wat 😉 Het garen wat ik gebruikte is 80% wol en 20% ramie, en is non-superwash. Het grote percentage wol betekent dat dit garen meestal de kleur heel goed opneemt. Toch werd het deze keer heel licht, hoewel de vloeistof in de pan vuurrood was. Ach, dat gebeurt! Verrassing 🙂 Ik vind de lichtroze kleur alsnog heel mooi geworden. Wat ook heel grappig was: nadat ik het garen uit de pan nam, kneep ik wat van het vocht eruit en liet ik het buiten aan ons houten tuinhek drogen. Het garen druppelde op het tuinhek, en na een tijdje was daar een grote rode vlek ontstaan! Daar had ik even paniek van, haha, maar gelukkig ging het met wat schrobben er goed af. Opletten waar de inkt terecht komt dus!
DIY #2 – Painting

And now for the ink! I reduced the red liquid down so that only the bottom of the pot was covered in ink. Pour it into a glass jar very carefully, and then wait until it’s cooled off. Sonja’s recipe says to add some cloves to keep it from spoiling. And voilà, the ink is ready to use!
En toen… de inkt! Ik had de rode vloeistof helemaal laten inkoken, en alleen nog de bodem van de pan was bedekt met inkt. Héél voorzichtig gieten in een glazen potje, en dan wachten tot het afgekoeld is. Op aanraden van Sonja deed ik er een kruidnagel in om de bederving tegen te gaan. En voilà, de inkt was klaar om te gebruiken!
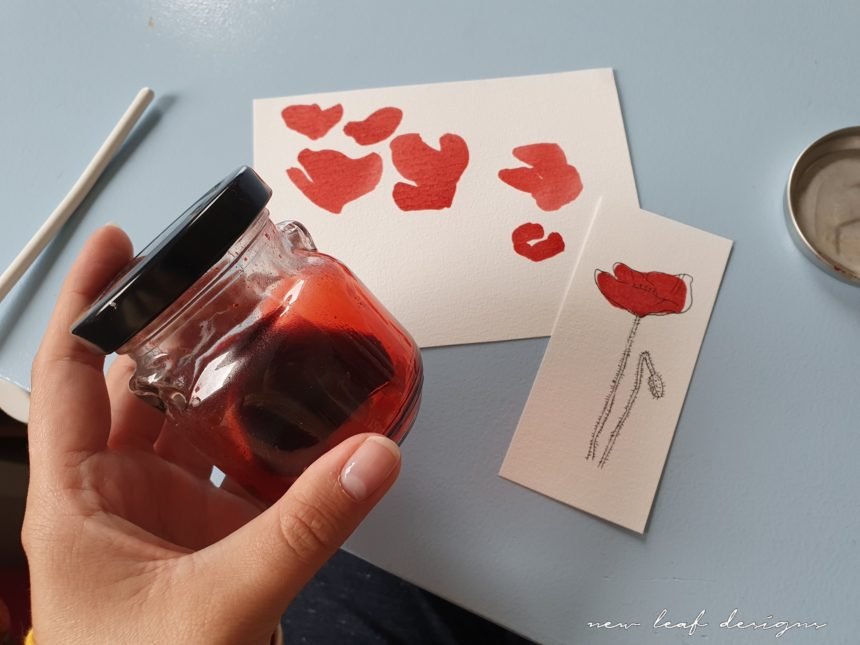
And yes, very original I know, I painted some poppies with the poppy ink! I just painted some ‘splotches’ onto watercolour paper, waited a day for it to dry, and then drew the outline of the poppy with a black pen. So much fun to do.
Ik bedacht, heel origineel, om klaprozen te gaan tekenen met de klaproosinkt! Ik verfde wat ‘vlekjes’ op aquarelpapier, wachtte een dag tot het droog was, en tekende dan met een zwarte pen de rest van de klaproos. Zo grappig om te doen.
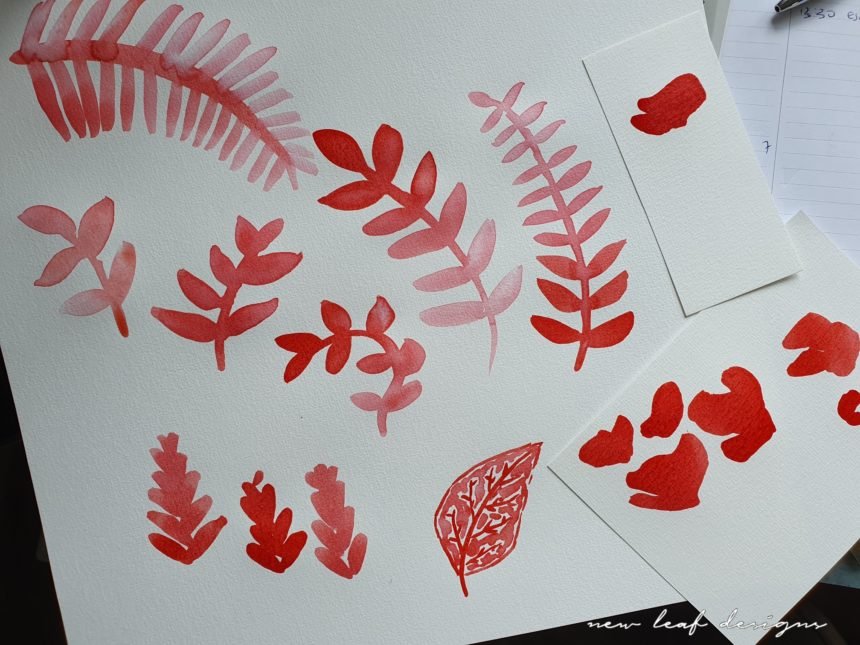
The ink has a kind of watercolour effect. For the branches I was painting, I would use pure ink for the first petal, then add a drop of water for each following petal. It created a very nice gradient effect!
De inkt heeft een soort aquarelverf effect. Voor het eerste blaadje van een takje gebruikte ik vaak pure inkt, en voor elk volgend blaadje deed ik er een druppel water bij. Je zag de inkt heel mooi vloeien over het papier en zo kan je heel mooi een ‘donker-naar-licht’ effect maken.
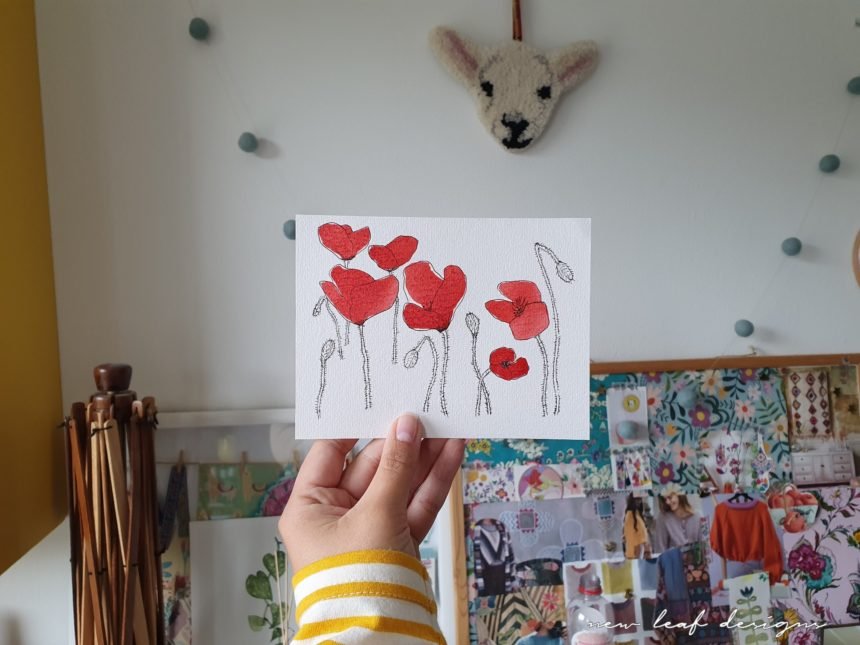 I’m actually quite proud of these poppies if I do say so myself, I think I’m going to do this more often!
Ik ben best wel een beetje trots op de klaproosjes, dit ga ik vaker doen!
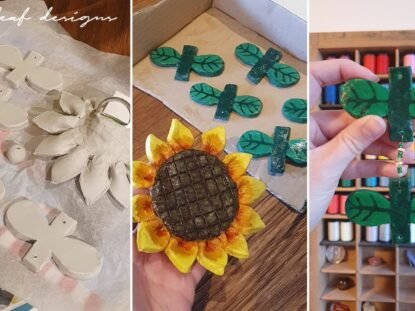
DIY #3 – Bathbombs!
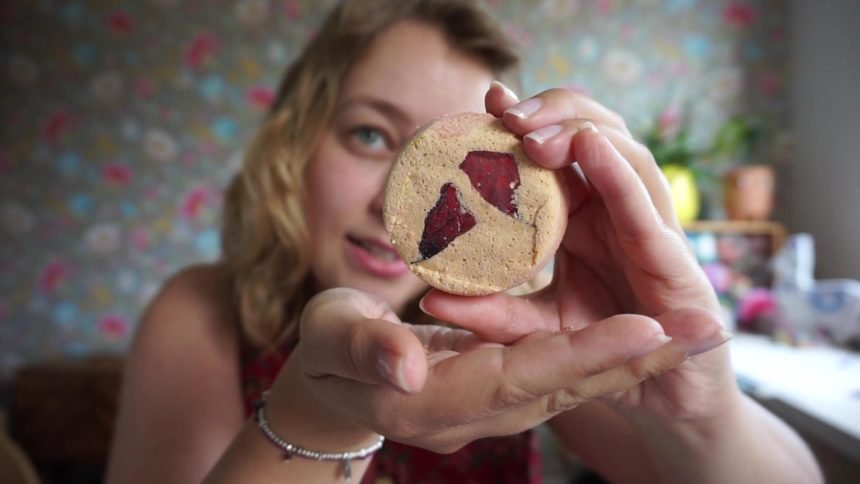
And then I made something completely different.. bath bombs! I read somewhere that you can easily make bath bombs from citric acid, baking soda and cornstarch, and it was a lot of fun making them. I still have to try them out to see if the recipe was any good, if they fizzle and float nicely instead of sinking to the bottom of the tub I’ll make sure to share the recipe here. I used food dyes and some flower petals from my garden. You can see some poppy petals on the one I’m holding in the photo! If you want to see the other ones I made, be sure to watch this podcast episode where I talk about them in more detail.
En toen even iets heel anders: badbruisballen! Ik las ergens dat je van citroenzuur, baksoda en maizena heel gemakkelijk zelf badbruisballen kan maken, en dat leek me wel heel erg leuk. Ik moet ze nog uittesten, en als ze goed bruisen en niet naar de bodem zinken zal ik het recept waarschijnlijk ook hier delen. Ik gebruikte wat levensmiddelenkleurstof, en ook wat bloemblaadjes uit eigen tuin waaronder ook klaproosblaadjes. Leuk he, wat je allemaal met bloemblaadjes kan doen? Als je de bruistabletjes beter wilt zien, bekijk dan deze podcast aflevering waar ik er in veel meer detail over praat.
If you want to receive updates whenever I write a new blogpost, a very easy way is to subscribe via Bloglovin. See you next time!
Als je een email wilt ontvangen wanneer ik een nieuwe blog schrijf, kun je je heel gemakkelijk abonneren via Bloglovin. Tot de volgende keer!


No Comment