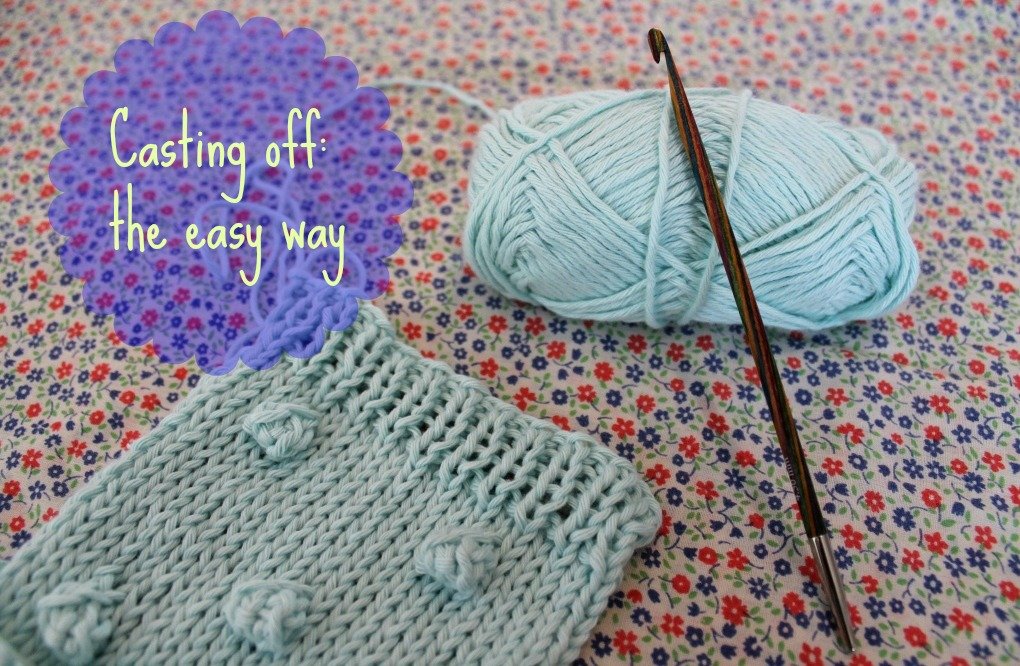
 Vandaag heb ik weer een gloednieuwe tutorial voor jullie, dit keer een van mijn bestbewaarde brei-geheimpjes! Ik gebruik altijd een speciale techniek om breiwerk af te kanten, en sinds ik dit probeerde wil ik niets anders meer. Laat ik jullie eerst een vraag stellen: Heb jij ook wel eens je hele werk afgekant, en kom je er dan achter dat je veel te strak hebt afgekant? Blijf dan zeker kijken! Hoe vaak heb ik het vroeger niet meegemaakt dat de ene kant van mijn breiwerk smaller was dan de andere kant, en dat alleen maar omdat ik altijd te strak afkantte. Een oplossing was om met grotere naalden te werken, maar ik vond afkanten alsnog erg lastig. De steken gleden steeds van mijn naalden af en uiteindelijk pakte ik steeds met mijn vingers de steken vast om ze af te halen. Dat duurde wel erg lang! Totdat ik het afkanten met een haaknaald probeerde: afkanten was nog nooit zo’n makkelijk klusje geweest!
I’ve got a brand new tutorial for you today! This is one of my best kept knitting secrets, and I can’t wait to share it with you! Let me first ask you a question: have you ever cast off too tightly? I sure have! Casting off (or binding off, it’s the same thing), has never been one of my favourite things. The stitches kept sliding off my needles when I wanted to slip one stitch over the other, it was very fiddly! And when I finally finished, I found out that I’ve been casting off too tightly and as a result the cast-on side was wider than the cast-off side.. For a while I tried larger needles for casting off, but it was still fiddly. Until I tried casting off with a crochet hook! It has never been easier to cast off, and here’s how!
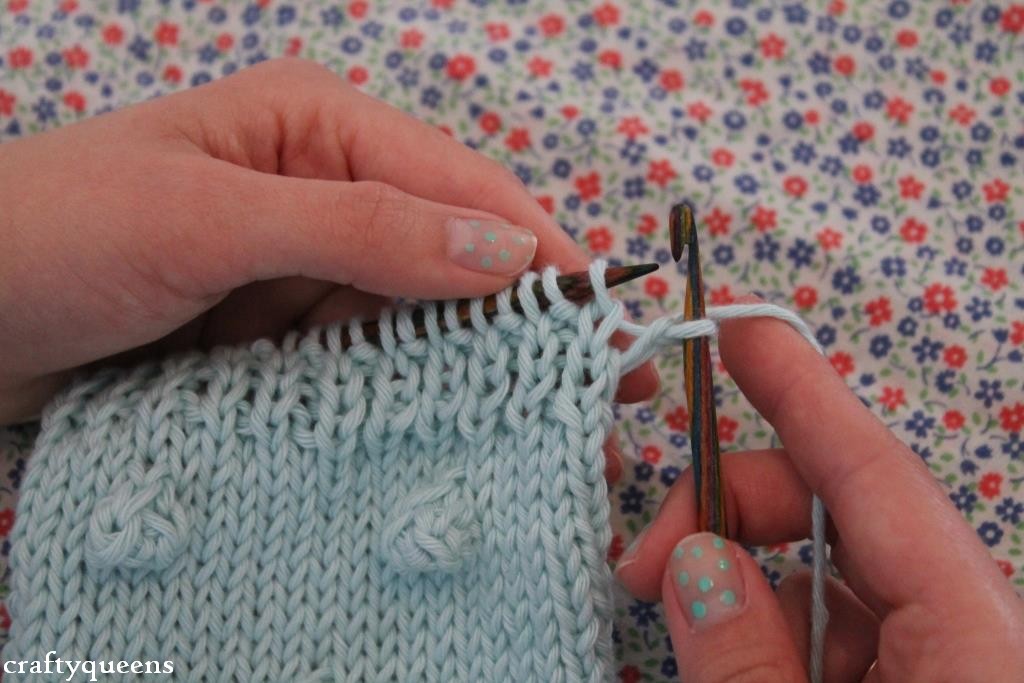 Het is het makkelijkst als je een haaknaald pakt die een maat groter is dan je breinaalden, zo voorkom je dat je strak afkant. Ik laat het hier zien hoe je boordsteek afkant, zo zie je meteen hoe je recht en averecht afkant. De eerste steek heb ik hier gewoon afgehaald, omdat ik de eerste steek niet brei. Zo krijg je namelijk een mooiere zijkant van je werk. Als je deze techniek nog niet toepast in je werk is dat ook niet erg, dan sla je deze stap over.
Casting off is the easiest if you pick a crochet hook that’s slightly larger than your needles, to prevent a tight cast off. Today I’m showing you how to cast off ribbing, this way you’ll see the technique for both the knit and purl stitch. I never knit the first stitch, so I just slipped it of the left needle. If you don’t use this technique yet, don’t worry! Just skip this step.
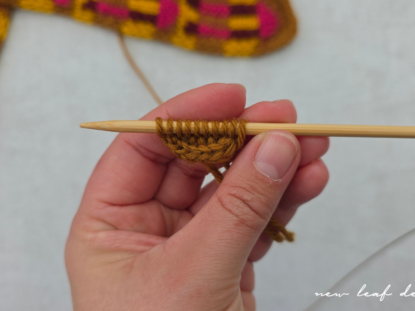
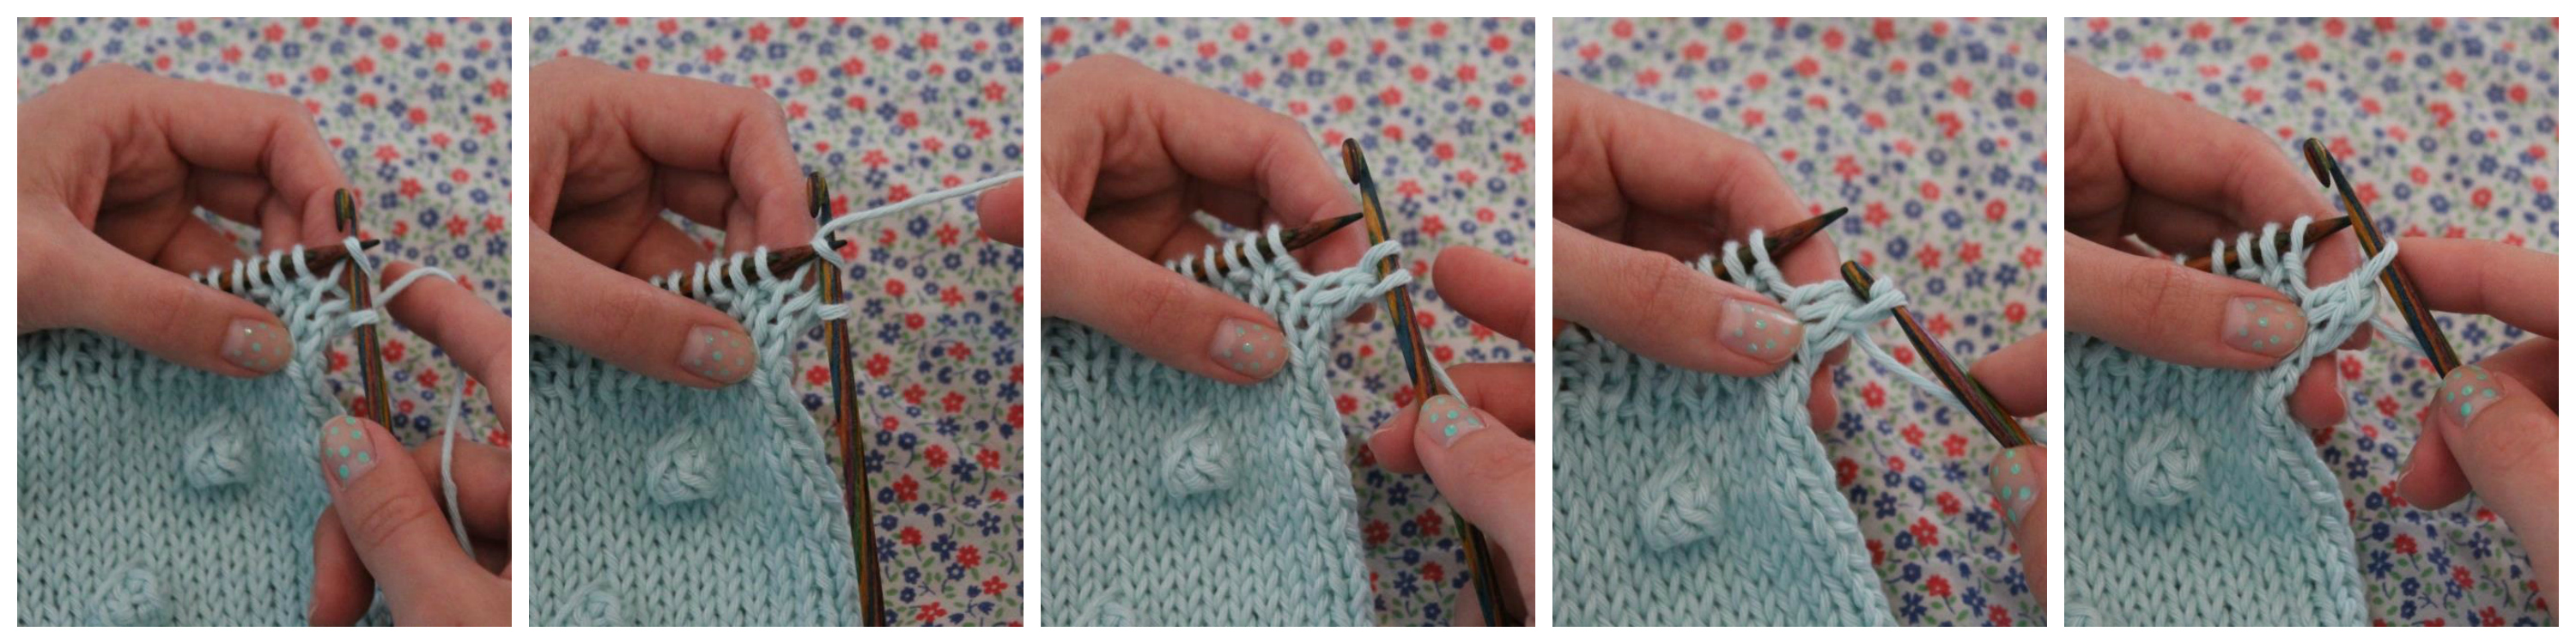 Eerst laat ik jullie zien hoe je een rechte steek afkant. Klik op de foto om deze te vergroten. Met je garen aan de achterkant van je werk, steek je de haaknaald in de volgende steek (of dus de eerste steek als je deze niet hebt afgehaald), en je breit deze recht. Op dit moment had ik al twee steken op mijn rechternaald (foto 3), maar als je de eerste steek niet hebt afgehaald zul je er nog een van je linkernaald moeten breien. Let hierbij op of dat recht of averecht moet. Als je dan eenmaal twee steken op je rechternaald hebt, haal je makkelijk met je haaknaald de linkersteek door de rechtersteek heen, zoals op foto 4 hierboven. Nu heb je nog één steek op je rechternaald.
First I’ll show you how to cast off a knit stitch. Click on the picture above to enlarge it. Holding your yarn at the back of your work, insert the crochet hook into the next stitch (or into your first stitch if you didn’t slip if off the needle like I did). Knit it like you would do with a knitting needle. At this moment, I already had two stitches on my right-hand needle (pic 3). If you don’t then continue and knit one more (pay attention if it needs to be knit or purl). When you do have two stitches on your right needle, use the crochet hook to pass the left stitch under the right stitch (pic 4). You have one stitch left on your right needle.
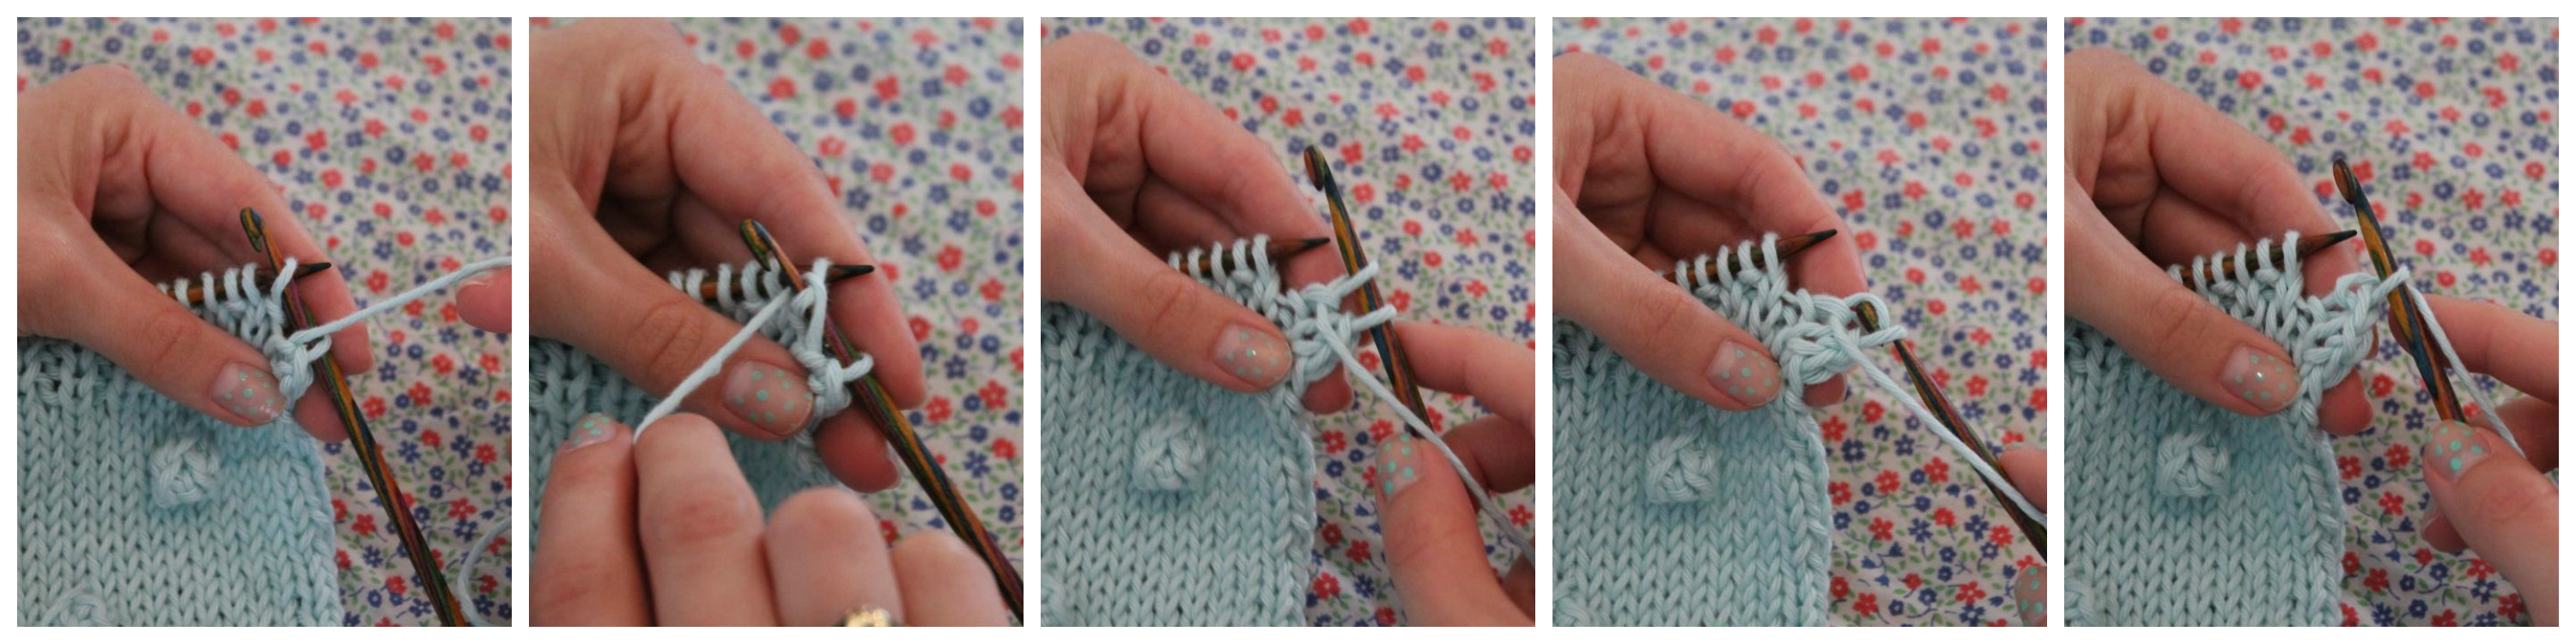 Voor een averechte steek heb je het garen aan de voorkant van je werk. Werk de volgende steek precies zoals je een steek averecht zou breien: van rechts naar links insteken, omslaan, doorhalen en af laten gaan. Nu heb je weer twee steken op je rechternaald. Haal weer de linkersteek met behulp van de haaknaald door de rechtersteek heen. Bonustip voor als je met een boordsteek bezig bent: terwijl je overgaat van foto 4 naar foto 5 ga je met je haaknaald onder je garen door, zodat het garen weer aan de achterkant van je werk is om de volgende steek recht te breien. Ik weet dat deze stap heel moeilijk is uit te leggen, dus heb ik speciaal voor jullie mijn eerste haak instructiefilmpje gemaakt! Er is nog geen geluid bij en het is een superkort filmpje, maar het is een begin!
For casting of a purl stitch, you’ll need the yarn in front of your work. Work the next stitch just like you would purl a stitch: insert in stitch from right to left, yarnover, pass loop through and slip the loop off the left needle. Now you have two stitches on your right needle again. Use the crochet hook to pass the left loop through the right loop. Bonus tip: if you’re actually casting off a 1×1 rib stitch: when you pass the left loop through the right loop (pic 4), try to push your working yarn to the back of your work with the crochet hook. This is very hard to describe to you, so I made my very first instruction video! No sound yet since I’m terrified of hearing back my own voice, so you’ll have to do with the visuals for now!
[youtube http://www.youtube.com/watch?v=0bmmWnT4iSY?rel=0&w=560&h=315]
Ik hoop dat de video voor iedereen duidelijk is, maar jullie kunnen me natuurlijk nog vragen stellen als jullie wat meer uitleg willen. Oh, en als je je afvraagt welke naalden dit zijn: ze heten KnitPro naalden, en ik ben lang niet de enige fan! Superglad, lichtgewicht en een lust voor het oog.. Ik heb zelf de rondbreinaalden-set gekocht die ik samen met mijn moeder deel, en de haaknaald kreeg ik cadeau. Het zijn mijn lievelingsnaalden tot nu toe!
I hope the video is clear for everyone. Play it as many times as you want, and if you’d like me to explain something in more detail, don’t hesitate to ask! Oh, and if you were wondering where I got those lovely needles, they are KnitPro Symphonie needles. I have the interchangeable circular needle-set myself, and a single crochet hook. The needles are remarkably smooth, light and so gorgeous! 
 Ga door met alle steken afkanten totdat je bij de laatste steek bent. Knip nu de draad naar je bol garen af, en trek zo lang aan de laatste lus totdat de hele draad hierdoorheen is gegaan. Alweer iets wat lastig is om te omschrijven, maar het gaat vanzelf goed. Werk je draadeindjes dan mooi in, en klaar ben je! Je merkt dat het boord nu echt elastisch is nu je losjes hebt afgekant, geen te strakke randen meer aan jouw breiprojectjes in het vervolg! Succes, en laat het me weten als jullie nog vragen hebben!
Keep casting off the stitches until you reach the end. Cut your yarn and pull the last loop until the yarn end has passed through. Again, this is something that’s quite hard to describe, but just keep pulling the loop softly until you can’t anymore, and it will be allright. Weave in the ends, and you’re done! You’ll notice that the ribbing is nice and elastic this time, no more tight edges to your knitting projects! Good luck and if you have any questions, let me know in the comments!
Mis geen enkele blogposts meer, volg mijn blog door op een van de knoppen onder aan deze pagina te klikken!
Don’t miss any more crafty ideas and tips, subscribe using one of the buttons below!


6 Comments
Wow dit helpt! Super duidelijk en mooi gedaan! Liefs Lisanne
draad en praat…
Dankjewel Lisanne! 🙂 Fijn dat het duidelijk is, ik vind het soms zo lastig uit te leggen! xx
Hé, dat is handig zeg! Ga ik zeker doen als ik m’n volgende breiwerk ga afkanten!
Dankjewel Helma! Ik doe zelf niet anders meer, met 2 breinaalden zat ik altijd zo te stuntelen.. hihi 🙂
This is just brilliant. Thankyou,
[…] Kant daarna alle steken af. Voor een makkelijke manier hoe je in boordsteek kan afkanten, kun je hier kijken. Switch to 5mm needles and knit 6 rounds of 1×1 ribbing. Cast off all stitches. For an […]