The Danish version of this pattern can be downloaded as a PDF file here.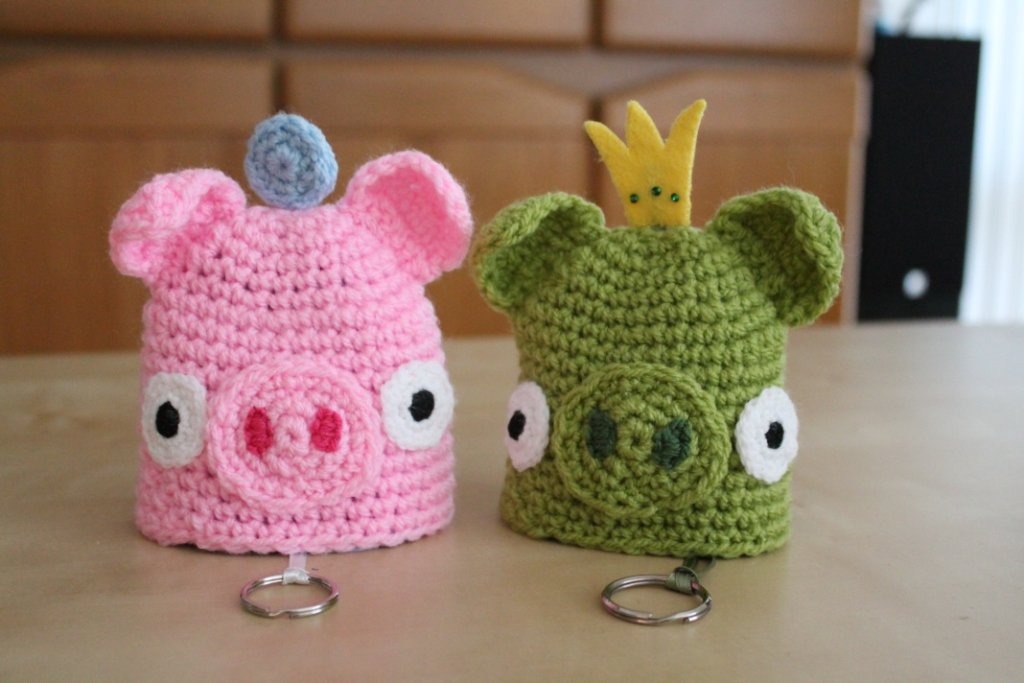
Met dit schattige varkentje ben je je sleutels nooit meer kwijt! Je kunt ze makkelijk vinden in je tas. Het is ook handig als je sleutels er hetzelfde uitzien. Ik heb bijvoorbeeld de sleutel voor de voordeur in een ander hoesje dan de achterdeursleutel, heel handig! Eerder plaatste ik al het patroon voor de Totoro Sleutelhoes. En nu kun je ook zelf dit varkentje maken. Kies zelf of je hem gewoon roze maakt, of groen, net zo als de varkentjes uit Angry Birds!
This cute piggy helps you find your keys every time! You’ll never have to turn your bag inside out again since it’s really easy to find. Do you have keys that look the same but open different doors? Just attach them to different key cozies! I do this with my keys, it’s really convenient 🙂
A while ago I posted the tutorial for the Totoro key cozy, and now he has two more friends to play with. Make your own piggy! I made one pink, and one green like the piggies from Angry Birds. My dad and brother just love that one, could be a nice father’s day gift!
Begin met het lijfje te haken. Het patroon is hetzelfde als het lijfje van Totoro, en je kunt het hier vinden. Hier is ook het patroon voor de ogen te vinden, en de aanwijzingen hoe je de voering moet maken.
Start with crocheting the body. This is the same as Totoro’s body, and you can find the pattern here, as well as the pattern for the eyes, and the instructions for the lining.
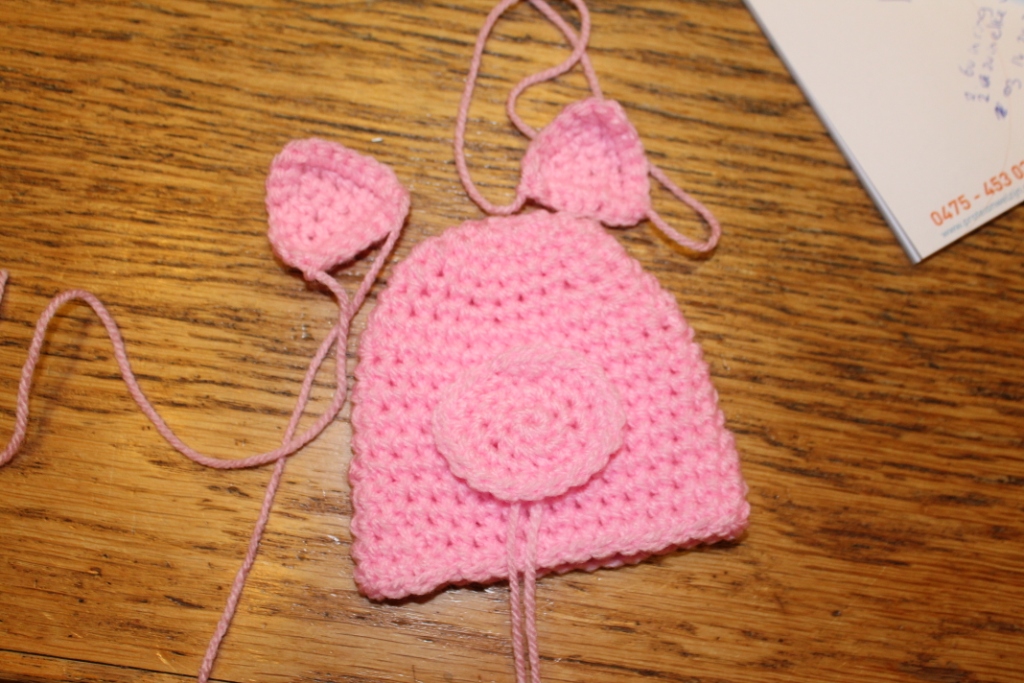
De oren en de neus zijn ook heel makkelijk te maken:
Oor (x2)
1. 7l
2. keer om, 6v
3. 1l, 2vsh, 4v
4. 1l, 2vsh, 3v
5. 1l, 2vsh, 2v
6. 1l, 2vsh, 1v
7. 1l, 2vsh
Haak nu een rand vasten om het oor heen. Sluit met een halve vaste. De zijde waar de draadeindes aan weerskanten zitten, is de onderkant. Naai ze hoog op het lijfje vast.
Neus (in gesloten rondes)
1. 6v in ring
2. 2v in elke v
3. 1v, 2v, 2v, 1v, 1hv, 1hv, 1v, 2v, 2v, 1v, 1hv, 1hv
4. 1v (x3), 2v, 1v (x7), 2v, 1v tot eind. Sluiten met hv.
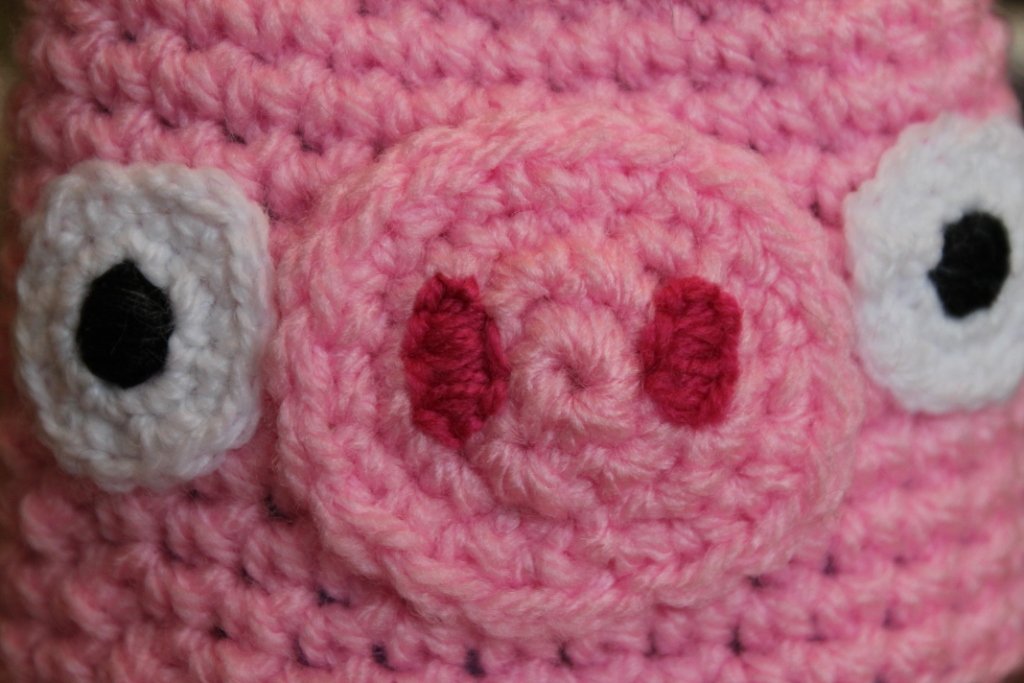
Als je de neus wat te groot vindt, kun je ook ervoor kiezen toer 4 niet te doen. Gebruik dan garen in een tint donkerder om de neusgaten te borduren. Eerst borduur je de omtrek, en daarna vul je het in van links naar rechts.
The ears and the nose are really easy to make, here’s how:
Ear (x2)
1. ch7
2. Turn around, 6sc
3. ch1, sc2tog, 4sc
4. ch1, sc2tog, 3sc
5. ch1, sc2tog, 2sc
6. ch1, sc2tog, 1sc
7. ch1, sc2tog
Crochet an edge of single crochet around the ear. The yarn ends are on the bottom side. Sew the ears to the top of the head.
Nose (in joined rounds)
1. 6sc in magic ring
2. 2sc in every sc
3. 1sc, 2sc, 2sc, 1sc, 1sl st, 1sl st, 1sc, 2sc, 2sc, 1sc, 1sl st, 1sl st.
4. 1sc (x3), 2sc, 1sc (x7), 2sc, 1sc till end. Close with sl st.
If you think the nose is too big, stop at the end of the 3rd row.
Use yarn a shade darker to embroider the holes. Embroider the outline first, then fill it in.
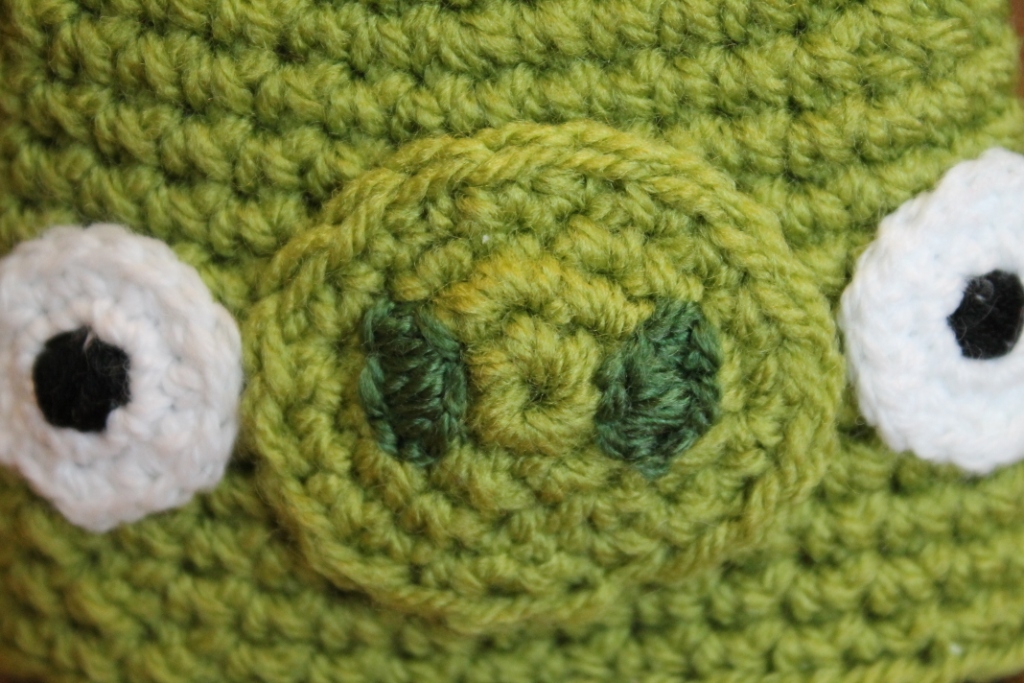
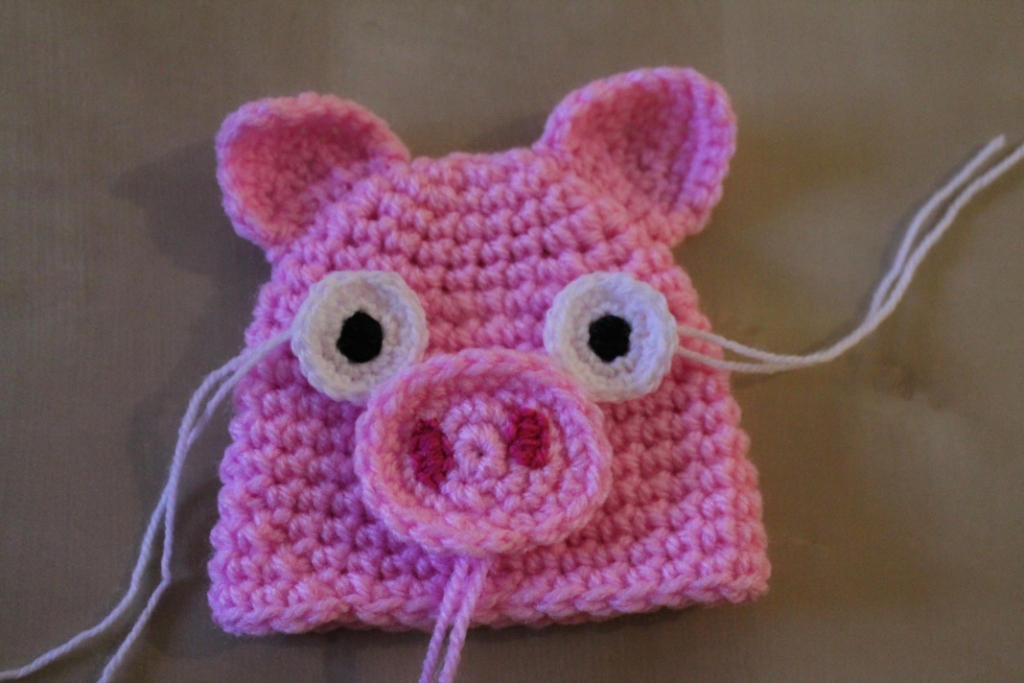
Oke, als je alle delen af hebt, is het tijd om te kijken hoe je alles op het lijfje gaat bevestigen. Het maakt veel uit waar je de ogen plaatst! Ze worden eigenlijk standaard rechts en links schuin boven de neus geplaatst, maar ik vind het vaak leuker om ze wat lager te plaatsen. Zo ziet je beestje er opeens veel schattiger (en ook wat minder slim) uit, haha 🙂 Kijk maar op de onderste foto’s.
When you finish all of the parts, it’s time to think where to attach them to the body. The place of the eyes is very important! It can change the entire expression. They are usually placed somewhere above the nose, but I find it cuter to place them on each side of the nose. It makes whatever your crafting look a bit dumb, and so cute! Take a look:


Als je hebt gekozen waar je alles vastnaait, speld je het vast en naai je alle delen vast. Ik naaide eerst de neus en daarna de ogen. Dit vond ik het makkelijkst.
Choose the expression you want your piggy to have, and pin the parts into place. I sewed the nose on first, and then the eyes.
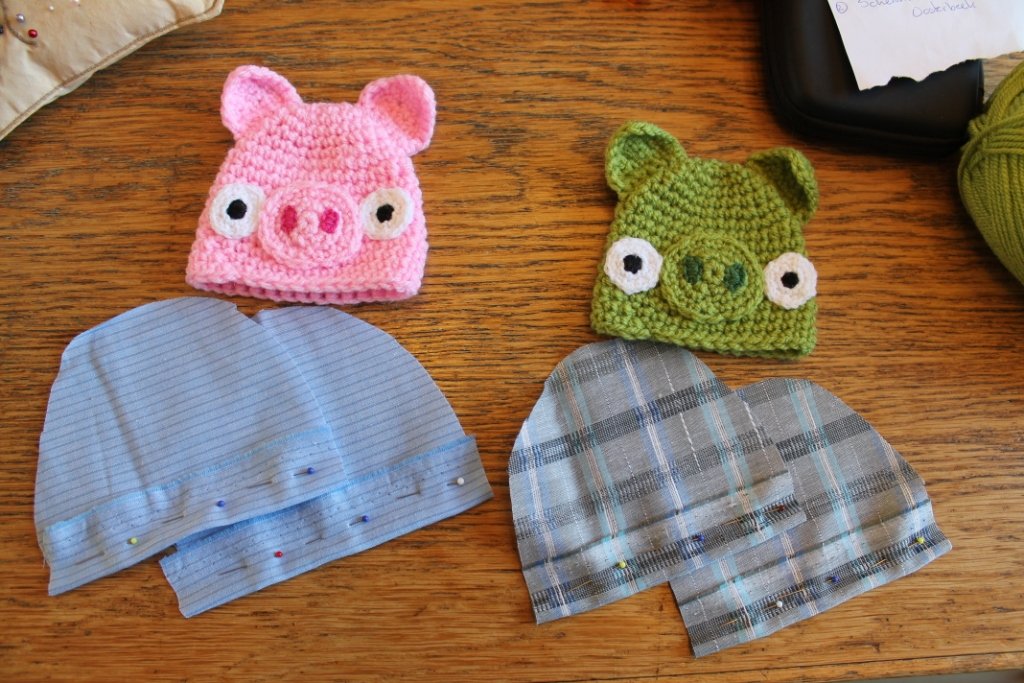
Tijd om de voering te maken. Kijk bij de Totoro sleutelhoes voor de instructies. Je kunt er ook voor kiezen om het niet te doen, maar het zorgt ervoor dat het varkentje zijn vorm niet verliest, en ik vind het er veel mooier en verzorgder uitzien. En je bent er zo mee klaar!
Line your key cozy. You can find the instructions in the Totoro key cozy tutorial. You don’t have to line it, but I think it makes a big difference! It secures the shape of whatever you’re crafting, and I think it makes it look ten times nicer. Lining things is much easier than I thought, actually.
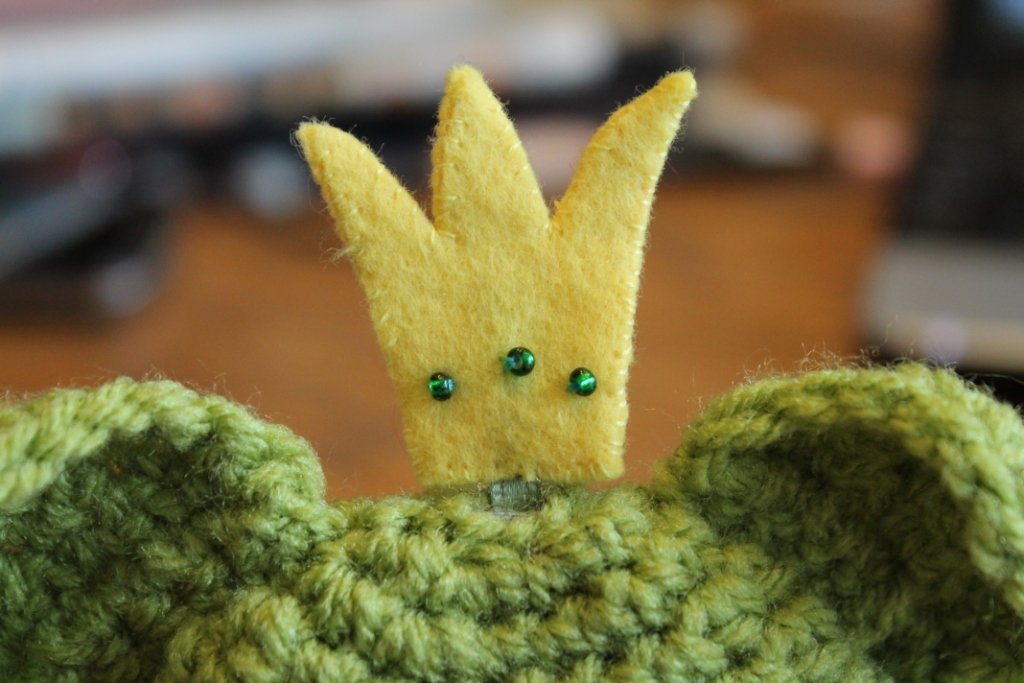
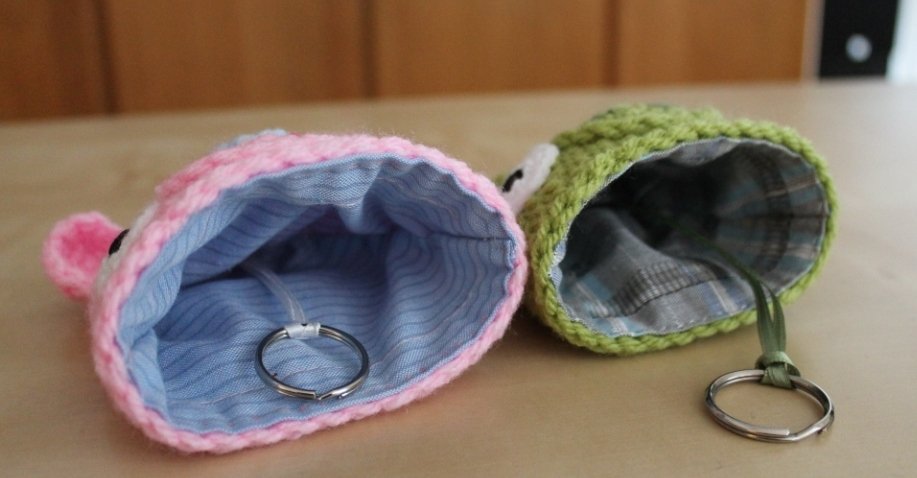
Bevestig de sleutelring aan een lintje, en bedenk iets leuks voor aan het andere eind. Bedenk wel dat je het lintje al door het gat heen haalt voordat je dat erop naait. Ik heb bij het groene varkentje gekozen voor een kroontje, omdat de Angry Birds varkentjes dat wel eens op hebben. Maar je kunt natuurlijk ook twee gehaakte rondjes maken zoals ik bij het roze varkentje heb gemaakt. Zorg dat het lintje er goed aan vast zit, of je dat nou met naald en draad doet of met superlijm.
Attach the keyring to some string, and let the other end come out of the gap at the top of the head. Make something nice and small to attach to the other end. I made a crown for the Angry Bird piggy, because they wear those sometimes in the game. But you could make anything you want, really. Just make sure everything’s attached, whether you do this with thread or glue.

Ze zijn klaar! Wat een schattige varkentjes 🙂 Welk dier zal ik de volgende keer maken? Een olifant, hondje of misschien een vis? Laat me weten wat je ervan vindt en vergeet niet je eigen foto’s op de Ravelry pagina te plaatsen! Ik vind het echt heel leuk om te zien wat jullie zelf hebben gemaakt. Happy Crafting!
And they’re done! Yay 🙂 This pattern is so versatile, I wonder what kind of animal I’ll make next time.. An elephant, doggy or maybe a fish? So many options! I hope you guys enjoy this pattern. If you make one of these, please post pictures on the Ravelry page! Happy Crafting 😉
*Dit patroon en de producten die je ermee maakt mogen zonder mijn toestemming niet worden gekopieerd of voor commerciële doeleinden worden gebruikt. * Dankjewel!
*Please don´t reproduce or sell this pattern or the end products without my consent*. Thank you!


5 Comments
Hallo Carmen, ik ben begonnen aan dit schattige sleutelhoesje, maar ik begrijp toer 3 niet. Ik heb 12 v. gehaakt (toer 2) en als ik de derde toer letterlijk zou nemen heb ik 17 v. nodig. Maar doe ik de 2v in 1 v, dan heb ik 13 v. nodig. Kan jij me helpen alsjeblieft? Hartelijke groet, Elly Geenjaar
Hoi Elly, je hebt volkomen gelijk! Sorry, ik had het foutje niet gezien. De vijfde steek (1v) heb ik dubbel getypt, die hoort niet in het rijtje. Ik heb het meteen aangepast! Groetjes, Carmen
geweldig bedankt, maar ik moet je opnieuw lastig vallen,ik haak al meer dan 40 jaar maar dit ben ik nog niet tegengekomen.Ik wilde vanavond met het lijfje beginnen en dat klopte ook al niet. Het moest (net als de neus) in gesloten rondes gehaakt worden, maar je begint met 7 lossen sluiten met hv. en dan in de 2e ronde moet ik vasten haken in de vasten. Welke? Het zijn toch echt lossen. Ik hoop dat ik je zondagavond niet verpest, anders geef je morgen maar antwoord, het heeft geen haast. Alvast bedankt Elly
[…] This delightful piggy key cozy crafted by Carmen Jorissen is not just eye-catching; it’s also designed to keep your keys safe and sound. The pattern focuses on creating the adorable features such as the face, snout, ears, and eyes! Don’t miss out on this cute project. You can find more information and the pattern here. […]
[…] by Carmen Jorissen, these adorable pig key cosies ensure that your keys never get lost. Featuring a charming design […]