
Scheepjes KAL 2022 Tips and Tricks
The long awaited Tips and Tricks information is finally here! In this blogpost, you will find all you need to know to prepare for the Scheepjes KAL 2022 starting on February 23rd. Basically, you will need two things: the Tips and Tricks document which you can download from Scheepjes right here. You can also find this document in the Scheepjes Facebook Group. The Tips and Tricks document also contains the instructions for the gauge swatch, so you’ll want to have this handy. Secondly, I have prepared a video where I knit the gauge swatch together with you, and in this video you can see all of the techniques used in the KAL project. Please find the video below in this blogpost.
De lang verwachte KAL Tips en Tricks zijn er dan eindelijk! In deze blogpost vind je alles om je voor te bereiden op de Scheepjes KAL 2022, die op 23 februari van start gaat. In principe heb je twee dingen nodig: ten eerste het Tips en Tricks document dat je hier kunt downloaden van de Scheepjes website. Je kunt dit document ook vinden in de Scheepjes Facebook Groep. In het Tips en Tricks document vind je onder andere het patroon voor het proeflapje, dus je wilt dit zeker bij de hand hebben. Ten tweede heb ik een video gemaakt waarin ik het proeflapje met je mee brei, en je gaandeweg alle technieken laat zien die tijdens de KAL aan bod komen. Je vind de video ook in deze blogpost.
Is dit de eerste keer dat je van de Scheepjes KAL 2022 hoort en wil je graag meer weten? Lees dan deze blogpost.
Scheepjes KAL yarn packs
Are you still looking for an official yarn kit? Many Scheepjes retailers including Wool Warehouse still have packs available. *Affiliate link
Zoek je nog naar een officiële garenkit? Veel Scheepjes retailers, bijvoorbeeld Wool Warehouse, hebben nog pakketten beschikbaar. *Affiliate link

English Video
Nederlandse Video
Gauge Swatch | Proeflapje
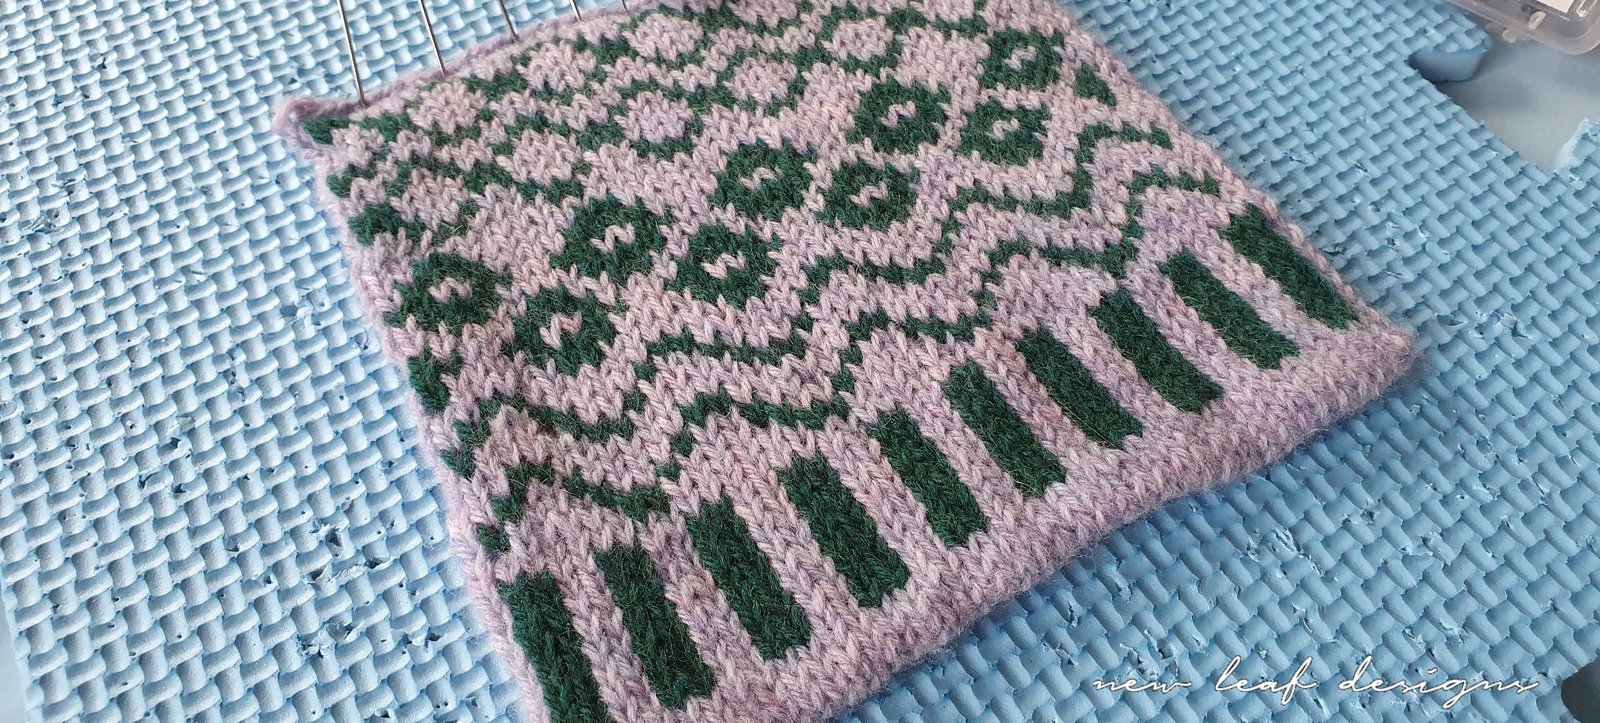
Please find the written instructions and chart for the gauge swatch in the Tips and Tricks Document, so you can follow along with the video. The gauge for the KAL cushions is: 29 sts and 34 rounds measure 10x10cm / 4x4in. Please do check that you reach this gauge, as it is important to ensure that you won’t run out of yarn. It is possible that you will need a different needle size to get this gauge.
Vind de instructies en het schema voor het proeflapje in het Tips en Tricks Document, zodat je met de video mee kan breien. De stekenverhouding voor de KAL kussens is: 29 stn en 34 toeren meten 10 x 10cm. Probeer alsjeblieft deze stekenverhouding te bereiken, als je een andere stekenverhouding hebt kan het zijn dat je niet genoeg garen hebt. Het is mogelijk dat je hiervoor een andere naalddikte moet gebruiken.
Knitting Style | Breistijl
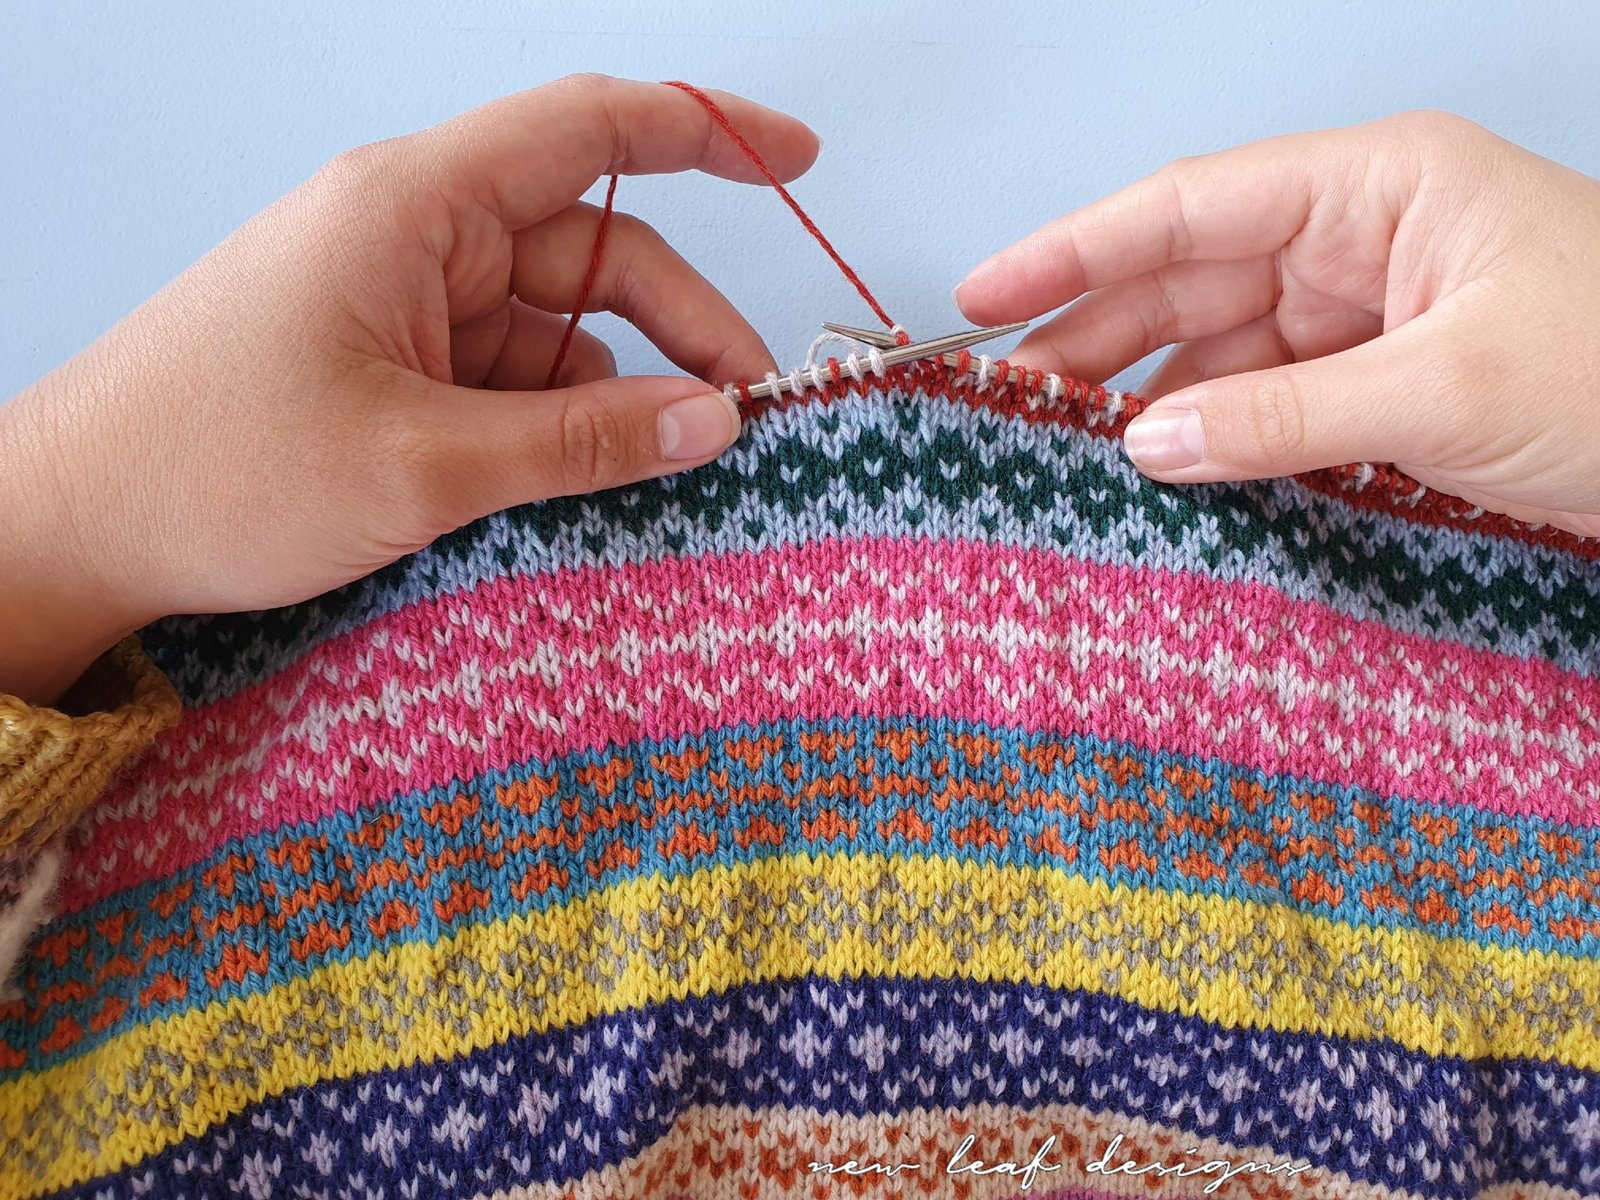
Whether you’re used to English style knitting or continental style, or perhaps both, I’ve got you covered! In the video shown above, I’m showing you how to knit colourwork when using both hands, as well as holding both yarns in only your left or only your right hand.
Of je nu gewend bent aan de Engelse breistijl met het garen in de rechterhand, of continentaal breien met het garen in de linkerhand, of wellicht wel beide, dat komt allemaal aan bod in de video hierboven.
Extra tips
- As a general rule for swatching, you swatch on the same needles that you are going to use for your project. Not just in terms of needle size, but also needle material. Wooden needles give a different gauge than metal needles. Similarly, make your gauge swatch in the same way as you would knit your actual project. We will be knitting the cushion covers in the round, so our swatch is also knit in the round.
- I recommend knitting on two separate circular needles. For the gauge swatch this isn’t technically necessary, but it’s nice to practice for the cushion covers. If you want to knit on one long circular, I recommend having a circular needle of 150cm length for the cushion covers.
- If your first couple rounds of stockinette – before the colourwork starts – look much looser than the colourwork, you can choose to reknit on 2.25mm/2.5mm needles from the start, and switch to 3mm when you get to the colourwork.
- The colourwork charts shown throughout in this Knit-a-long are read bottom to top, right to left.
- For the swatch and the cushion covers, two stitches on either side will be knit in the background colour. This is clear to see in the charts, but I want to emphasize it because it can be easy to forget.
Nog meer tips
- Bij het breien van je proeflapje gebruik je altijd dezelfde naalden als voor je daadwerkelijke project. En dan bedoel ik niet alleen de maat van de naald, maar ook het materiaal. Op houten naalden krijg je een ander resultaat dan op metalen naalden bijvoorbeeld, dus brei je proeflapje echt op exact dezelfde naalden als de kussens.
- Ik raad aan om met twee rondbreinaalden te breien. Voor het proeflapje is dit niet strikt noodzakelijk, maar het is juist wel handig om er al mee te oefenen voordat je met de kussens aan de slag gaat. Als je liever op één lange rondbreinaald breit, raad ik aan om er een te gebruiken van 150cm lengte voor de kussens.
- Als je eerste paar toeren tricotsteek – vóór het kleurwerk begint – veel losser lijken dan het kleurwerk, dan kun je dit opnieuw breien met 2,25mm of 2,5mm naalden. Zodra je met het kleurwerk begint brei je verder op je 3mm naalden.
- De kleurwerk schema’s die we gebruiken tijdens de Knit-a-long lees je altijd van onder naar boven en van rechts naar links.
- Voor het proeflapje en de kussens brei je telkens 2 steken aan elke zijkant in de achtergrondkleur. Deze steken staan goed aangegeven in de kleurschema’s, maar omdat je het gemakkelijk vergeet wil ik het nog even aanstippen.
Share your swatch | Deel je proeflapje
Share your swatch in the International Scheepjes Facebook Group and join in all of the KAL chatter!
Deel je eigen proeflapje in de Nederlandse Facebook Groep van Scheepjes en klets mee over de KAL!


4 Comments
Kleuren B en F??
Niet kleur A, waarvan we 150 gram hebben en maar 110 gebruiken??
Hoi Simone, de meeste kits bevatten slechts 110 gram van Kleur A, dus je hebt geluk! Je kunt prima kleur A gebruiken in dit geval.
Dank je wel voor je fijne uitleg en filmpje. Super top.
Dank je wel voor je fijne uitleg en filmpje. Super top.!