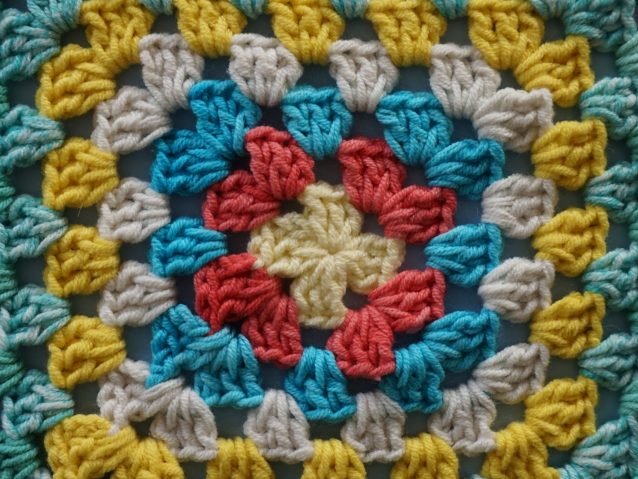
Usually, when it comes to patterns, I will post the English translation below the Dutch ones. Because this tutorial has a lot of pictures, I’ll post the English and the Dutch both directly under the pictures.
Granny squares zijn er in alle soorten en maten. Het zijn gehaakte vierkantjes, die je rij voor rij groter maakt. Je ziet er vaak grote spreien van. Ik had tot vandaag nog nooit een granny square gehaakt, maar ik vond dat het tijd was om ermee te beginnen! Ik zeg niet dat ik ooit zo’n gigantische sprei ga maken, dat is namelijk ontzettend veel werk, vooral als je elke rij in een andere kleur haakt. Het meeste werk is niet het haken van de vierkanten, maar het inweven van alle draadeinden. Weet dus waaraan je begint als je zo’n kleed haakt! Om het wat gemakkelijker te maken, kun je de draadjes tijdens het haken al een beetje inweven. Maar dat komt later, eerst de basics!
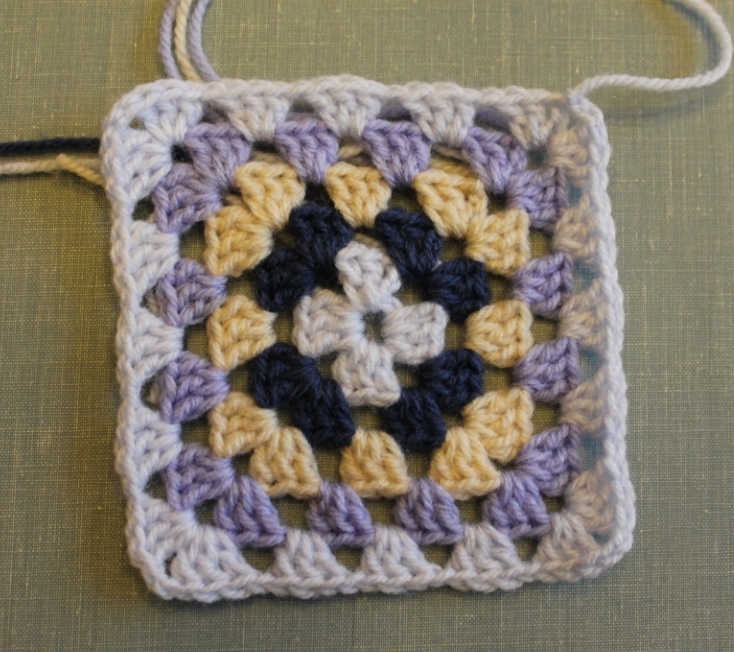
Granny Squares come in all shapes and sizes. They are crocheted squares, made by adding row after row. To this day, I had never crocheted a granny square, but I found it fairly easy to do, I’m excited to make more! I’ve seen a lot of people crocheting complete afghans using dozens of granny squares. They are lovely, but be warned: it’s a huge amount of work, and by that I don’t even mean the crocheting! If you use a different color for every row, weaving in the ends alone will take hours. To make things easier though, you can weave in the ends as you go. But I’ll show you that later, but first: the basic steps!
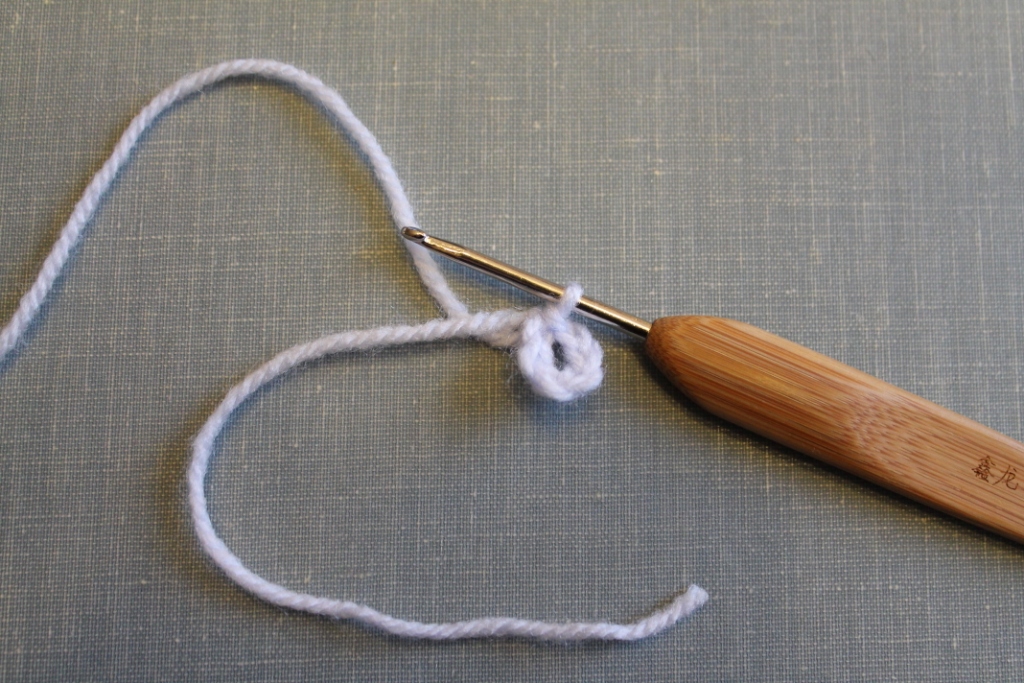
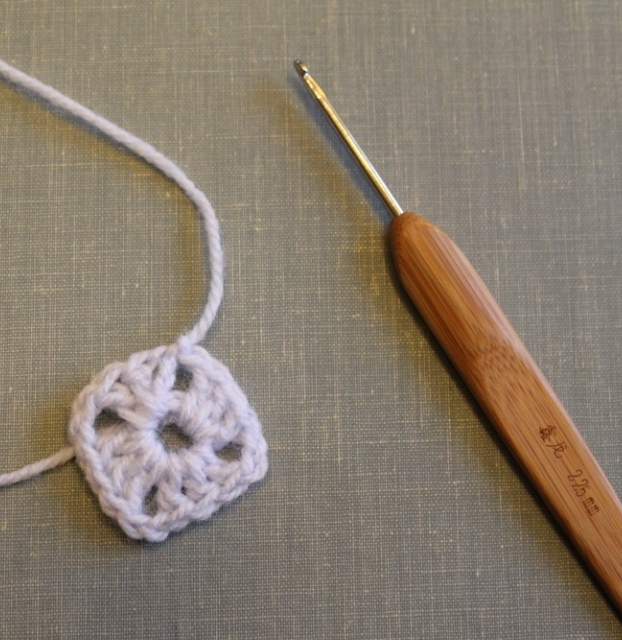
Eerst maak je een ketting van 6 lossen. Maak er een ring van door weer terug te gaan in de 1e losse, en een halve vaste te haken.
First, chain 6 stitches, then go back into the first chain stitch and join them in a circle by doing a slip stitch.
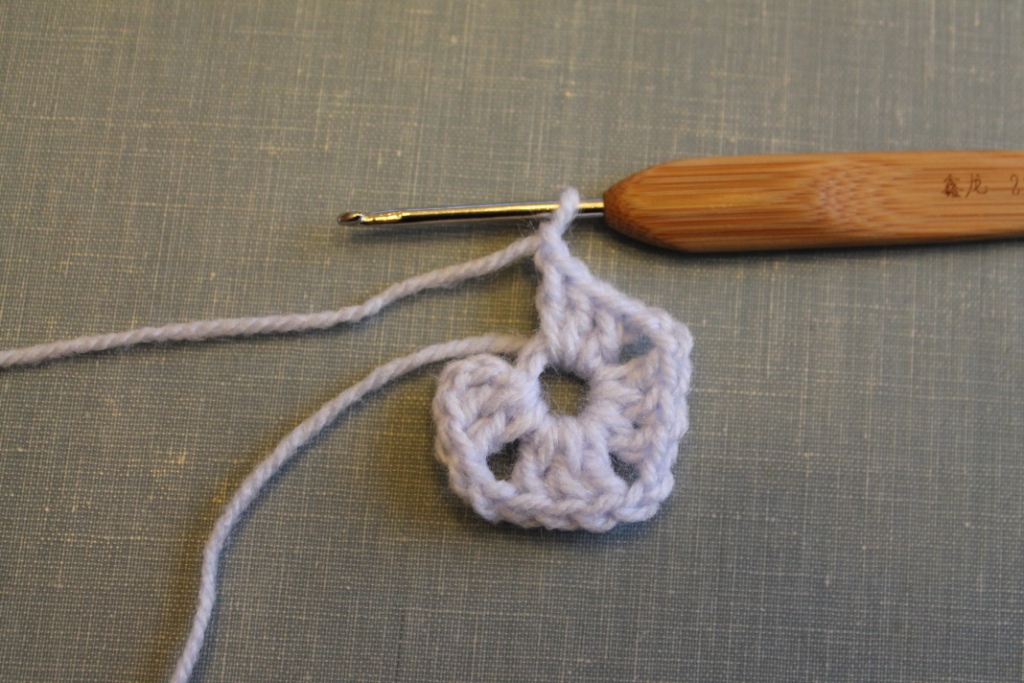
Haak dan 3 lossen, dit is je eerste stokje. Maak in de cirkel nog 2 stokjes. Deze drie stokjes samen worden in granny-square termen een ‘shell’ genoemd.
Chain 3. This will be your first double crochet (dc), make two more dc in the circle. These three double crochets together are called one ‘shell’.
Haak 2 lossen, en haak dan weer 3 stokjes in de cirkel. Ga zo door tot je in totaal 4 shells hebt, met steeds 2 lossen daartussen.
Chain 2, and make another shell. Keep on doing this until you’ve got 4 shells, separated from each other by 2 chain stitches.
Als je 4 shells hebt, haak dan de 2 lossen en haak deze met een halve vaste aan de 3e losse van het begin van de toer. Dit is dus de bovenkant van het eerste stokje dat je hebt gemaakt. Je hebt nu je eerste rij gemaakt!
When you have 4 shells, chain 2 and join this with a slip stitch to the 3rd chain stitch of the beginning of this row. This will be the top stitch on the first double crochet you’ve made. Well done! You’ve completed your first row.
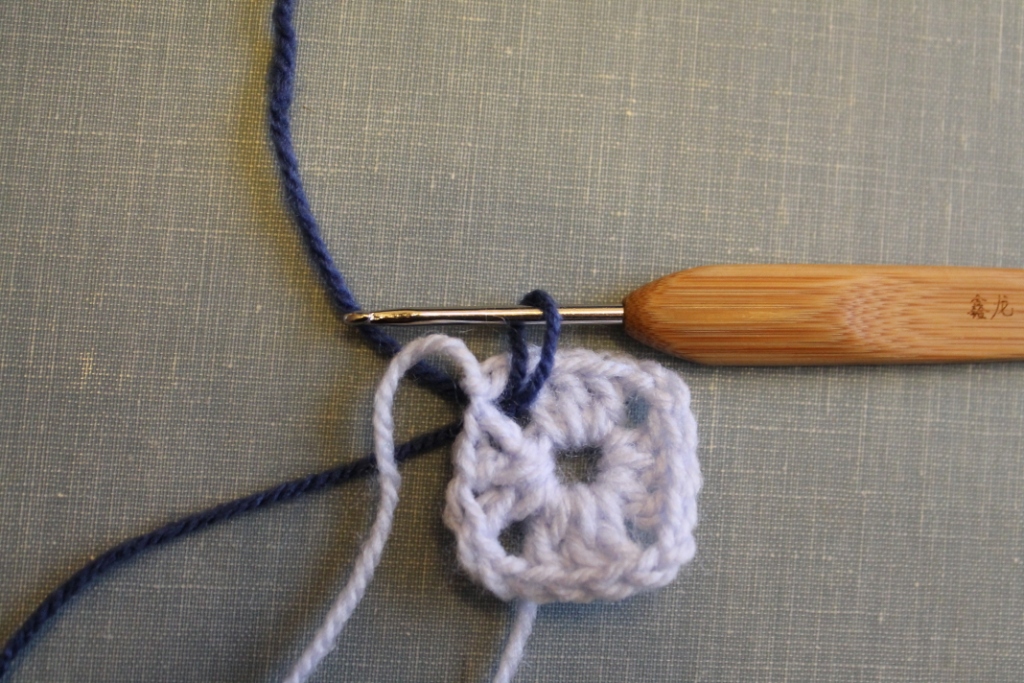
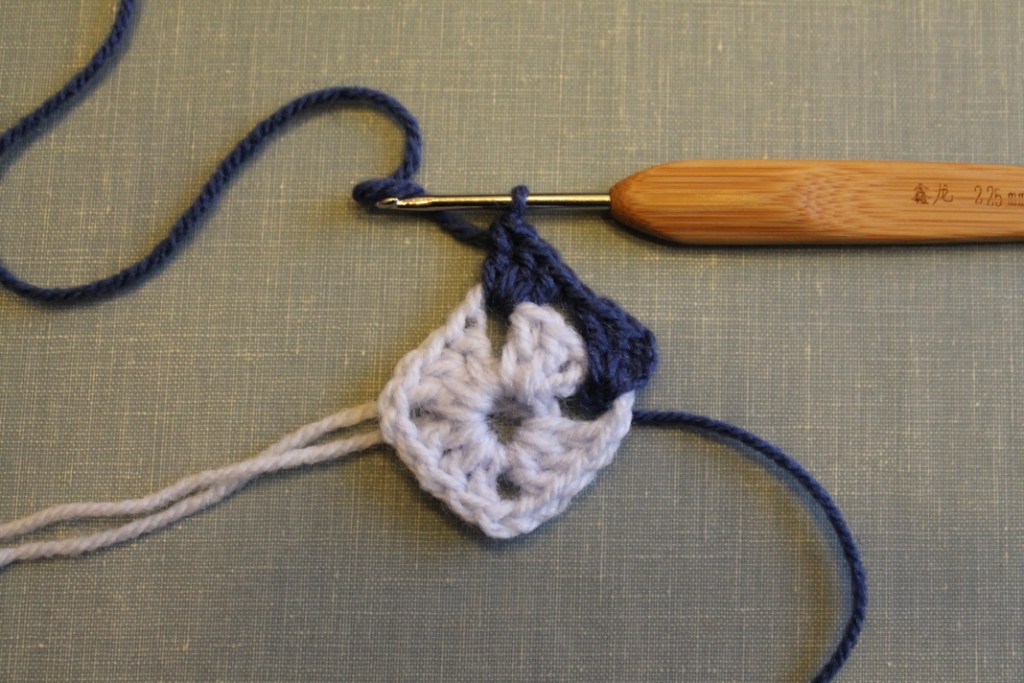
Pak nu je tweede kleur en haak deze met een losse vast aan de eerste rij. In welk gat je dit doet maakt niet uit, als je het maar tussen twee shells in haakt. Haak nog 2 lossen.
Now, take your second color and chain this to the first row. It doesn’t matter where you start, as long as you start in one of the gaps between the shells. Chain 2 more.
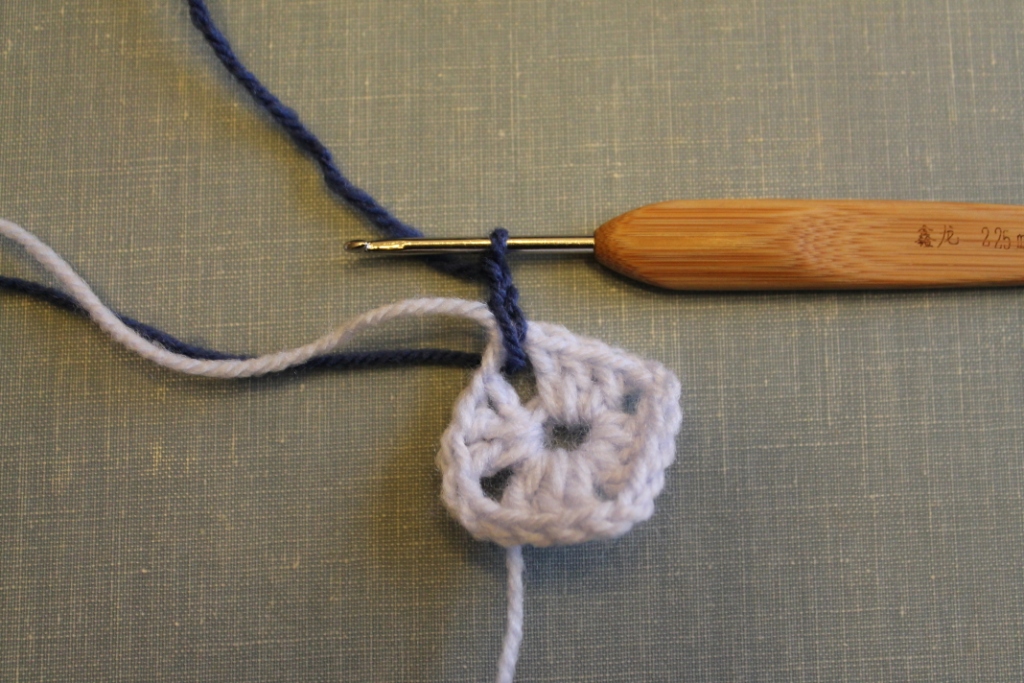
Haak nog twee stokjes in hetzelfde gat. Haak dan 1 losse voordat je naar het volgende gat gaat. Haak daar 3 stokjes, 2 losse en weer drie stokjes. Door dit te doen krijg je de vierkante vorm.
Make 2 dc in the same gap. Chain 1, and then in the next gap: 3 dc, ch 2, 3 dc. By doing this, you will get the square shape.
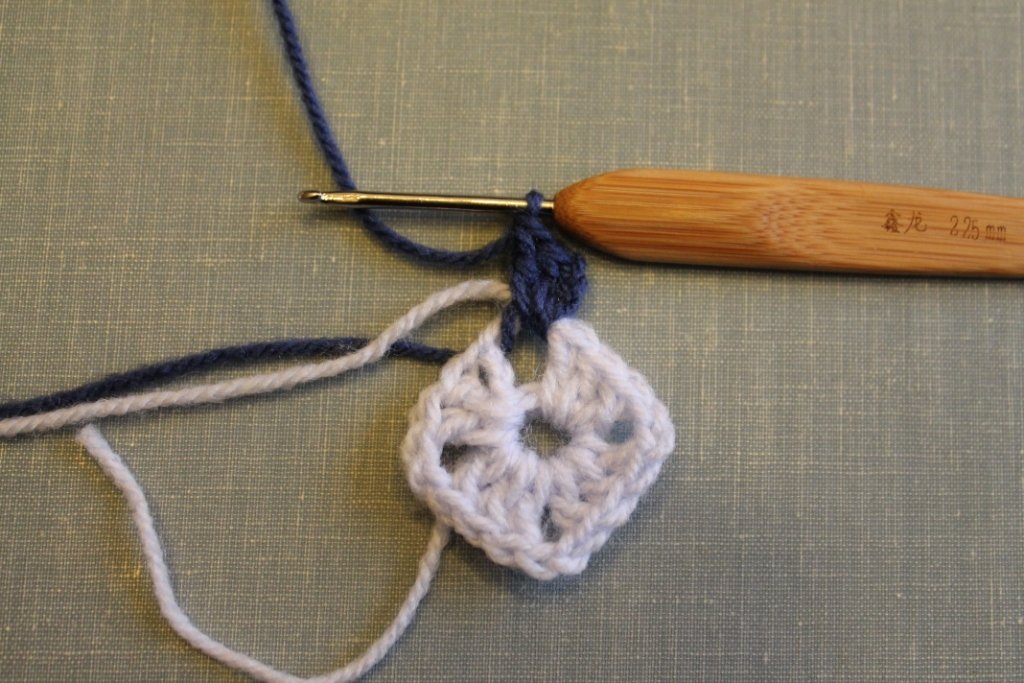
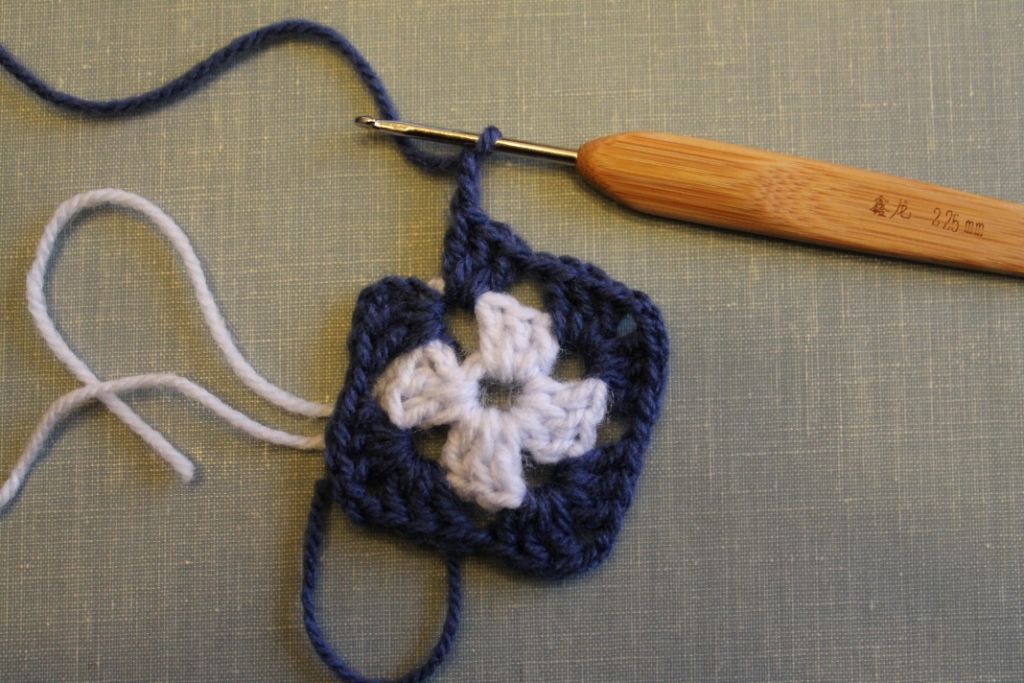
Ga hiermee door: 1 losse tussen de hoeken, en in de hoek 3 stokjes, 2 lossen en dan weer 3 stokjes. Als je aan het eind van de rij komt, haak je het goede aantal lossen. Dit verschilt namelijk of je in een hoek eindigt(2 l.) of tussen hoeken in(1 l.) Maak het dan weer vast met een halve vaste aan de 3e losse van die rij.
Keep on doing this: chain 1 between the corners, and in every corner: 3 dc, ch 2, 3 dc. When you get to the end of the row, you chain the right amount of stitches. 1 or 2, that depends on the place you end. If it’s in a corner, ch 2, between corners, ch 1. Then join it again with a slip stitch to the 3rd chain stitch of that row.
Pak dan je derde kleur en maak deze weer vast zoals je bij de tweede kleur deed.
Take your next color and chain it to the 2nd row, just like you did last time.
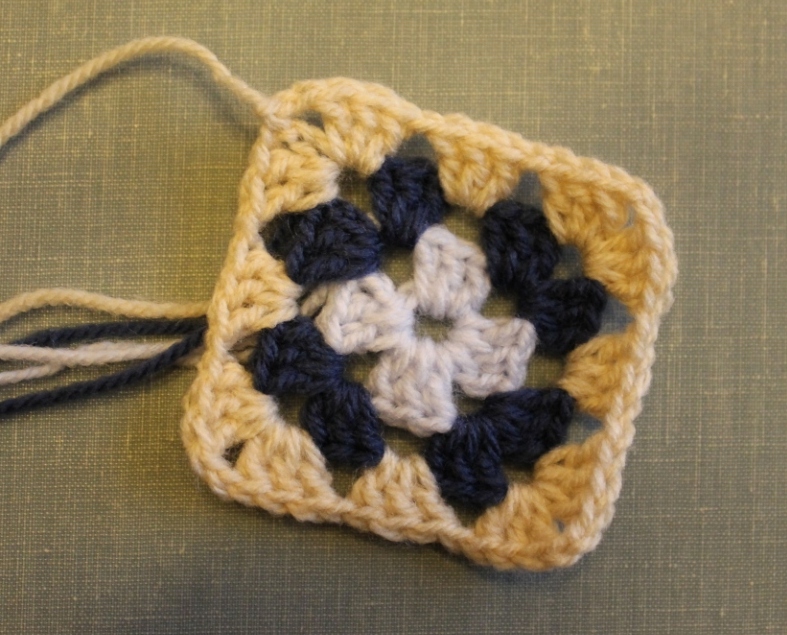
Ga weer door met 3 stokjes haken per gat, en in de hoeken dus 2x. maar let wel op het aantal lossen dat je ertussen haakt. Ik herhaal het nog een keer: in de hoeken haak je er 2, en bij de rest 1.
Keep on crocheting one shell per gap, except for the corners where you crochet 2. Remember that you chain 1 stitch between ‘normal’ shells, and chain 2 in corners.
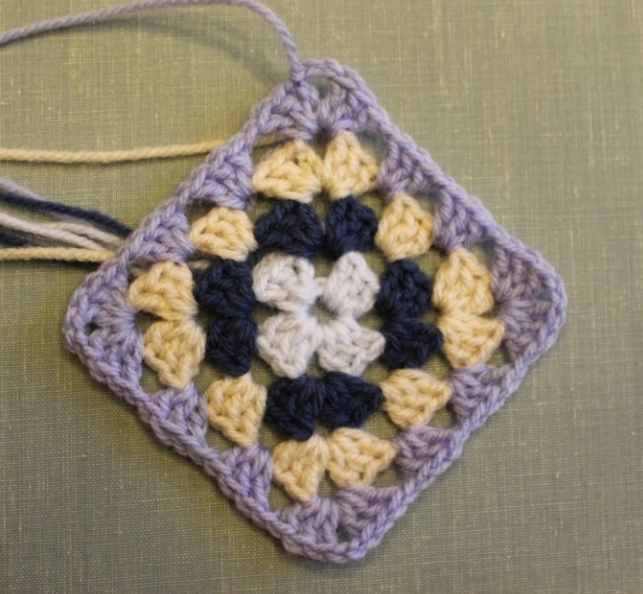
Je kunt je granny square steeds groter maken..
You can make your granny square as big as you want..
Of je kunt een reeks kleintjes maken! Of allemaal grote natuurlijk, wat je maar wil.
Or you could whip up a lot of small ones! Or a lot of large ones, it’s al up to you.
Er bestaan ook honderden variaties, zoals bijvoorbeeld die hieronder. Klik op de plaatjes om naar het patroon te gaan.
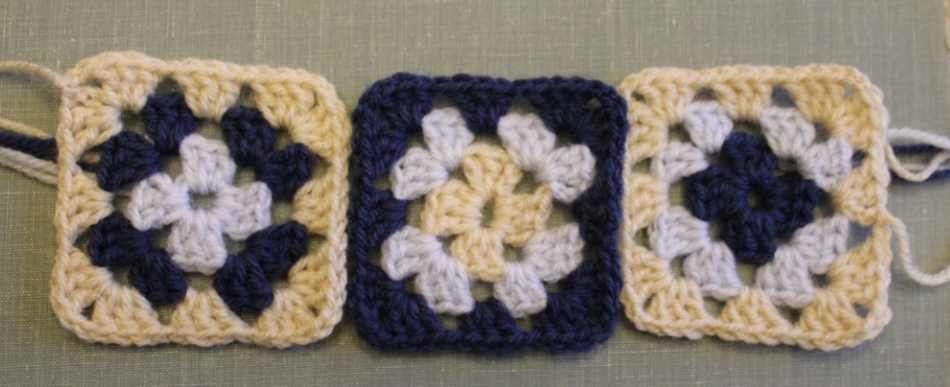
There are hundreds of variations when it comes to granny squares, the squares below are just a few examples. Click on the images for the pattern.


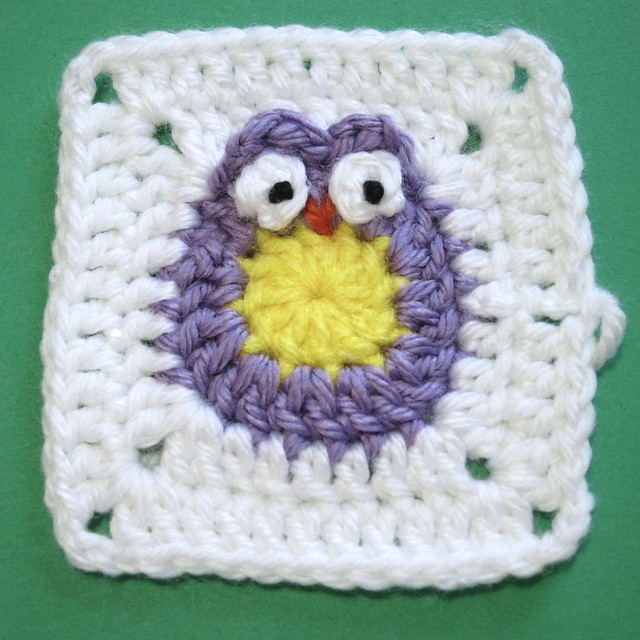
Volgens mij heb ik de granny square koorts opgelopen! De komende paar weken zal ik zeker nog eens over deze leuke techniek schrijven.
Woops, I think I just got the granny square fever! The next couple of weeks you’ll be seeing more of this fun technique on my blog.







6 Comments
Super leuk! Zojuist mijn eerste granny square gehaakt (wil een sprei maken en kussens) en al verslaafd 🙂 Je granny’s zijn wondermooi!!! Die met de uil is erg schattig aww,…… heb je ergens een post met uitleg?
Hee Lourdes, dankjewel! Niet alle foto’s hier zijn van mij trouwens. Ik heb de tutorial gemaakt, en de foto’s daaronder heb ik van patronen op Ravelry gehaald. Je kunt naar de patronen gaan als je op het plaatje klikt 🙂 Ik ben nu ook bezig met een deken! Het is wel een hele hoop werk, maar superleuk om te doen.
In deze post zie je nog meer patronen en voorbeelden: http://creacarmen.wordpress.com/2013/03/07/my-first-granny-square-blanket/
En in deze post zie je de vierkantjes van mijn eigen deken: http://creacarmen.wordpress.com/2013/03/15/granny-blanket-progress/
Als je ergens vragen over hebt hoor ik ze graag 🙂 xx
[…] Standaard Granny Square. Patroon vind je hier of hier. […]
[…] dan haak je namelijk 2 lossen. Kom je er met alleen het haakschema niet uit? Check dan even deze tutorial, met veel foto’s om je op weg te […]
Goedemorgen,
Ik zou graag het patroon willen bemachtigen van de donkerblauw, lichtblauw en gele deken. Alleen als ik op het plaatje wil klikken, dan is er geen doorkliklink. Kunt u mij hiermee helpen?
Groeten,
Miranda
Beste Miranda,
bedankt voor uw bericht. De originele deken werd gemaakt met dit patroon, maar het is momenteel niet meer beschikbaar: https://www.ravelry.com/patterns/library/sunburst-flower-granny-square
Ik heb zelf wel een patroon van een vierkantje dat er heel erg op lijkt (5 toeren per vierkant ipv 4), die kunt u ook met deze kleuren maken. Hier is het gratis patroon daarvoor: https://newleafdesigns.nl/2015/09/16/modified-sunburst-square-the-pattern/
met creatieve groet,
Carmen