


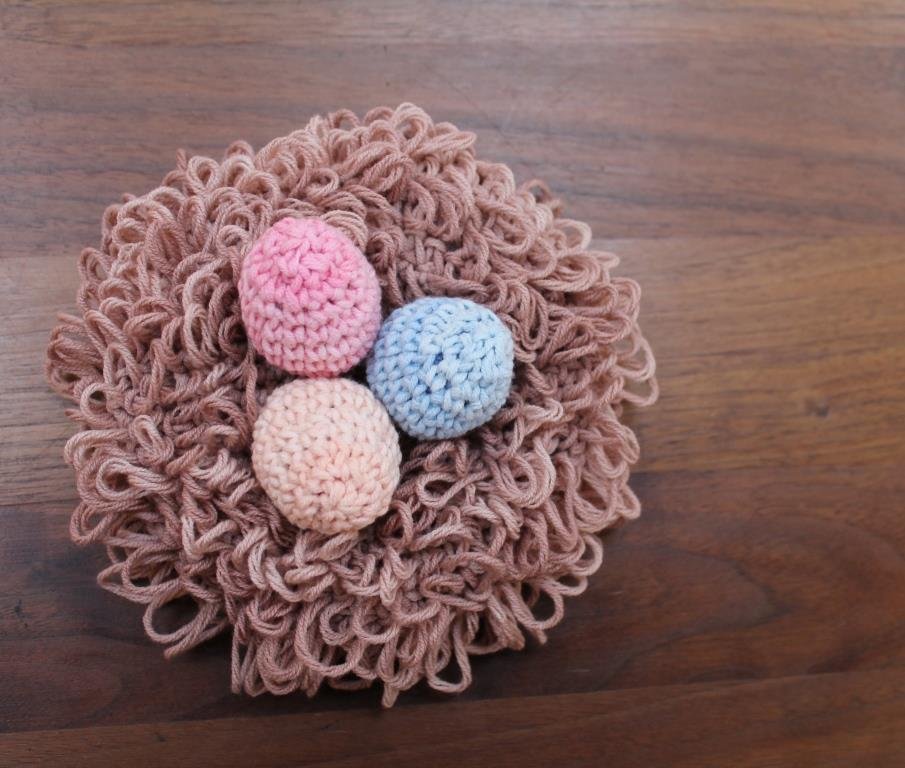

Het is weer bijna Pasen, en daar horen eitjes bij! En dan niet alleen eitjes, maar ook een leuk nestje erbij om ze in te doen. Het is een vrij makkelijk projectje, je hebt niet veel garen of tijd nodig!
It’s almost Easter, which means it’s time to crochet some Easter eggs! And not just eggs, but also a pretty nest to keep them in. It’s a pretty easy project, and you don’t need much yarn or time!
Tijdens het haken leer je ook nog een leuke nieuwe steek: de lussensteek! Voor deze steek wind je de draad een keer om je vinger voordat je het vasthaakt, en zo ontstaan er lussen! Het is even oefenen, je moet eventjes kijken wat voor jou het prettigst werkt. Op deze site zie je een video van deze steek, handig! Ik gebruikte een gemêleerd garen voor het nestje voor een natuurlijk effect, heel leuk!
During this project you’ll also learn a new stitch: the crochet loop stitch! For this stitch, you wind the yarn around your finger while crocheting, which makes a loop! It feels a bit weird at first, but after some practice it will go smoothly. Take a look at this video for instructions! I used a yarn with a subtle colour change for the nest, I love how it turned out!

Benodigdheden
Garen in pastelkleurtjes voor de eitjes – Ik gebruikte Scheepjes Softfun Denim 504, 507 en 509.
Bruin garen voor het nestje – Ik gebruikte Scheepjes Softfun Denim 508
Haaknaald – Ik gebruikte 4mm
Schaar
Stopnaald
Vulling
You’ll need
Pastel coloured yarn for the eggs – I used Scheepjes Softfun Denim 504, 507 and 509
Brown yarn for the nest – I used Scheepjes Softfun Denim 508
Crochet hook – I used a 4mm hook
Scissors
Darning needle
Stuffing
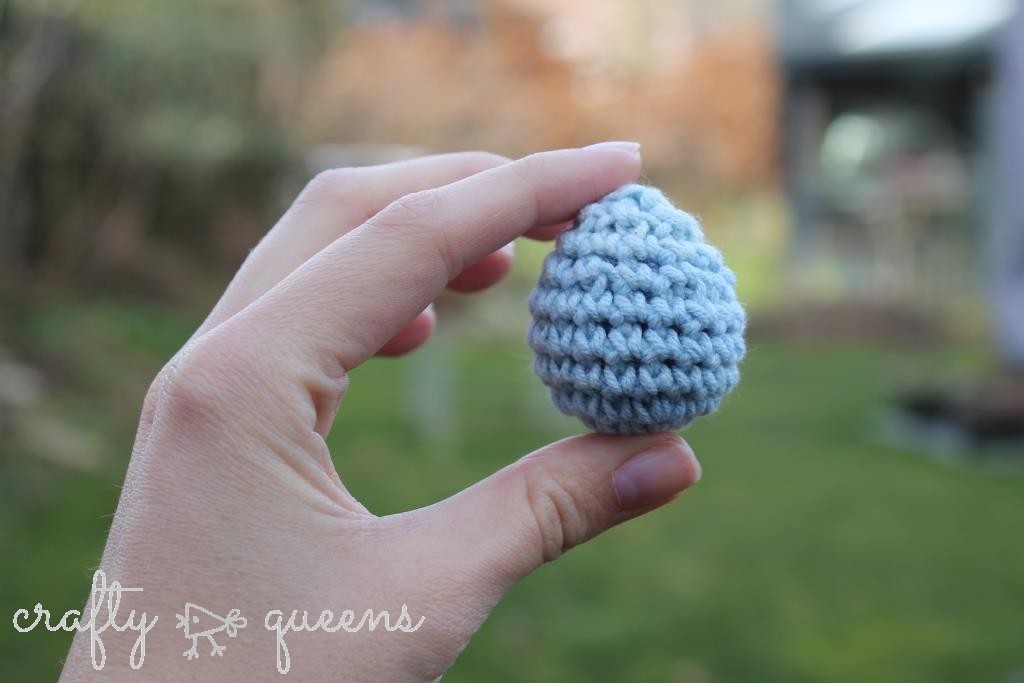
Het ei
Begin met een magische ring
1. 6v in de ring
2. 2v in elke v (12)
3. *1v, 2v* herhaal tot eind (18)
4-6. *1v*, herhaal (drie rondes)
7. *1v, 2vsh* (12)
Vul op.
8. *1v*
9. *2vsh* (6)
Hecht de draad af en haal deze door de overgebleven steken. Trek dicht en werk de draad weg.
The egg
Start with a magic loop
1. sc6 in loop
2. sc2 in every stitch (12)
3. *sc1, sc2*, repeat till end. (18)
4-6 sc around (3 rounds)
7. *sc1, sc2tog*, repeat (12)
Stuff.
8. sc around
9. *sc2tog* (6)
Cut yarn and thread through all remaining stitches. Pull tight and weave in the end.
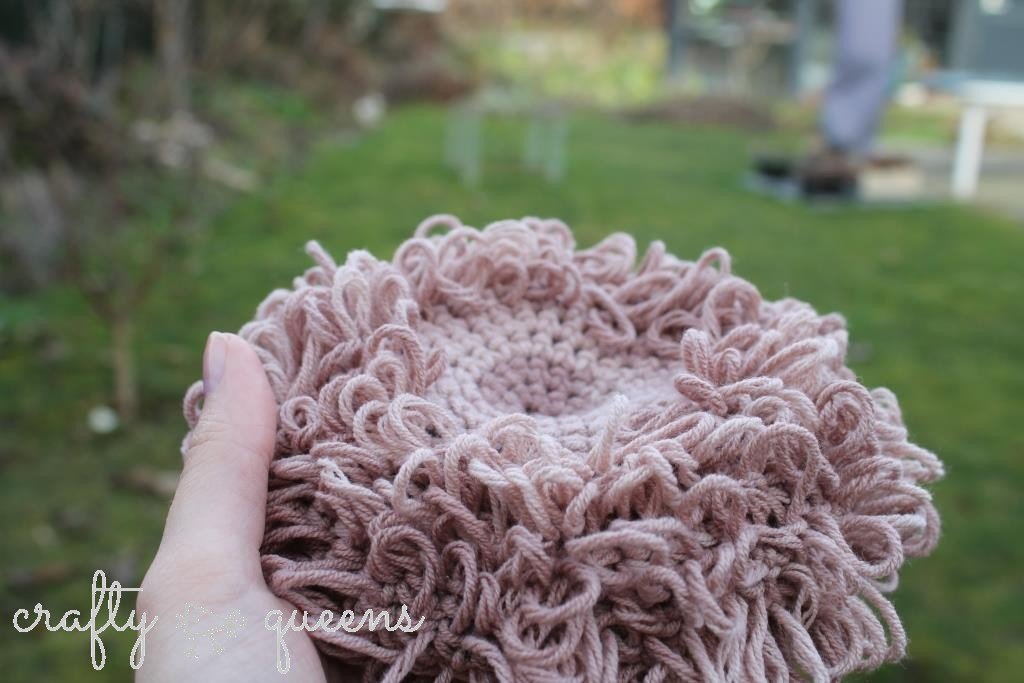
Het nest
In dit patroon begin je met de bovenkant van het nestje. Op het begin gebruik je nog geen lussensteek, zodat de vogeleitjes makkelijk in het nestje blijven liggen. Ook voor de onderkant gebruik je geen lussensteek, zodat het nestje fijn plat blijft liggen (en je niet onnodig veel garen gebruikt). De lussen komen aan de achterkant van je haakwerk, dat is bij dit project dus de goede kant. Als er instructies tussen asterisken * staan, herhaal je die instructies tot het einde van de ronde.
Begin met een magische ring.
1. 6v in de ring
2. 2v in elke v (12)
3. *1v, 2v* (18)
4. *1v, 1v, 2v* (24)
5. *1v, 1v, 1v, 2v* (30)
6. *1v (x4) 2v* (36)
Begin nu met de lussensteek.
7. *1v (x5) 2v* (42)
8. *1v (x6), 2v* (48)
9. *1v (x7), 2v* (54)
10. *1v (x8), 2v* (60)
11-13. *1v* (drie toeren)
14. *1v (x8), 2vsh* (54)
15. *1v (x7), 2vsh*(48)
Ga nu verder zonder lussensteek.
16. *1v (x6), 2vsh* (42)
17. *1v (x5), 2vsh* (36)
18. *1v (x4), 2vsh* (30)
19. *1v, 1v, 1v, 2vsh* (24)
Vul heel lichtjes op.
20. *1v, 1v, 2vsh* (18)
21. *1v, 2vsh* (12)
22. *2vsh* (6)
Hecht de draad af en haal deze door de overgebleven steken. Trek dicht en werk de draad weg.
The nest
In this pattern, the nest is crocheted from the top to the bottom. For the first few rounds, you won’t use the loop stitch yet, so the eggs really ‘sit’ in the nest. You also won’t use the loop stitch on the bottom half of the nest, so it won’t be wobbly when you put it down (plus you won’t waste any yarn with loops where you can’t see them). The loops will form on the backside of your work, so that side will be the good side for this project. Repeat instructions between asterisks till the end of the round.
Start with a magic loop
1. sc6 in loop
2. sc2 in every stitch (12)
3. *sc1, sc2*, (18)
4. *sc1, sc1, sc2* (24)
5. *sc1, sc1, sc1, sc2* (30)
6. *sc1 [4 times], sc2* (36)
Now start with the loop stitch
7. *sc1 [5 times], sc2* (42)
8. *sc1 [6 times], sc2* (48)
9. *sc1 [7 times], sc2* (54)
10. *sc1 [8 times], sc2* (60)
11-13. sc around (3 rounds)
14. *sc1 [8 times], sc2tog* (54)
15. *sc1 [7 times], sc2tog* (48)
Continue without loop stitch
16. *sc1 [6 times], sc2tog* (42)
17. *sc1 [5 times], sc2tog* (36)
18. *sc1 [4 times], sc2tog* (30)
19. *sc1, sc1, sc1, sc2tog* (24)
Stuff very lightly
20. *sc1, sc1, sc2tog* (18)
21. *sc1, sc2tog* (12)
22. *sc2tog* (6)
Cut yarn and thread through all remaining stitches. Pull tight and weave in the end.

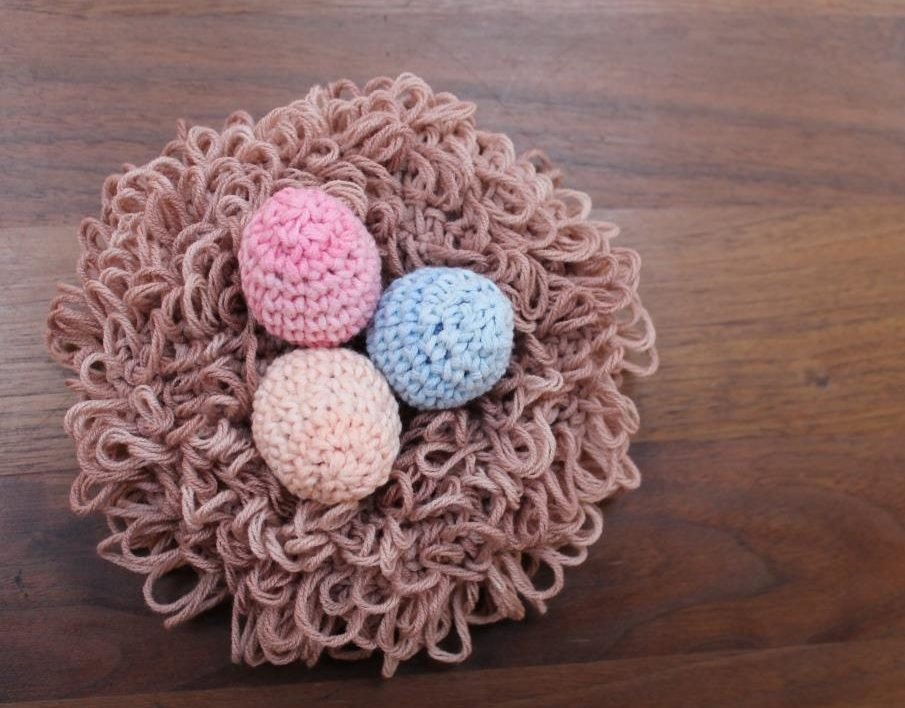
Hier zie je de onderkant van het nestje als het af is.
On this picture you see the bottom side of the nest when it’s finished.
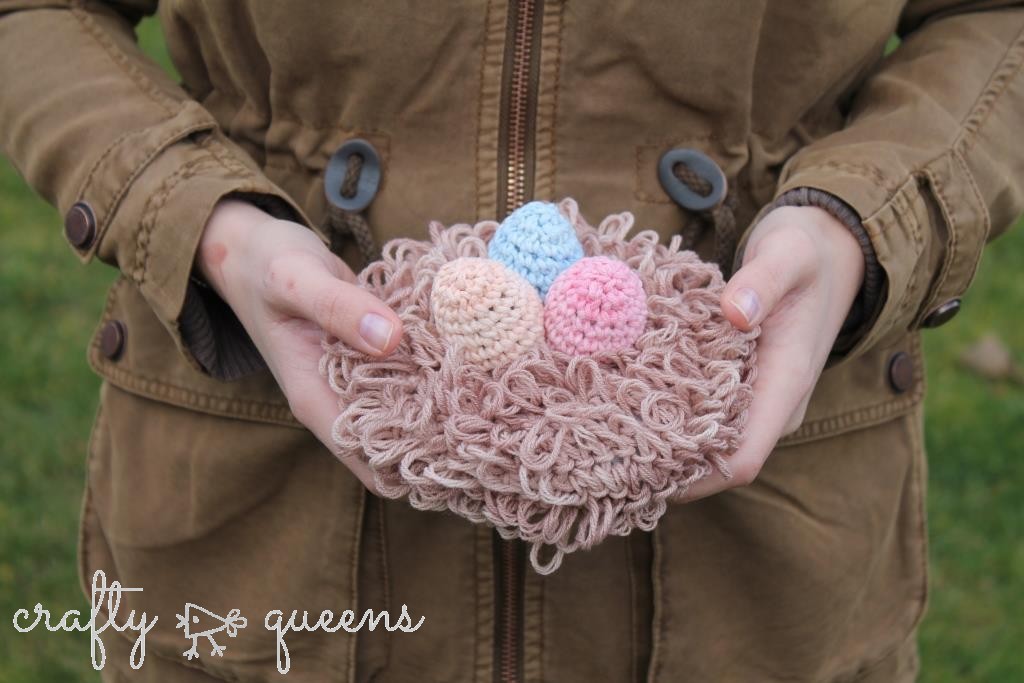
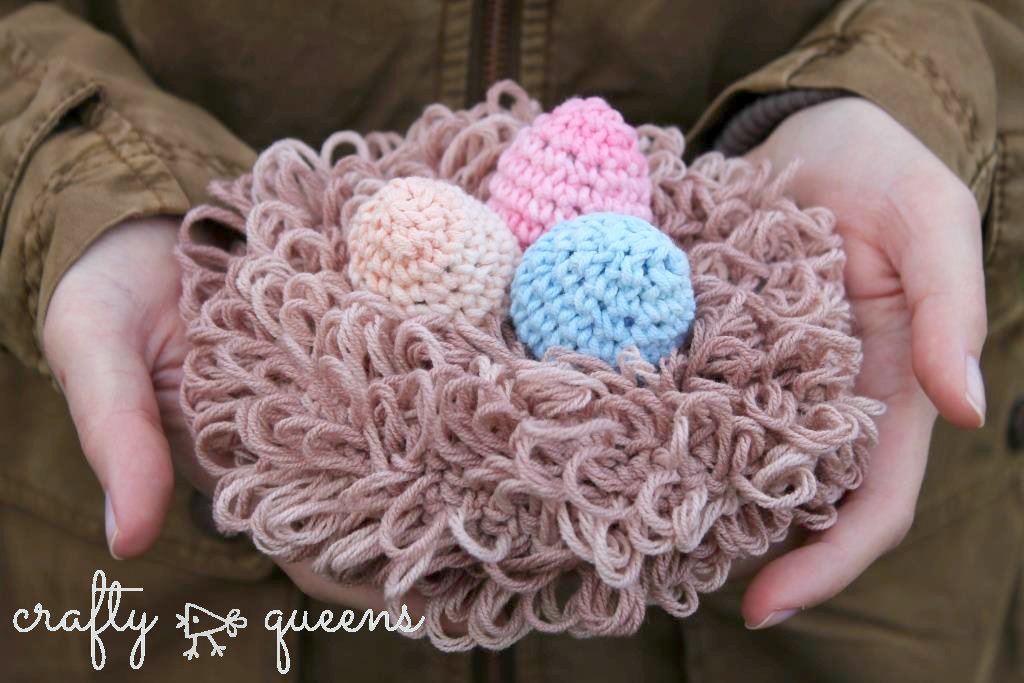
Tadaa! 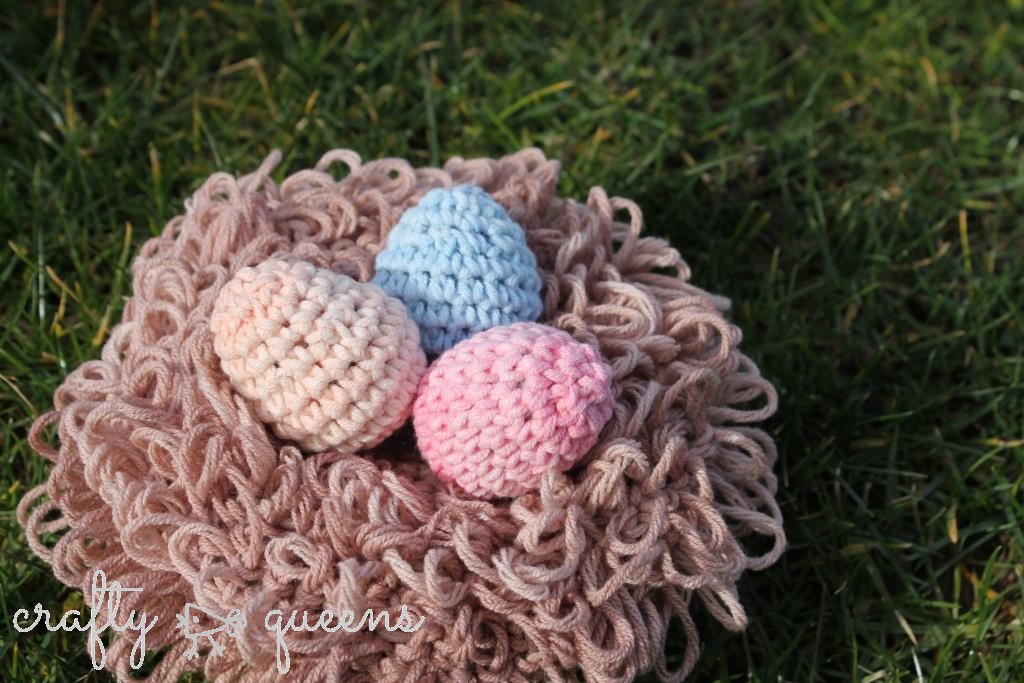
And you’re done! It would look so cute on the breakfast table during Easter.. But also a nice little decoration piece for the home. I have mine on my desk and it makes me happy every time I see it!
If you’ve made one of these, please share a picture on my Facebookpage or Ravelry! You may sell finished products of this pattern, but not the pattern itself. Happy crafting!
** Follow me on Bloglovin’ **
Deze blogpost is geschreven in samenwerking met Scheepjes. De wol wordt gesponsord door Scheepjeswol, en in ruil daarvoor deel ik dit patroon met jullie. De blogpost wordt nog steeds door mijzelf geschreven en bevat alleen mijn eigen mening over de producten.
This blogpost is written in collaboration with Scheepjes. The yarn for this project was sponsored by Scheepjes, and in turn I share this pattern with you all. Although this blogpost is sponsored, all contents and opinions are my own.