


Als eerste wil ik even zeggen, bedankt allemaal voor jullie lieve reacties op mijn berg kussens! Ik werd er zo blij van 🙂 Daarom kondig ik ook met genoegen het haakpatroon voor deze kussens aan! Ik hoop dat ze snel jullie banken, stoelen en bedden mogen versieren.
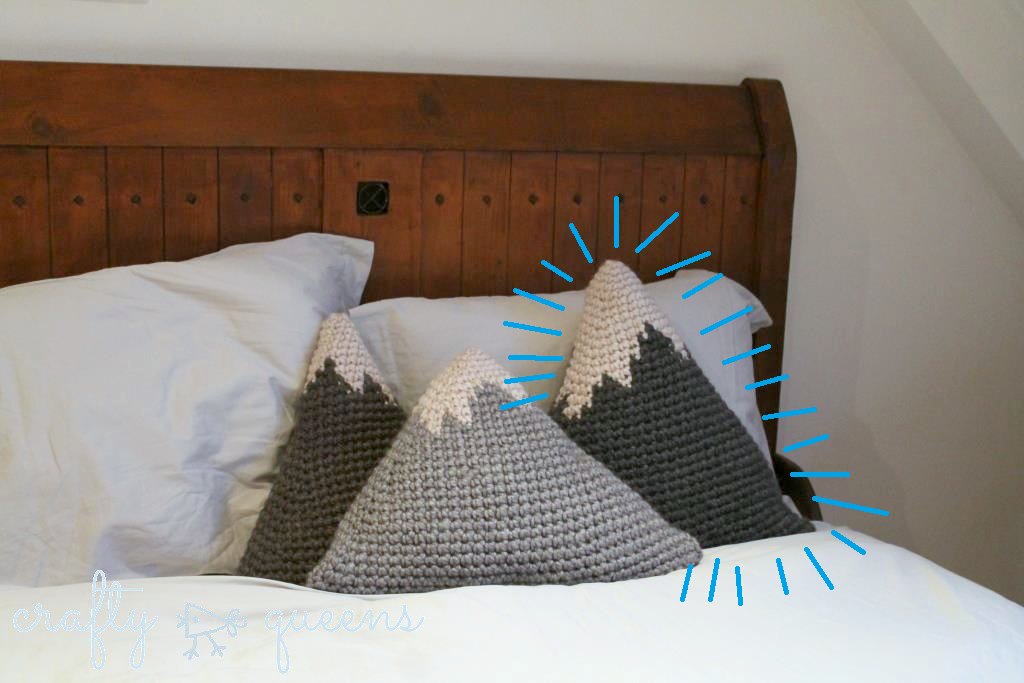
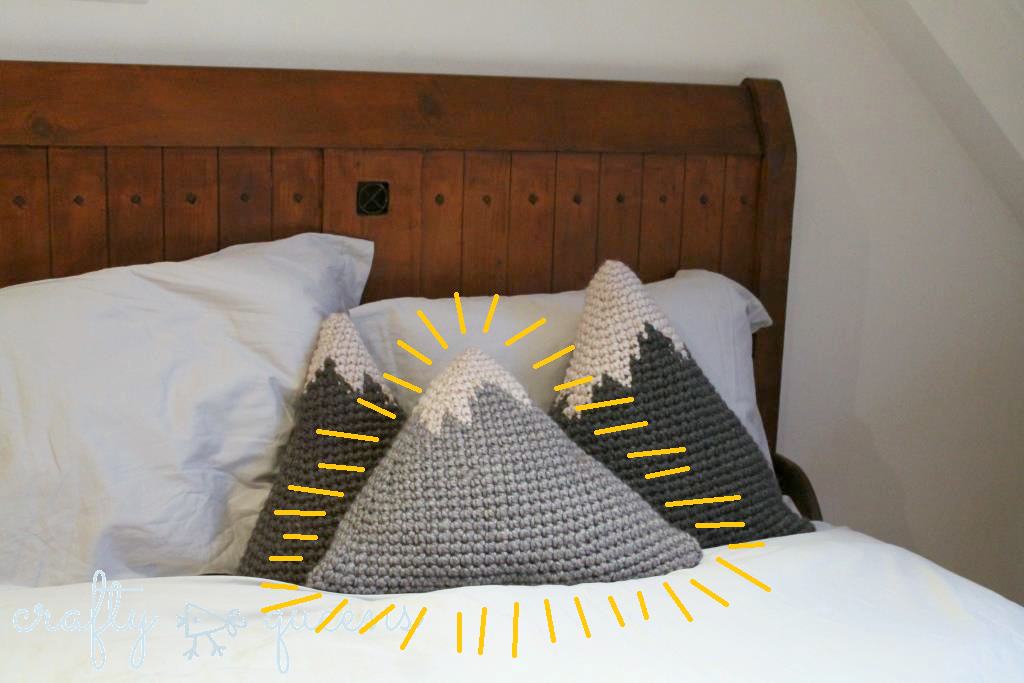
Ik maakte kussens in drie verschillende formaten: een kleine smalle bergtop (bruin-grijs), een hoge en vrij brede berg (donkergrijs) en een lagere en hele brede berg (lichtgrijs). Zelf kun je kiezen welke vormen je het leukste vindt, zo komt er een leuke variatie aan bergtoppen bij jou thuis op de bank! Omdat dit patroon bij de top begint, kun je in principe haken totdat je wol op is. Handig!
Voor elke bergtop schrijf ik eerst het basispatroon uit, zonder kleurwisselingen. Daarop volgt een schema dat je aan kunt houden voor het wisselen van licht naar donker. Ik heb het zelf geïmproviseerd, maar misschien vind je het een beetje lastig om zelf te bepalen waar de sneeuwtop moet eindigen. In dat geval kun je het kleurenschema aanhouden! Voor het netjes wisselen van kleur, gebruik je de nieuwe kleur al bij de laatste garenomslag van de steek voordat de kleurwisseling plaats moet vinden. Dit is heel belangrijk!
First I want to say, thank you all so so much for all of your lovely thoughts on my mountain pillows! Your kind words mean a lot to me 🙂 I’m very happy to share the crochet pattern today with you! I hope they will decorate your beds, couches and lounge chairs very soon.
I’ve made these pillows in three different shapes: a small narrow peak (brownish grey), a high and quite wide peak (dark grey), and a low but really wide peak (light grey). You can choose whichever shape you like best, and make an entire variety of different sized mountains! This pattern starts from the peak downwards. I’ve designed it in this way so you can keep crocheting until you run out of yarn. Very useful if you want to use every last bit of your deliciously chunky skeins!
For each mountain shape I will first write the basic pattern for that shape. Without the colour changes, that is. If you scroll down from the pattern, you can see the colour scheme I made for that particular top. Of course, you can improvise if you want to! The colour schemes are there to help you if you’re not sure when to change from light to dark yarn. As always, with colour changing: Change colour by using the new colour for the last yarnover of the stitch before the colour change has to take place. This is very important! The English pattern will be written in light grey right below the Dutch version of the pattern. So if you see terms you don’t recognize, don’t panic! Just scroll down a bit until you see the English version. US terminology is used for the pattern.
Benodigdheden
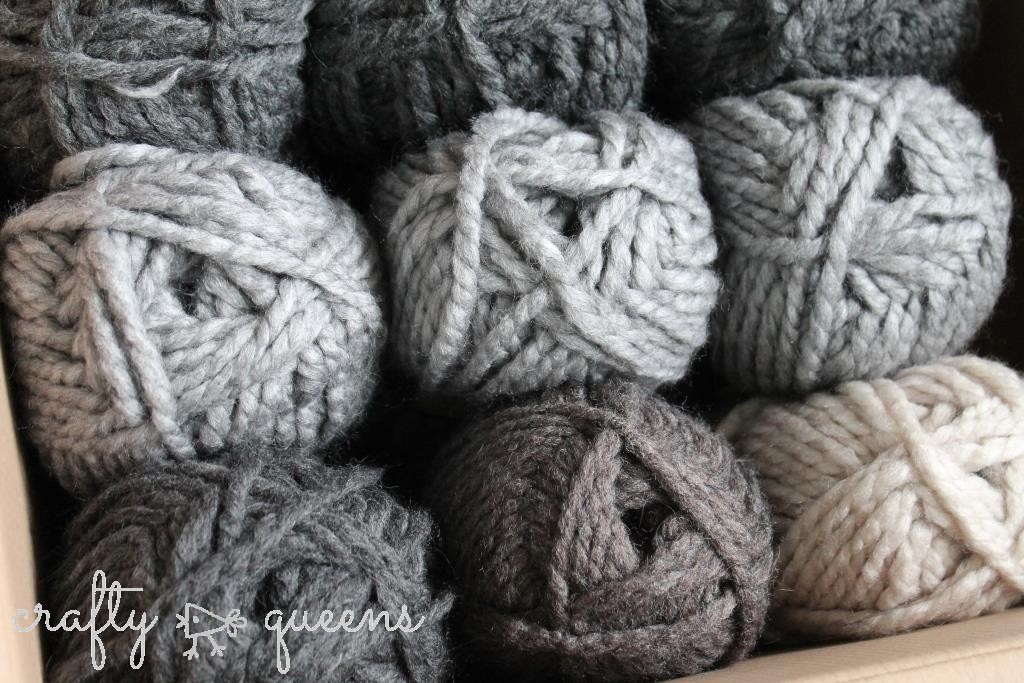
Scheepjeswol Peru in je gewenste kleuren. Ik gebruikte voor elk kussen ongeveer 2 à 3 bollen in de grijstint, en 1/3e van een witte bol voor de sneeuwtop.
Haaknaald nr. 9 of 10
Grote stopnaald
Knopen
Schaar
Stof voor binnenkussens
Vulling
You’ll need
Scheepjeswol Peru in whichever colours you like. I used about 2 or 3 balls of dark yarn for each mountain top, and 1/3rd of a lightcoloured skein per mountain for the snowy peak.
9mm or 10mm crochet hook
Large darning needle
Buttons
Scissors
Fabric for inner cushions
Stuffing
Patroon 1 – Smalle berg | Pattern 1 – Narrow peak

Begin met een magische ring. Als je bij toer 6 bent begin je ook met het kleurenschema bijhouden.
6v in de ring
1. *1v, 1v, 2v* x2 (8)
2. *1v, 1v, 1v, 2v* x2 (10)
3. *1v, 1v, 1v, 1v, 2v* x2 (12)
4. *1v, 1v, 1v, 1v, 1v, 2v* x2 (14)
5. *1v [x6], 2v* x2 (16)
6. *1v[x7], 2v* x2 (18)
Je ziet als het goed is dat er een driehoek vormt. Vanaf dit moment meerder je steeds aan weerszijden van deze driehoek. Let op! Bij het haken komen steken niet recht onder elkaar te zitten. Dit zorgt ervoor dat je werk langzaam gaat draaien, omdat de steken steeds iets opschuiven. Als je zoals normaal precies bovenop de meerdering van de vorige toer meerdert, zal je berg na een aantal toeren scheef worden. Om dit te voorkomen moet je steeds even goed kijken wanneer je echt bij de zijkant van de berg bent, zodat je dan pas meerdert. Zet anders een steekmarkeerder aan elke zijkant, en probeer steeds op die lijn te meerderen. Het is vrij makkelijk!
Nu werk je op zo’n manier door totdat je berg groot genoeg is. Dan moet je een keuze maken of je een afneembare kussenhoes wilt maken of niet. Zo niet, dan vul je hem op en naai je de hoes dicht. Als je hem afneembaar wilt maken, dan maak je eerst nog een flap met knoopsgaten. Dat doe je zo:
Werk tot een zijkant, maakt niet uit welke van de twee.
1. Keer je werk om. Haak 1 losse, dan 1 vaste in elke steek totdat je bij de andere zijkant bent.
2. Keer, 1l, *1v* tot eind.
3. Keer, 1l, *1v* tot eind.
4. Keer, 1l, *1v* tot eind.
5. Keer, 1l, 1v, 2vsh, *1v* tot laatste 3 steken, 2vsh, 1v
6. Herhaal rij 5.
7. In deze rij maak je de knoopsgaten. Kies 2 of 3 punten verspreid over de rij, en markeer deze.
Keer, 1l, 1v, 2vsh, 1v tot eerste markering, sla 1 steek over en haak 1l. Haak tot volgende markering, sla 1 steek over en haak 1l. Doe dit ook voor de eventuele derde markering. *1v* tot laatste drie steken, 2vsh, 1v.
8. Herhaal rij 5. Als je bij de lossen komt, haak je hier omheen.
9. Herhaal rij 5.
Knip nu de draad af op ongeveer 20cm lengte, en werk de draad netjes weg. Knip nu twee lappen stof op maat om de binnenkussens van te maken, naai ze aan elkaar en vul het op. Met het binnenkussen in de sloop, doe je even de flap dicht. Markeer waar de knoopsgaten zijn, en naai daar met een restje dunner katoen de knopen erop. Als je dit doet voordat je het kussen vult, krijg je hem later misschien niet meer dicht. (Die fout maakte ik namelijk, dus staan de knopen op kussen nr 1 een beetje onder spanning..)
Start with a magic loop. From round 6 onwards, work the colour chart as well.
sc6 in loop
1. *sc1, sc1, sc2* two times (8)
2. *sc1, sc1, sc1, sc2* two times (10)
3. *sc1, sc1, sc1, sc1, sc2* two times (12)
4. *sc1, sc1, sc1, sc1, sc1, sc2* two times (14)
5. *sc1 [x6], sc2* two times (16)
6. *sc1 [x7], sc2* two times (18)
If you’re doing this right, you’ll see that you’re making a triangle shape. From this point onwards you will increase (sc2) on both sides of this triangle. Pay attention! Crochet stitches don’t appear right above/under each other. In each row, the stitches will be a bit more to the left or right, depending on in which hand you hold your crochet hook. If you would continue to increase in the manner written above, your mountain top would twist. You don’t want that! It’s easiest to place a stitch marker on each side of the triangle, and just increase whenever you reach the marker.
Now, continue in this manner until your mountain is big enough. Now, you have to decide if you want your pillow case to be removable or not. If not, just stuff it and sew the bottom sides together. If you do want to make the case removable, you’ll have to crochet a few more rows with button holes. First, crochet until you reach a side (it doesn’t matter which one). Then:
1. Turn your work, ch1, sc1 in every stitch until you reach the other side.
2. Turn, ch1, *sc1* till end.
3. Turn, ch1, *sc1* till end.
4. Turn, ch1, *sc1* till end.
5. Turn, ch1, sc1, sc2tog, *sc1* until last three stitches: sc2tog, sc1.
6. Repeat row 5
7. In this row you will make the button holes. Choose two or three places, evenly spread across the row, and mark them with stitch markers.
Turn, ch1, sc1, sc2tog, sc1 until first marker, skip that stitch and ch1. Do the same for the other marked spaces. Then sc1 until last three stitches, sc2tog, sc1.
8. Repeat row 5. When you reach the chain spaces, crochet around them (sc1)
9. Repeat row 5.
Cut yarn and weave in all ends. Before you sew on the buttons, you have to make the inner cushion. Lay the case on some fabric and cut out two layers. Sew them together while stuffing them. Put the cushion inside the pillow case, close it and mark where the button holes are. Then sew on the buttons!

Patroon 2 – Hoge berg | Pattern 2 – High mountain
Begin met een magische ring. Vanaf toer 9 kleurenschema aanhouden.
6v in ring
1. *1v, 2v*
2. *1v, 1v, 2v*
3. *1v, 1v, 1v, 2v*
4. *1v, 1v, 1v, 1v, 2v*
In de toeren hierna meerder je alleen 1x aan elke zijkant, zoals bij berg nr. 1. Ga op deze manier door totdat je berg groot genoeg is. Als je een flap wilt maken, volg dan ook de instructies hiervoor zoals bij berg nr. 1. Denk eraan dat als deze berg breder is, dat je meer knoopsgaten maakt.
Start with a magic loop. Work the colour chart starting from round 9.
sc6 in loop
1. *sc1, sc2*
2. *sc1, sc1, sc2*
3. *sc1, sc1, sc1, sc2*
4. *sc1, sc1, sc1, sc1, sc2*
From the next round on, only increase once on every side, just like the first mountain shape. Keep going until your mountain is big enough. If you want to make the case removable, follow the instructions above (see mountain nr. 1). Note that if this mountain is bigger, you could make more button holes.

Patroon 3 – Lage brede berg | Pattern 3 – Low wide mountain
Begin met een magische ring. Vanaf toer 6 begin je met het kleurenschema onderaan.
6v in ring
1. *2v, 1v, 2v*
2. *2v, 1v, 1v, 1v, 2v*
3. *2v, 1v, 1v, 1v, 1v, 1v, 2v*
4. *2v, 1v[x7], 2v*
5. *2v, 1v[x9], 2v*
In de toeren hierna meerder je alleen 1x aan elke zijkant, zoals bij berg nr. 1. Ga op deze manier door totdat je berg groot genoeg is. Als je een flap wilt maken, volg dan ook de instructies hiervoor zoals bij berg nr. 1. Denk eraan dat als deze berg breder is, dat je meer knoopsgaten maakt.
Start with a magic loop. From round 6, also start working the colour chart below.
sc6 in loop
1. *sc2, sc1, sc2*
2. *sc2, sc1, sc1, sc1, sc2*
3. *sc2, sc1, sc1, sc1, sc1, sc1, sc2*
4. *sc2, sc1[x7], sc2*
5. *sc2, sc1[x9], sc2*
From the next round on, only increase once on every side, just like the first mountain shape. Keep going until your mountain is big enough. If you want to make the case removable, follow the instructions above (see mountain nr. 1). Note that if this mountain is bigger, you could make more button holes.

Enn…. je bergen zijn klaar! Maak er zoveel als je wilt voor in je huis of bijvoorbeeld als housewarming cadeautjes voor anderen! Perfect voor bergwandelaars, backpackers en natuurliefhebbers. Als je er een paar hebt gemaakt zou ik het heel leuk vinden om foto’s ervan te zien! Deel ze op Facebook of op Ravelry. Veel plezier met dit patroon!
**Het is niet toegestaan om dit patroon door te verkopen of te plaatsen op je eigen blog. Een linkje plaatsen naar mijn patroon mag natuurlijk wel. Ook het verkopen van producten dat je met dit patroon maakt is niet toegestaan zonder mijn expliciete toestemming**
And your mountains are done!! Yay! Make as much as you want for yourself or give them to friends as a housewarming present! It’s a perfect gift for hikers, backpackers and nature lovers. If you’ve made one yourself I’d love to see pictures of it! Please share them on Facebook or Ravelry. Have fun crocheting!
**Please don’t reduplicate or sell this pattern on your own blog. Sharing the link to this pattern is okay, of course! Also, please don’t sell any finished products of this pattern without my permission.**
** Follow me on Bloglovin’ **
Deze blogpost is geschreven in samenwerking met Scheepjes. De wol wordt gesponsord door Scheepjeswol, en in ruil daarvoor deel ik dit patroon met jullie. De blogpost wordt nog steeds door mijzelf geschreven en bevat alleen mijn eigen mening over de producten.
This blogpost is written in collaboration with Scheepjes. The yarn for this project was sponsored by Scheepjes, and in turn I share this pattern with you all. Although this blogpost is sponsored, all contents and opinions are still my own.