This post is written in both Dutch (black) and English (light grey). Please turn off your translator to avoid confusion.
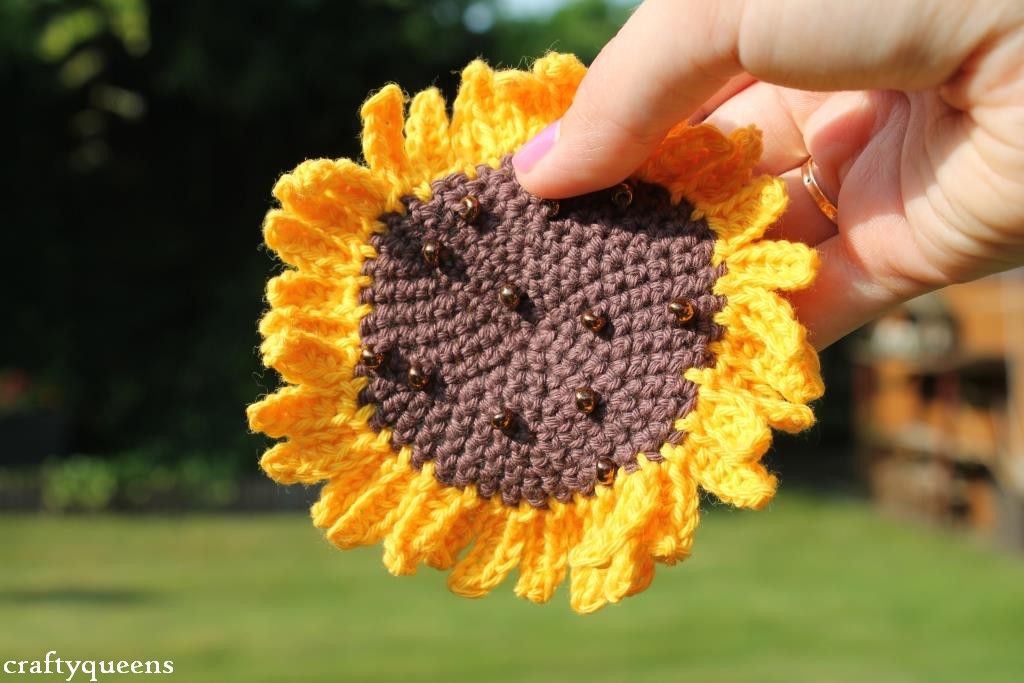
Hi everyone! Today I have a fun new DIY for you, yay! Quick and easy, you’ll have this happy flower ready in no time. The beads add a little sparkle to it. I made it to decorate a crochet curtain, but this flower serves many purposes. Make a brooch out of it to decorate a cute cardigan or a bag, or make a bunting!
Je hebt nodig:
Bruin en geel katoen, ik gebruikte Scheepjeswol Cotton 8
Bruine kraaltjes
Haaknaald die bij het garen past, ik gebruikte 2,25mm
Schaar
Stopnaald
Gebruikte afkortingen
v – vaste
hv – halve vaste
l – losse
What you’ll need:
Brown and yellow cotton, I used Scheepjeswol Cotton 8
Brown beads
Matching crochet hook, I used a 2,25mm hook
Scissors
Tapestry needle
Used abbreviations (US)
sc – single crochet
sl st – slip stitch
ch – chain
Om te beginnen rijg je een aantal kralen op het bruine katoen. Bedenk dat het altijd makkelijker is om er teveel op te rijgen, die kun je namelijk later weer van de draad afhalen. Als je er opeens meer nodig hebt dan je op de draad hebt geregen, wordt het iets lastiger. Ik gebruikte er zelf 12, die ik op willekeurige plekken inhaakte.
To start, string the beads onto the yarn. It’s best to string a few more beads than you think you will use, since you can always take them off again afterwards. It’s more difficult to add beads when you’ve started crocheting. I used 12 beads in my sunflower, which I placed randomly across the stitches.
De volgende stap: het hart van de zonnebloem haken. Deze haken we in vasten, en als je kralen inhaakt bij vasten komen de kralen áltijd aan de achterkant van je werk. Daarom gebruiken we deze keer de achterkant van je werk als voorkant van de zonnebloem. Als je een kraal wilt invoegen, schuif je hem dicht op je werk en haak je eromheen. Als je eenmaal een kraal wilt invoegen zal het duidelijk zijn hoe je dit kunt doen. Als je toch graag wat meer begeleiding wilt, kun je deze video bekijken.
Hart van de zonnebloem (in bruin), werk in spiralen:
1. 6v in een magische ring
2. 2v in elke v
3. *1v, 2v* Herhaal van * tot * tot het eind van de toer
4. *1v, 1v, 2v*
5. *1v, 1v, 1v, 2v*
6. *1v [x4], 2v*
7. *1v[x5], 2v*
8. *1v [x6], 2v*
9. Haak rondom 1 vaste per steek.
Sluit met een halve vaste, optioneel kun je deze al haken met de volgende kleur: geel. Hierna kun je het bruine garen afknippen.
The next step is to crochet the middle part of the sunflower. We’re using single crochet stitches for this. When you want to add beads to single crochets, they will show on the back side every time. There’s no way you’ll get them in front of the stitch unless you sew them on, so we are using the back side of the crochet as the front side of the sunflower, m’kay? If you want to add a bead while crocheting, simply push a bead towards the stitch, and work around it. You can watch this video for clear instructions.
Start by making a magic ring in brown yarn. You will be working in spiral rounds afterwards.
1. 6sc in ring
2. 2sc in every sc
3. *1sc, 2sc* Repeat from * to * until the end of the round
4. *1sc, 1sc, 2sc*
5. *1sc, 1sc, 1sc, 2sc*
6. *1sc [x4], 2sc*
7. *1sc [x5], 2sc*
8. *1sc [x6], 2sc*
9. 1sc in every sc
Crochet one slip stitch with the next yarn colour: yellow. After doing this you can cut the brown yarn.
1. 6 l, keer om
2. 1v, 1v, 1hst, 1hst, 1hst, hv in volgende steek aan het hart van de bloem.
Herhaal dit totdat je helemaal rondom bent gegaan.
Knip het garen door en werk de eindjes af.
Time to crochet the petals! You’ll make one for every stitch. If your work is starting to curl/ruffle because of too many petals, you can choose to skip a stitch every once in a while. The pattern for the petals is:
1. ch 6, turn
2. 1sc, 1sc, 1hdc, 1hdc, 1hdc, sl st into next stitch on middle part of the flower.
Keep repeating this until the end of the round.
Cut the yarn, weave in the ends and you’re done!
Congratulations, you’ve crocheted a sunflower! What is your sunflower going to decorate? I’m very curious, so let me know! Leave a comment or post a picture on my Facebook page, Ravelry or Instagram with #craftyqueens. Happy crafting!
