

This pattern is written in both Dutch and English. English instructions are in red.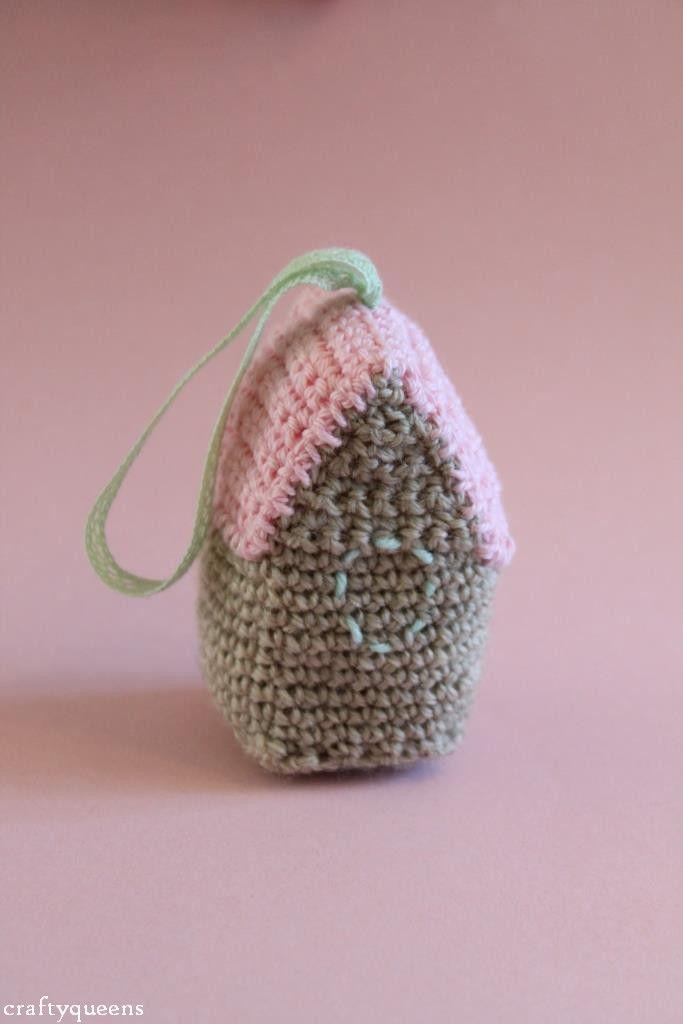

Wat heb je nodig?
-Minimaal 2 kleuren garen (Ik gebruikte Scheepjeswol Cotton 8)
-Een beetje garen om mee te borduren
-Losse draadjes of fiberfill om mee op te vullen
-Een klein stukje karton
-Lint (optioneel)
-Haaknaald, naald en schaar
Ik wilde deze keer eens wat nieuws proberen, dus ik heb het patroon op een stuk papier geschreven en daar een foto van gemaakt (zie onder). Ik vind het zelf altijd handig als patronen heel compact zijn. Meestal moet je op mijn blog heel wat scrollen voordat je het hele patroon hebt gelezen, en dan staat er ook nog de Engelse versie tussen. Ik weet zelf niet hoe jullie dit altijd beleven, maar ik dacht dat dit wel handig zou zijn. Je kunt de foto groter maken door erop te klikken, en dan kun je hem ook uitprinten. Hieronder volgen nog een aantal foto’s om sommige stappen duidelijk te maken, maar als je die onder de knie hebt kun je makkelijk alleen dit plaatje gebruiken. Volg de instructies die onder de foto’s staan. Laat me weten of het handig is, dan schrijf ik in het vervolg meer van mijn patronen op deze manier. 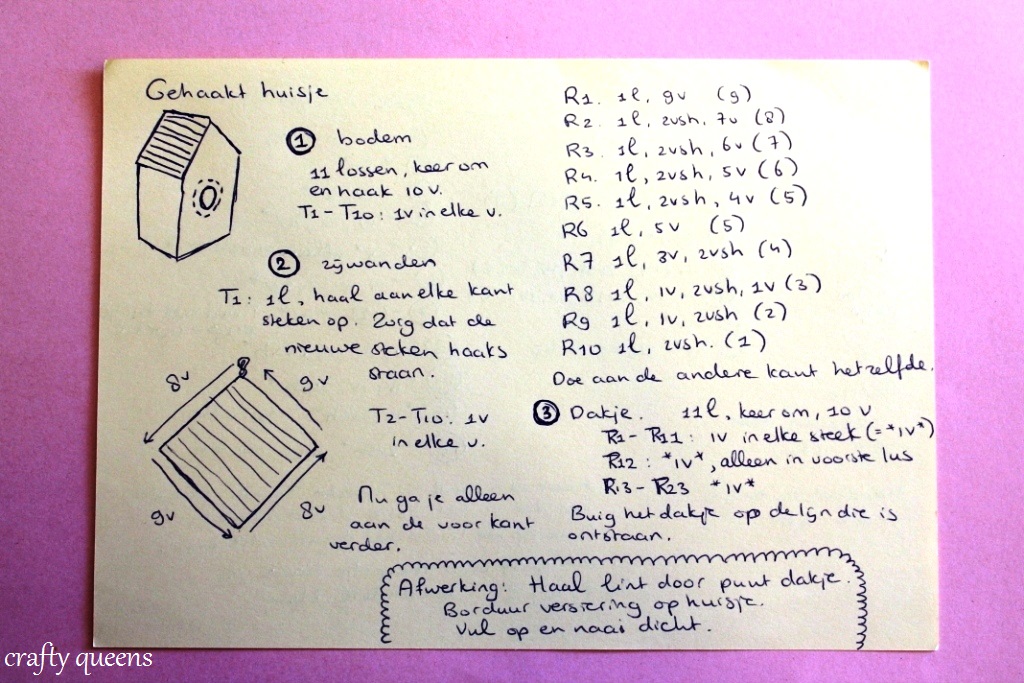
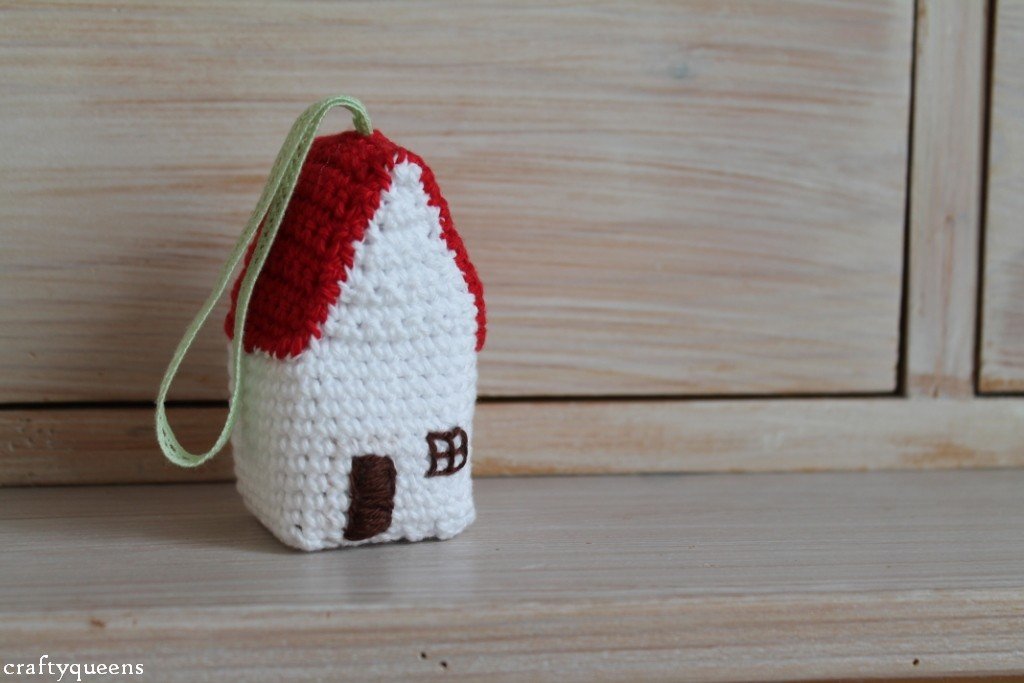
Two of my cousins are moving out this month to start college life in their own apartment. I remember when I moved out 4 years ago, and I’m so happy for them to experience this. Time will go by fast, so I hope they make the most of it. One of my cousins is moving to Amsterdam, our capital city, I can’t wait to hear all of her stories! Not that I live far from Amsterdam, I just don’t go there often. I want to crochet or knit a gift for them, to make their new home cosy. I can’t really think of something, but on the way I came up with the idea to crochet a house! Just for decorating, but I think it looks really cute. I crocheted a birdhouse last week, but I like this one better, maybe because of the colours. Anyway, you can choose which one you want to make, cause I’ve written down the pattern for you guys!
You’ll need:
-Yarn in at least 2 colours ( I used Scheepjeswol Cotton 8)
-Some yarn to embroider with
-Yarn ends or fiber fill for stuffing
-A small piece of cardboard
-Ribbon (optional)
-crochet hook, needle and scissors
The Dutch pattern is pictured above, but I didn’t have time yet to write the English pattern down on actual paper. I thought it would be easier to just write it here, with pictures to go with it. The notes directly below the pictures are in Dutch, but the English instructions are found in the red text beneath.
First, we’ll crochet a square. This is going to be the foundation of your house:
Chain 11, turn your work and single crochet 10.
Rows 1 to 10: single crochet in every stitch
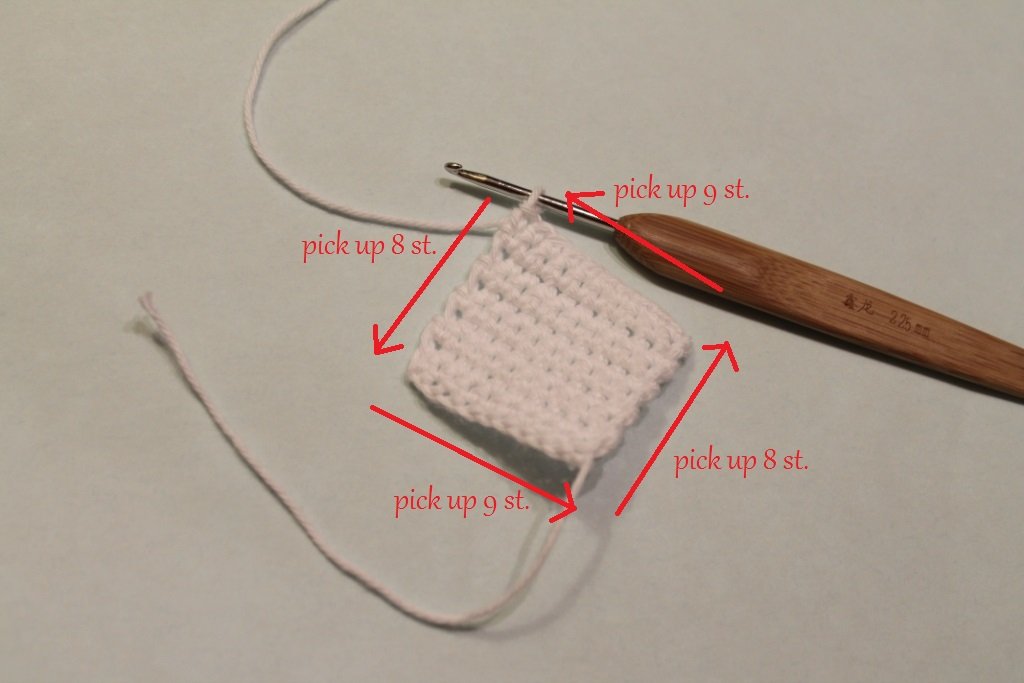
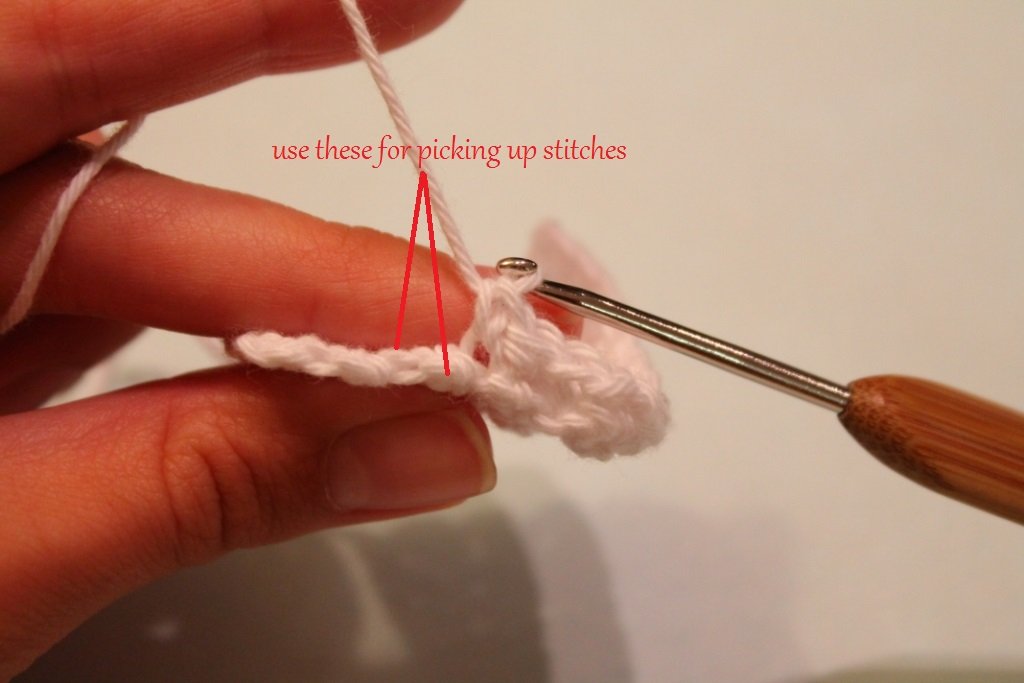
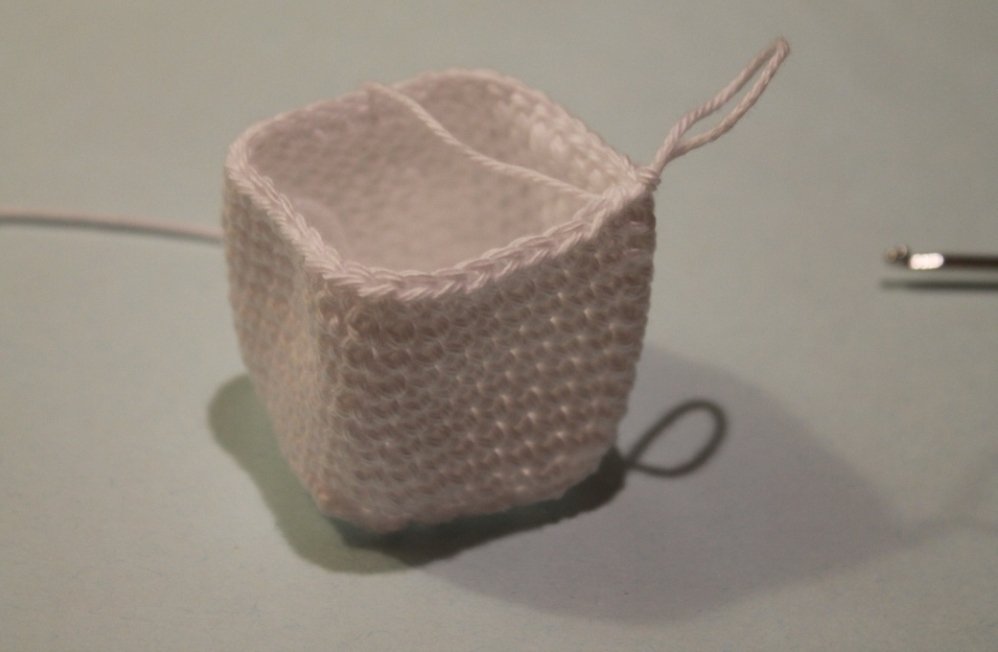
Then, pick up stitches at every side. I chose to pick up 8/9/8/9 stitches, but you can also choose to pick up 9 stitches at every side. As long as the stitch amount is equal on opposite sides. Keep crocheting in joined rounds for 10 rounds. Usually, joined rounds result in this kind of diagonal line across your work. Follow these instructions to make sure you don’t get this diagonal line. Instead, the line will be perfectly vertical, at one of the corners of the walls.
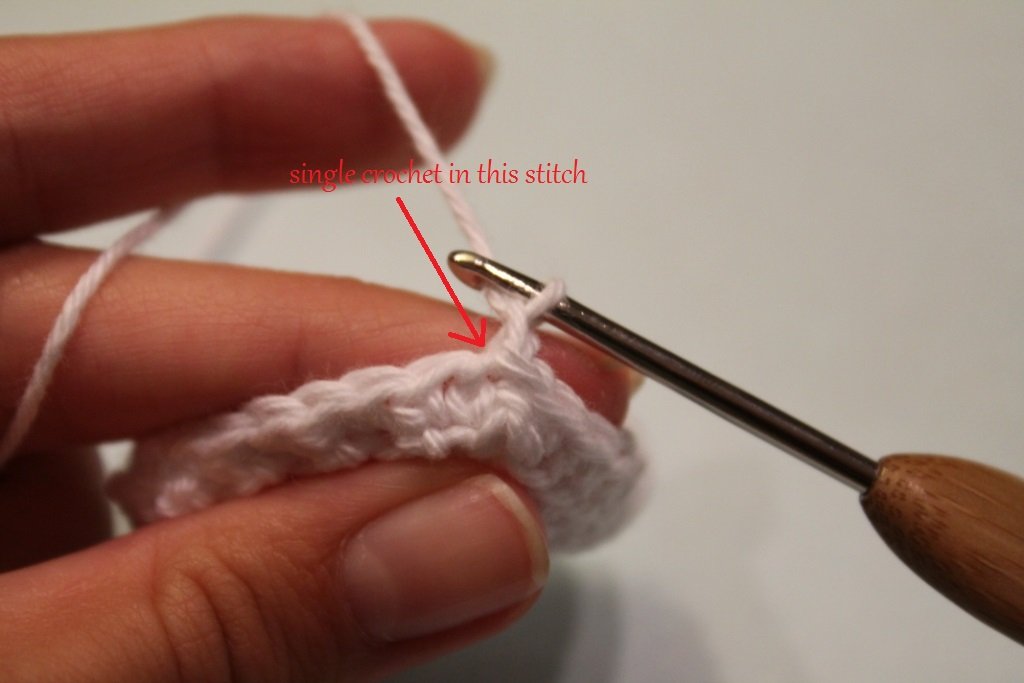
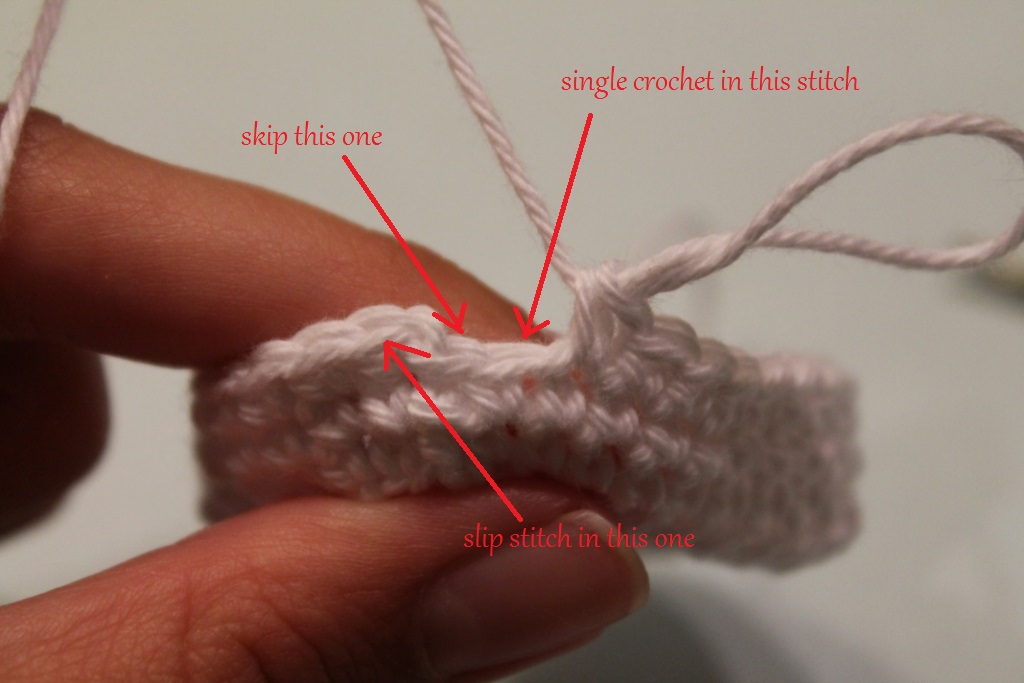
First, single crochet into the stitch you usually would skip. This is the same stitch you made a slip stitch in the previous round. To make up for this extra stitch, skip the last stitch of the round, shown in the pictures above. And that’s all there is to it!
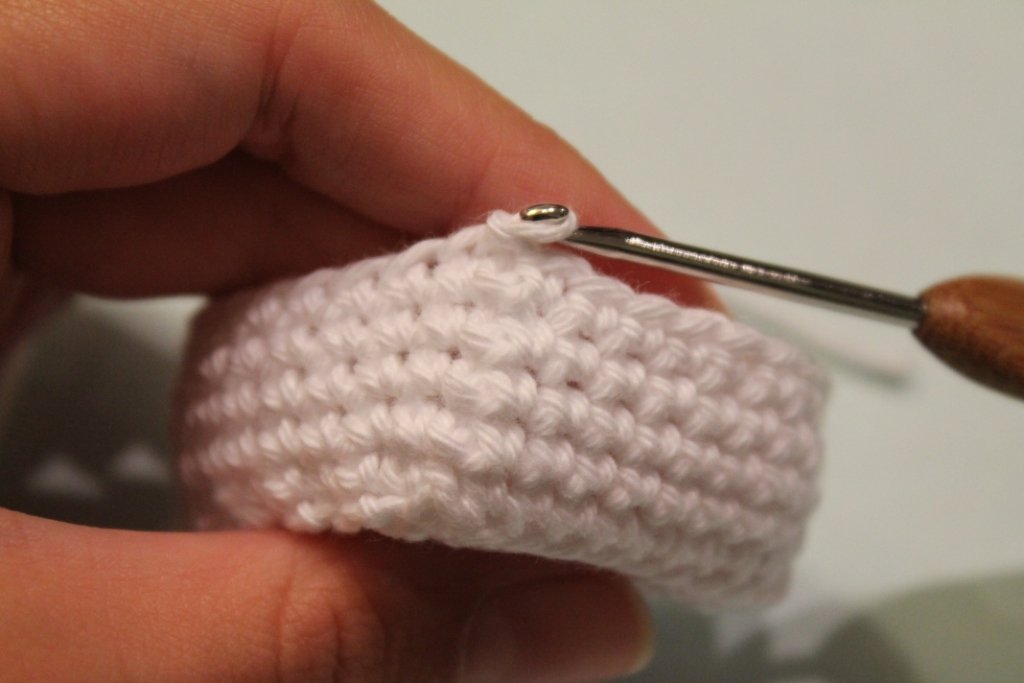
Tadah! No diagonal line anymore! If only I had known this earlier..
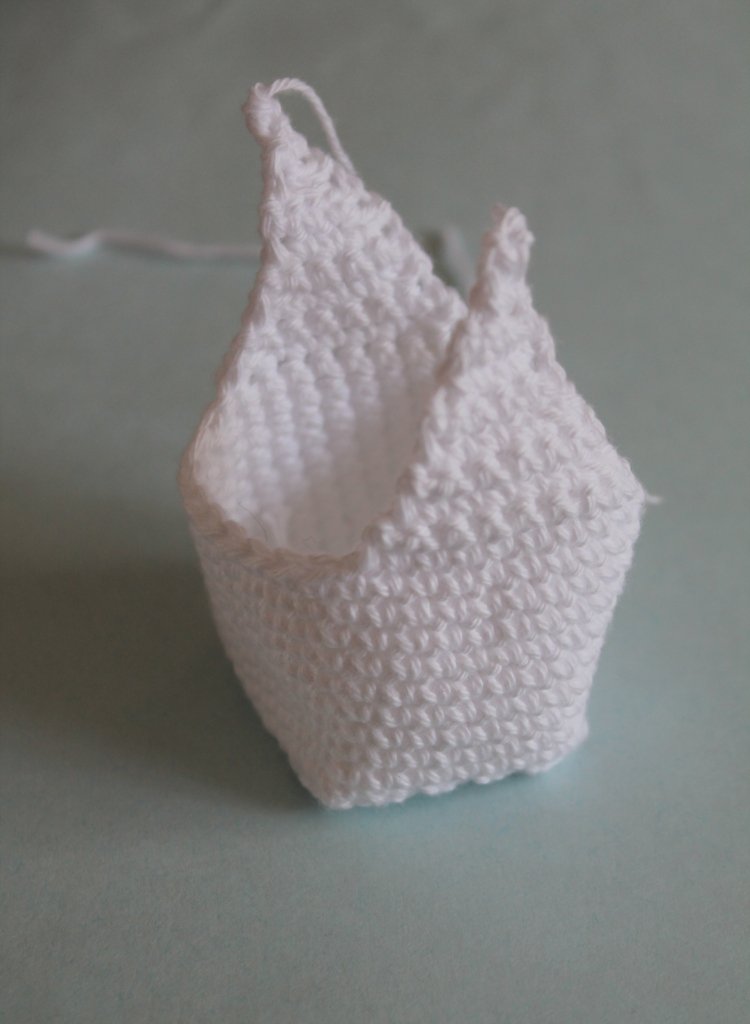
R1: ch1, (turn and) sc 9 (9)
R2: ch1, sc2tog, sc7 (8)
R3: ch1, sc2tog, sc6 (7)
R4: ch1, sc2tog, sc5 (6)
R5: ch1, sc2tog, sc4 (5)
R6: ch1, sc5 (5)
R7: ch1, sc3, sc2tog (4)
R8: ch1, sc1, sc2tog, sc1 (3)
R9: ch1, sc1, sc2tog (2)
R10: ch1, sc2tog (1)
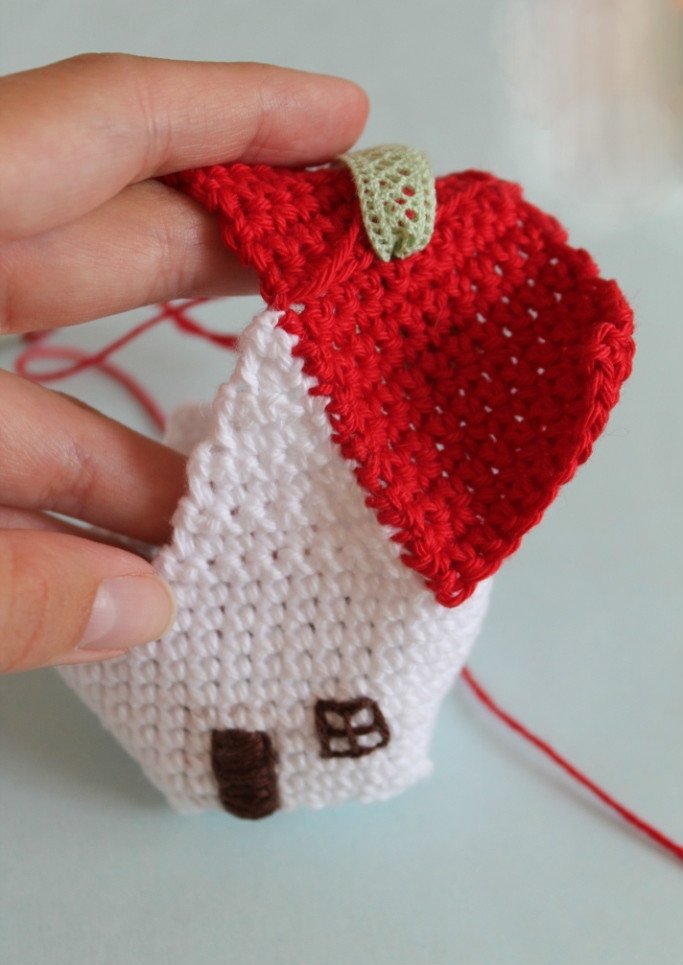
Then attach your yarn at the back of the house and do the same. Note: When you are single crocheting 2 stitches together, make sure that when you’re facing the front, you use the front loops. When you’re facing the back of your work, use the back loops. This way you won’t have any loops on the front of your work.
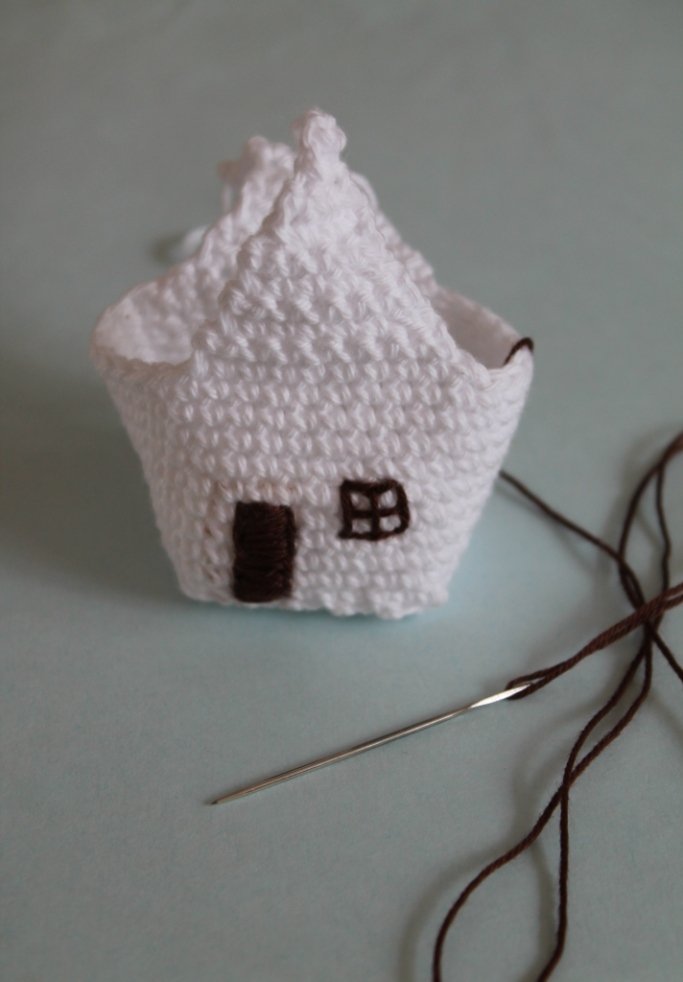
Take some thread and embroider the door and a window, or just one hole if you’re making a birdhouse. You could also embroider some flowers on the side, it’s all up to you!
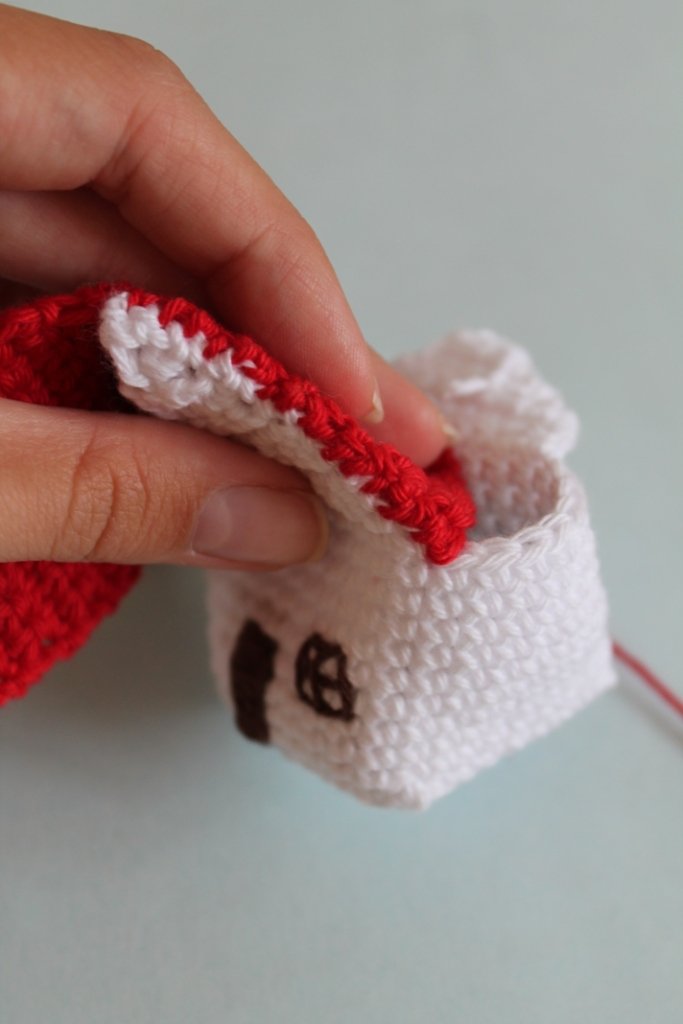
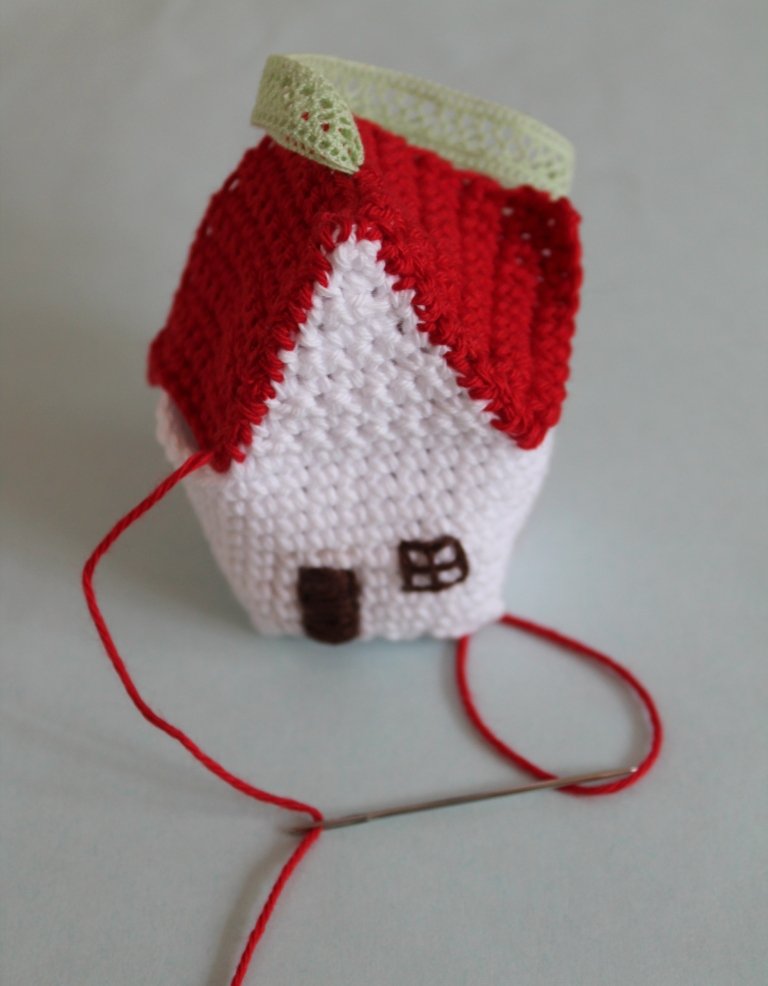
Now it’s time to crochet the roof. Take a different colour of yarn. Chain 11, turn, 10 single crochet.
R1-R11: single crochet in every stitch (= *sc*)
R12: *sc flo* (front loop only)
R13-23: *sc*
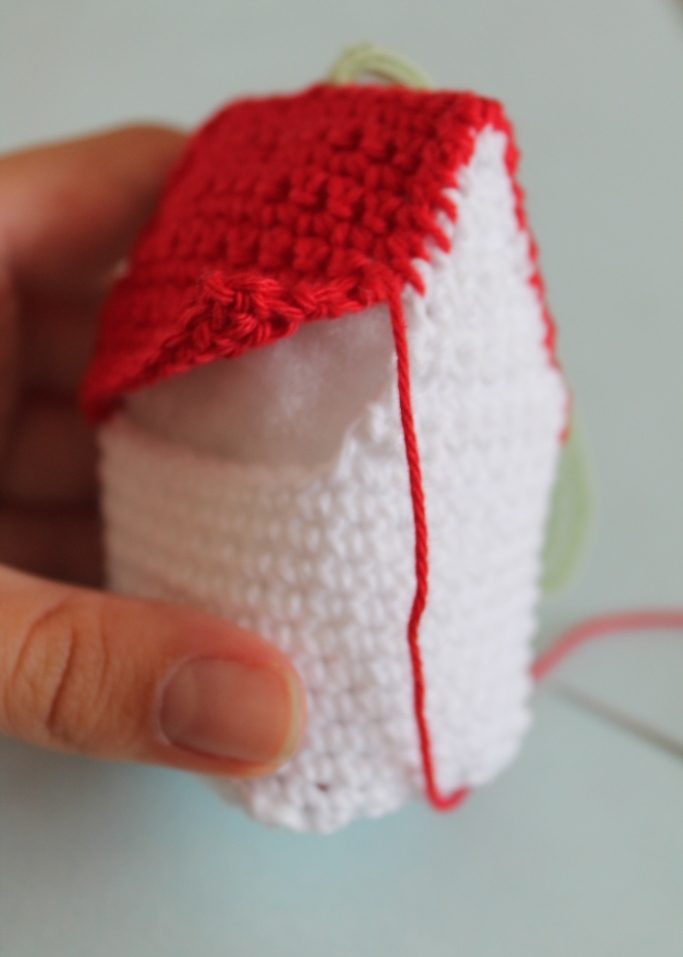
Bend the roof at Row 12. You could attach a ribbon at this point if you want.
*Dit patroon en de foto’s erbij zijn door mijzelf bedacht en gemaakt. Kopieer dit patroon niet, maar vermeld een link naar deze pagina. Als je een foto gebruikt, wees dan zo lief om een verwijzing te plaatsen. Het patroon zelf en huisjes die je met mijn patroon maakt mogen niet worden verkocht zonder toestemming van mij.
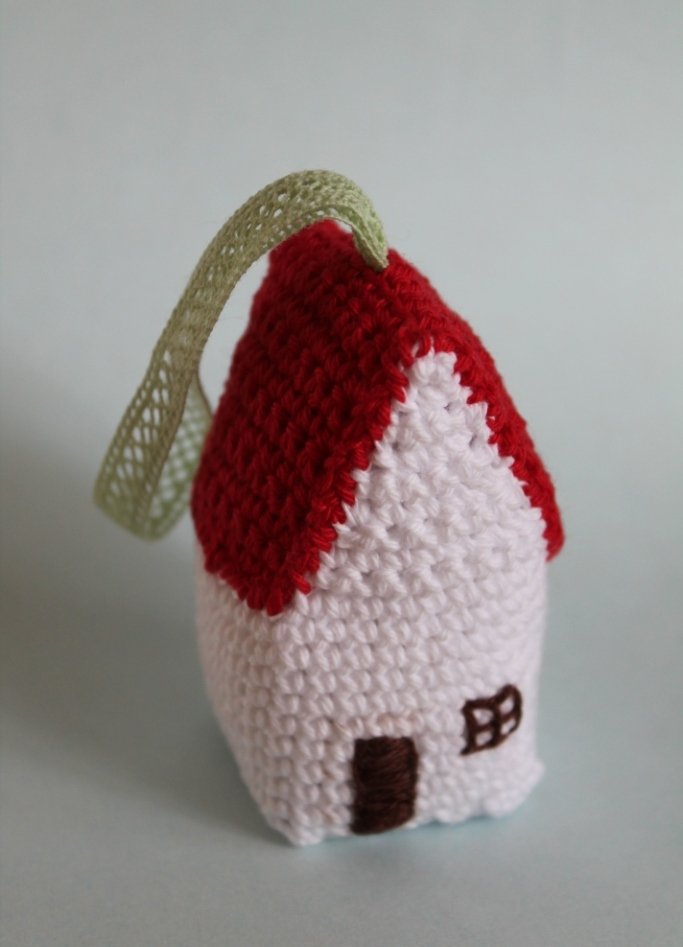
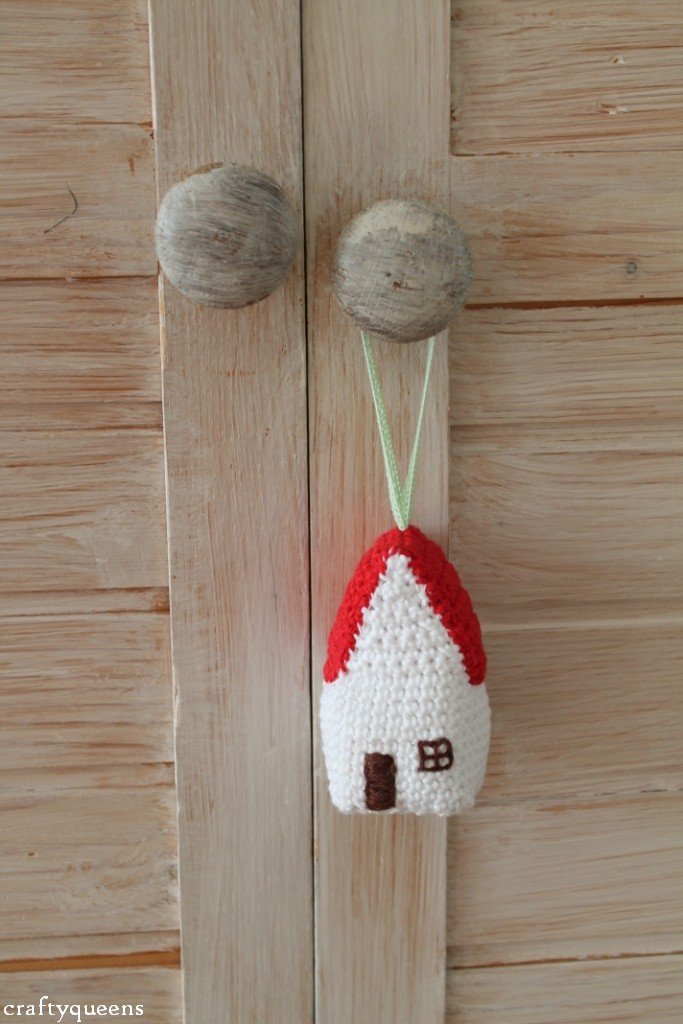
And you’re done! Create a whole town of whimsical houses. Make houses with different heights, colours, windows, or other embellishments. Use your imagination!
*The pattern above and all pictures above are made by me. Please don’t copy this pattern, but provide links to this page. If you use pictures I made, please be kind and credit me. This pattern, as well as the products you make with it, may not be sold without my consent.
I would love it if you guys shared your houses on Ravelry, so we can inspire each other.